How to Create Vibrant Watercolour Resist Art
Watercolours are a magical medium and can be used to create breathtaking pieces of art for all your friends and family!
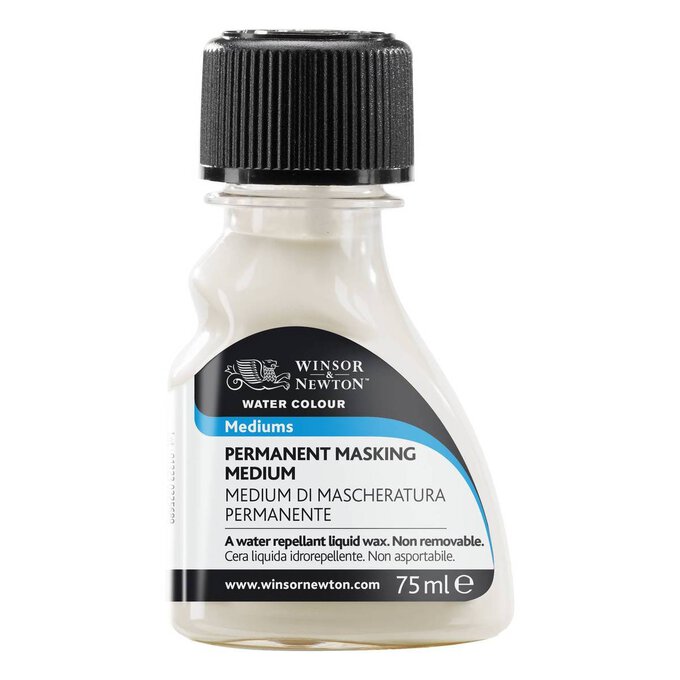
Masking fluid is a game-changing watercolour medium, allowing for striking effects as it resists the paint. In this guide we'll take you through the steps to create vibrant watercolour resist art.
Project and instructions by Charlotte Baker
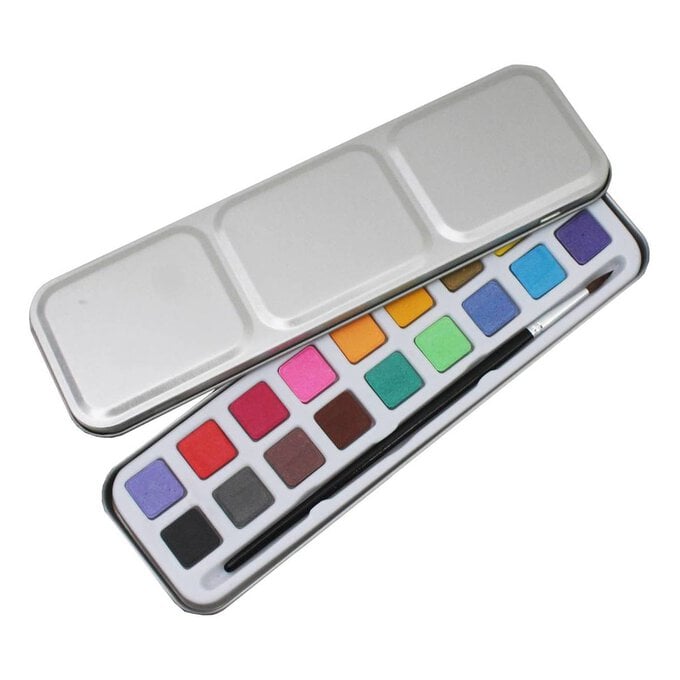
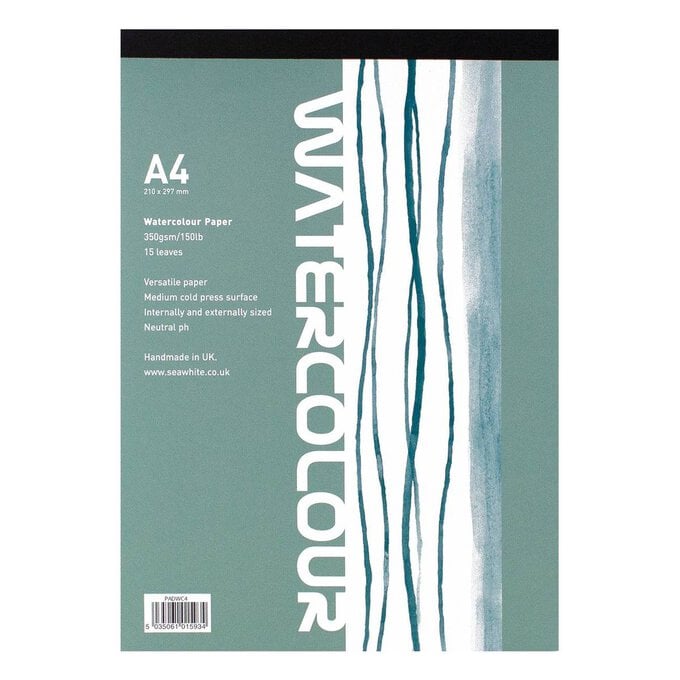
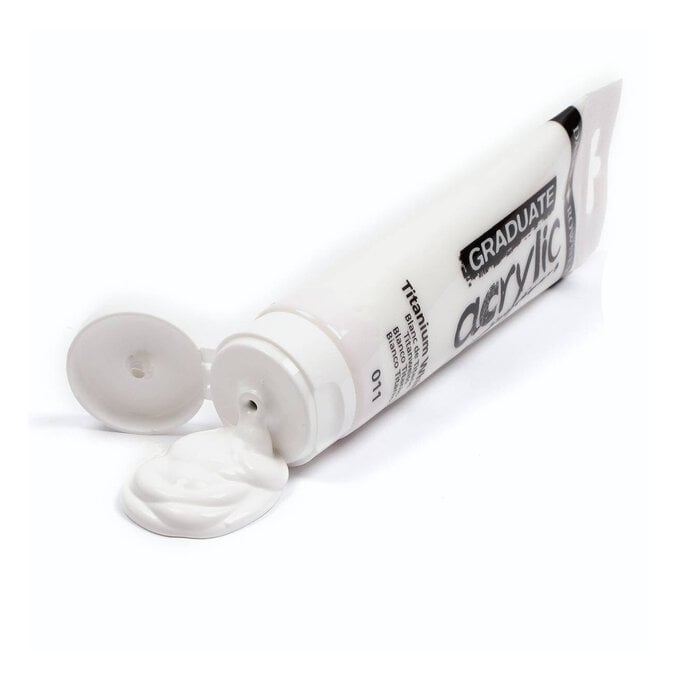
You will need

Subtotal
Is $ 23.00
Subtotal
Is $ 12.00
Subtotal
Is $ 10.00
Subtotal
Is $ 15.00
Subtotal
Is $ 6.49
You will also need:
* An old thin paint brush for the masking fluid
* A jar of Water
* Kitchen roll/ a rag
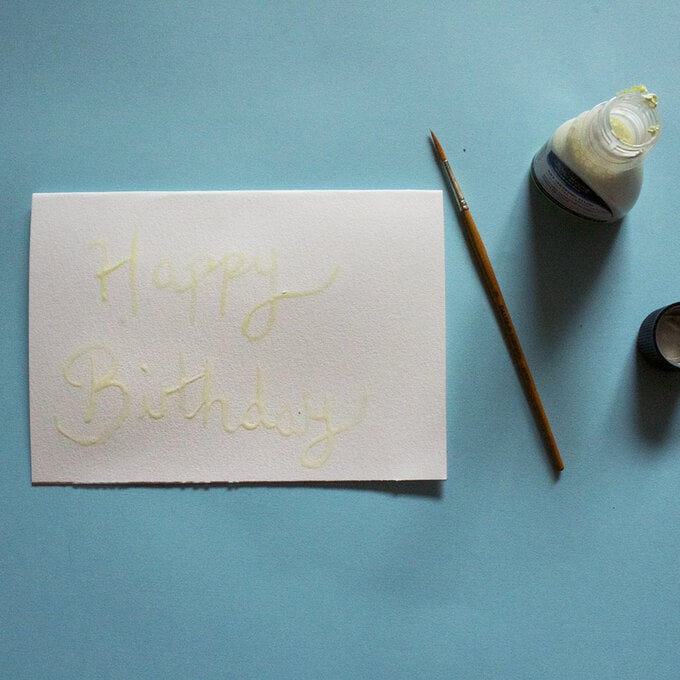
Create your design using the masking fluid.
Masking fluid can be applied to clean areas or areas with previous paint on. It acts as a protective layer on the paper and prevents the colour from getting to the areas it is covering. Use an old paintbrush to apply this as it can damage watercolour brushes especially.
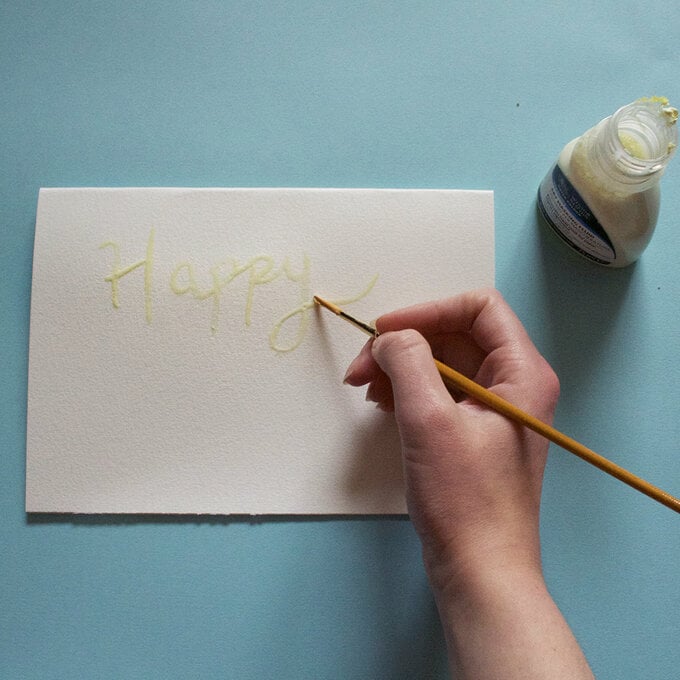
Wait for the masking fluid to be completely dry - this should only take 5 minutes. It is important to wait otherwise the sections you have painted the masking fluid on will not be fully protected.
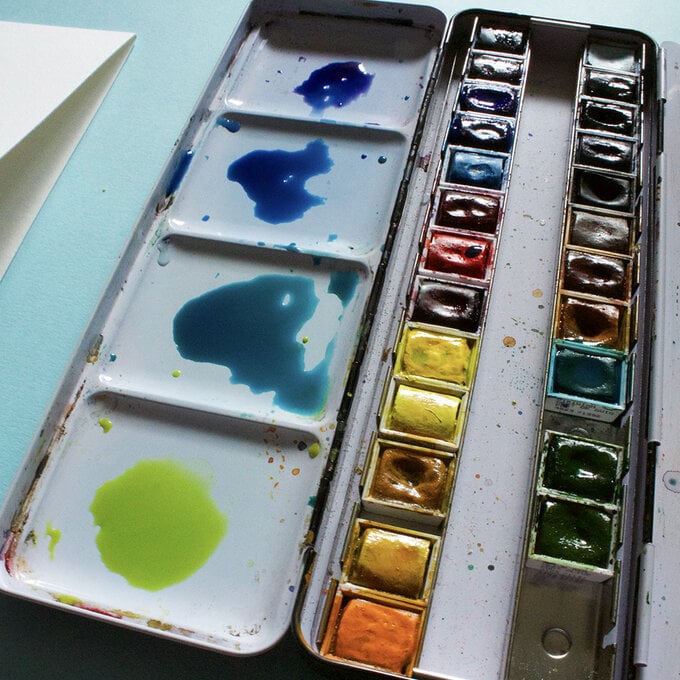
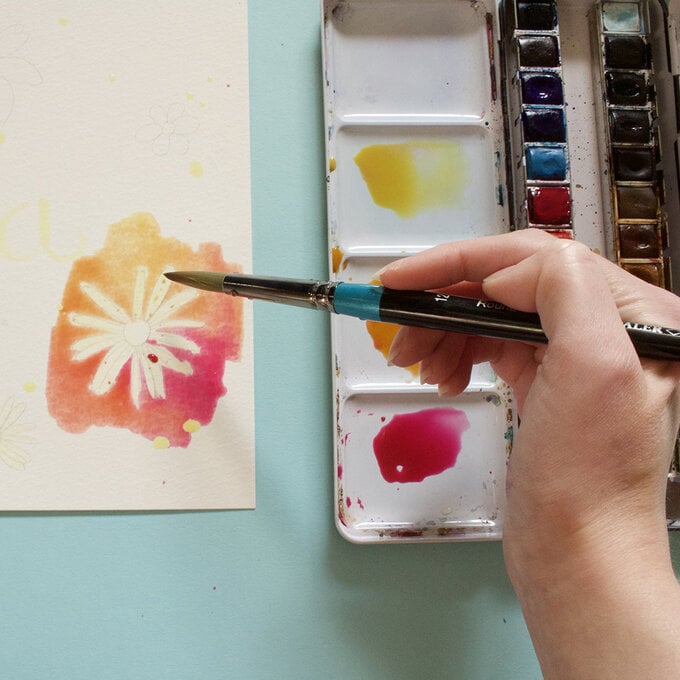
Mix bright colours up in a mixing area and make sure you mix enough paint. Pick colours that compliment each other – warm colours or cold colours.
It is important to have your paints mixed beforehand for this method so you do not allow the paint to dry on the paper whilst you are mixing colours.
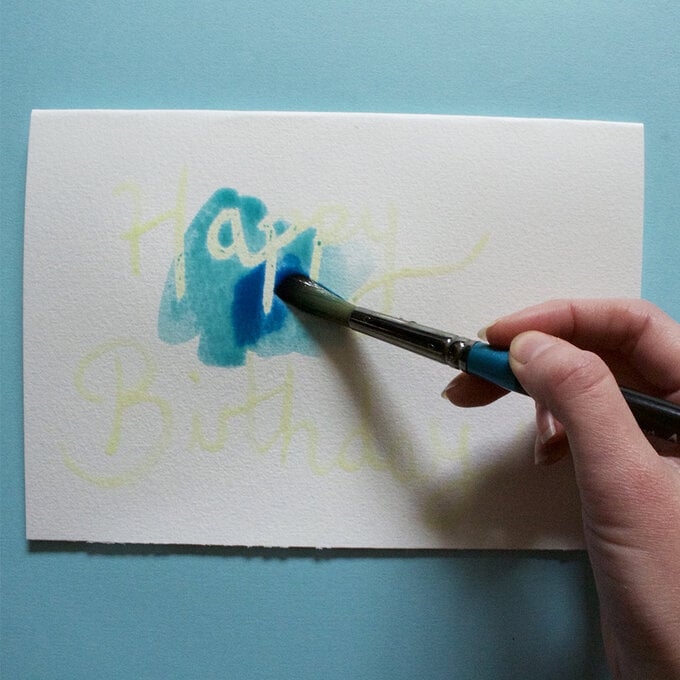
Using the wet-on-wet technique, paint in all the areas on the paper you would like painted. The wet-on-wet technique is where you apply colour to an already wet surface. This surface can be wet with just pure water or a layer of paint. You wet the surface and before it dries, you can choose to paint in bold stripes of colour or gently drop in blobs of paint.
The wet-on-wet technique allows for beautiful colours to form and blend together. This method is especially good if you want little to no brush marks.
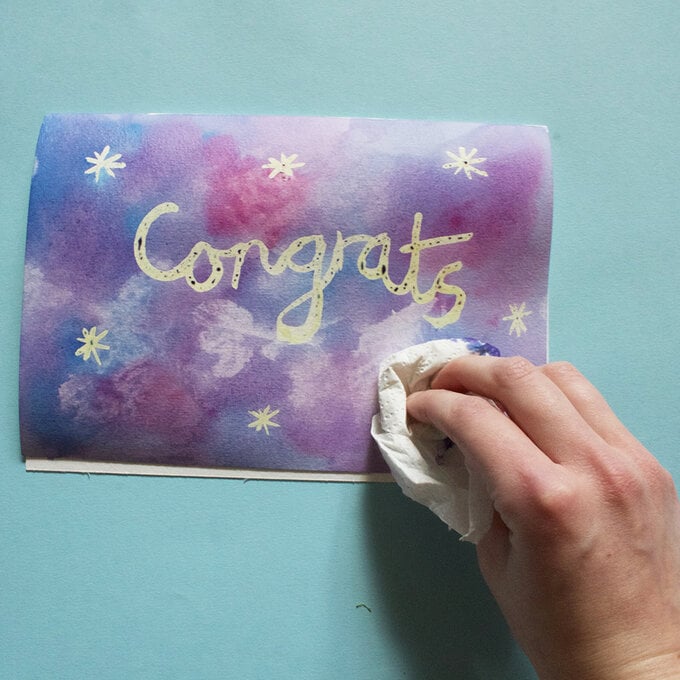
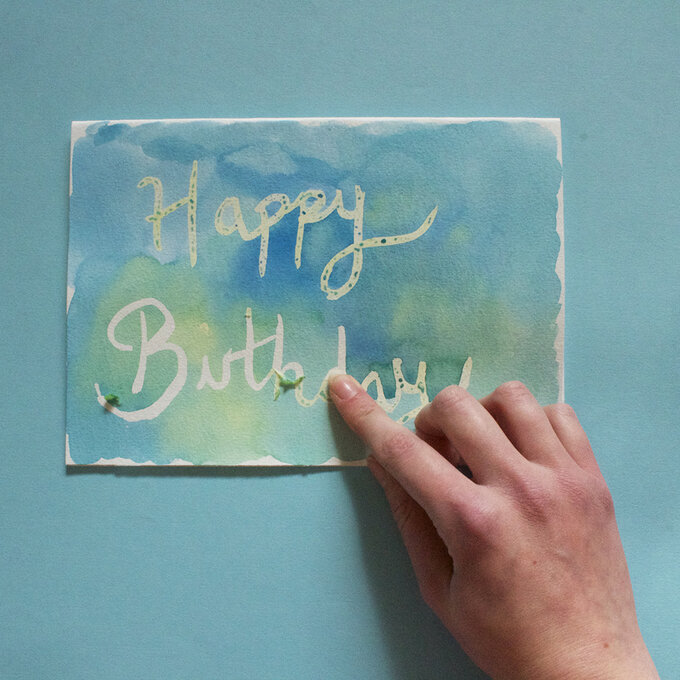
Allow the watercolours to completely dry. Make sure the painting does not feel cold or damp and carefully rub off the masking fluid. You are then left with the white paper underneath creating a lovely contrasting effect.
If you do not wait for the painting to be dry, you risk tearing the paper when rubbing the masking fluid off.
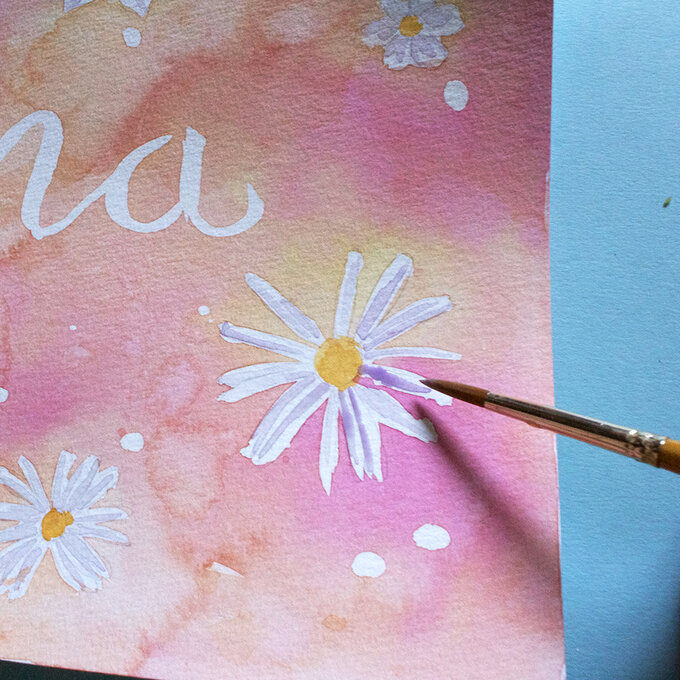
Add more decoration to the piece using more watercolour or acrylics if you would like.
You could do splatter effects using white acrylic paint for a starry effect or use more watercolour to add detail to the piece. I decided to go for a galactic feel in this card.

Push your paintbrush skills more by using masking fluid to block out a more detailed floral design or try brush lettering for a refined design.
Related Products