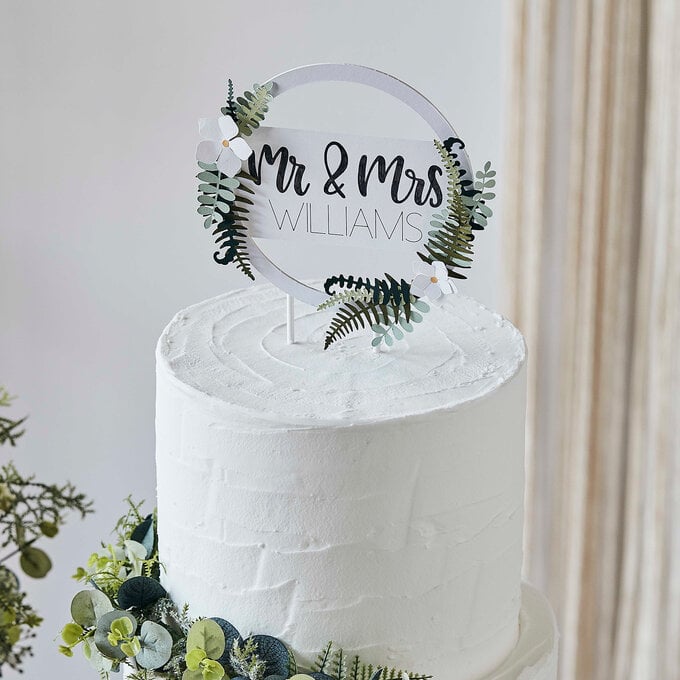
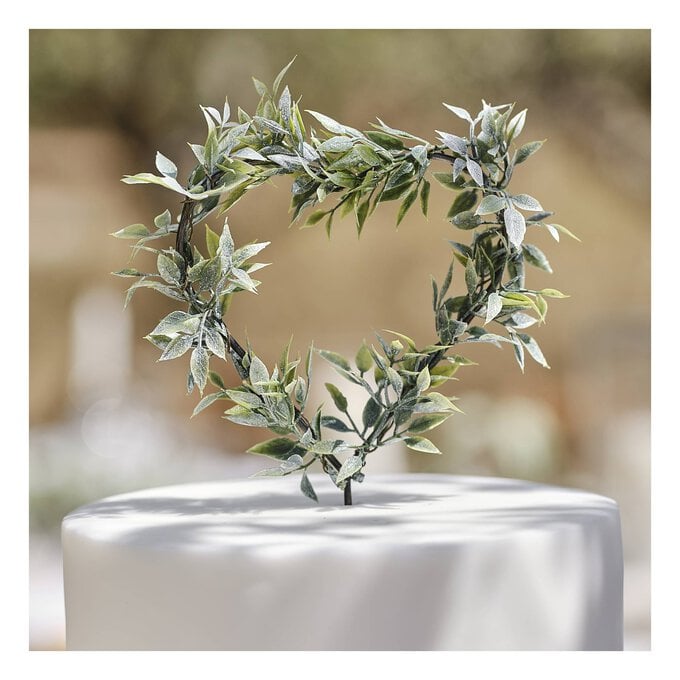
Cricut: How to Make a Personalised Wreath Cake Topper
Creating personalised cake toppers for special occasions is a doddle with your Cricut Explore/ Explore Air 2/Maker and the Design Space software. There are lots of different fonts to choose from that can be made as big or as small as you like, just make sure to keep the size of your cake in mind when designing your topper, otherwise you may end up with something a little bigger/smaller than planned!
You will need

Subtotal
Is $ 4.49
Subtotal
Is $ 1.49
Subtotal
Is $ 4.49
Subtotal
Is $ 22.00
Subtotal
Is $ 7.49
Using a laptop/Mac/iPad/iPhone/Android device, log on to your Design Space™ account and make sure you are connected to your Cricut Explore™ / Maker™ machine. Open a new project and select the 'Image' button from the toolbar along the bottom of the screen.
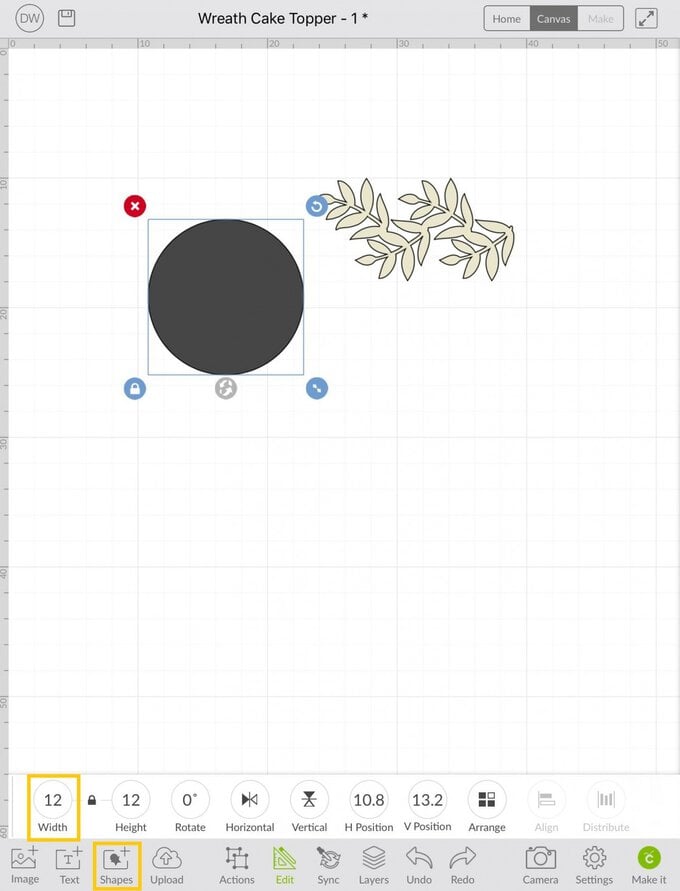
Search 'Leaf Border' in the top search bar and select the below design. Click 'Insert'.

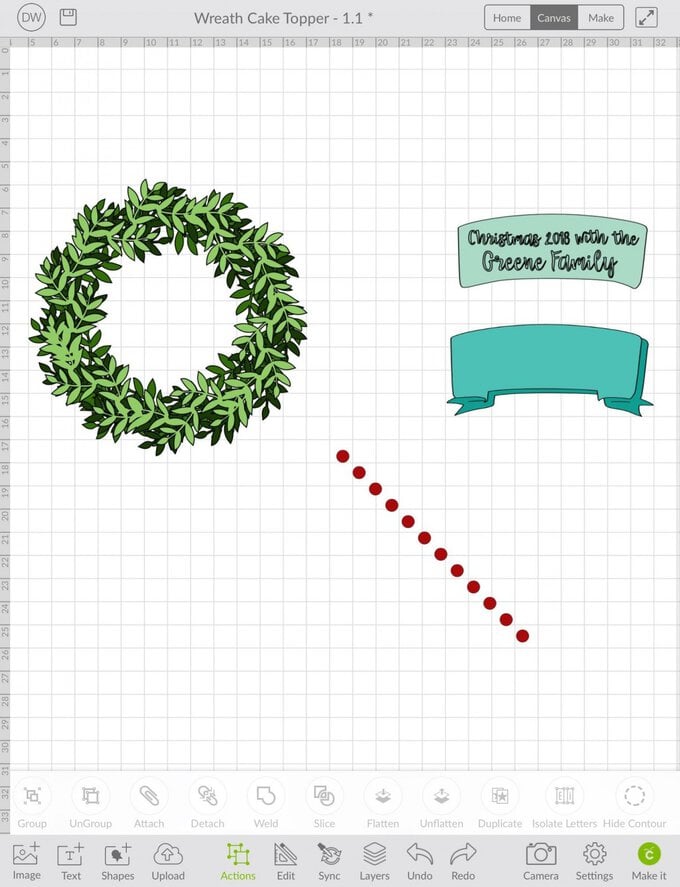
Once on your canvas screen add a circle from the 'Shapes' menu in the toolbar at the bottom of the screen. Re-size the circle to 12cm wide.
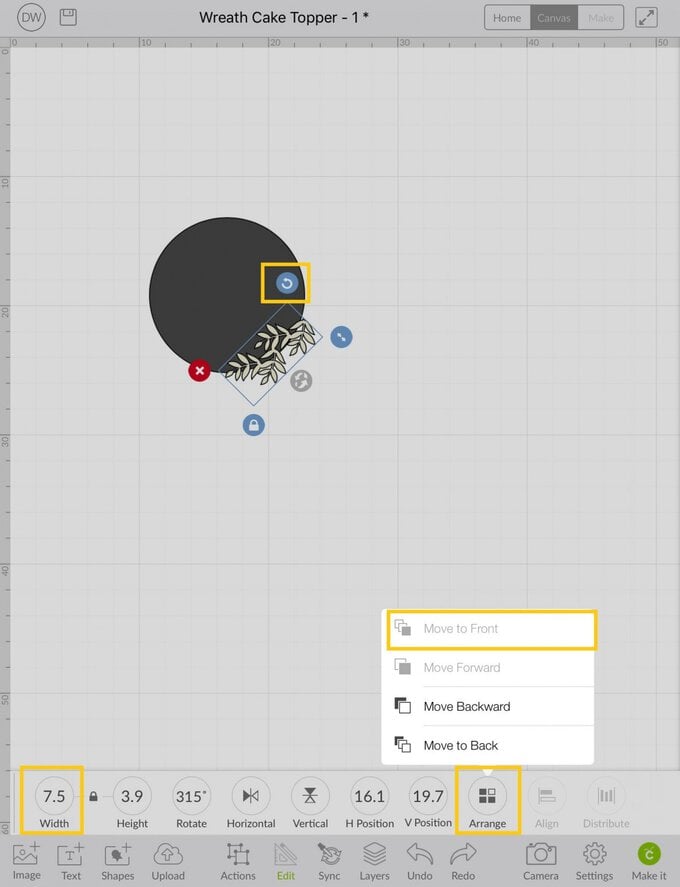
Reduce the size of the leaf border to 7.5cm in width, ensuring the padlock is locked. Rotate the leaf border so that it follows the outside curve of the circle. So that you can see the entirety of the leaf border design, you will need to select 'Arrange' from the 'Edit' menu in the toolbar at the bottom of the screen, select 'Move to Front'.
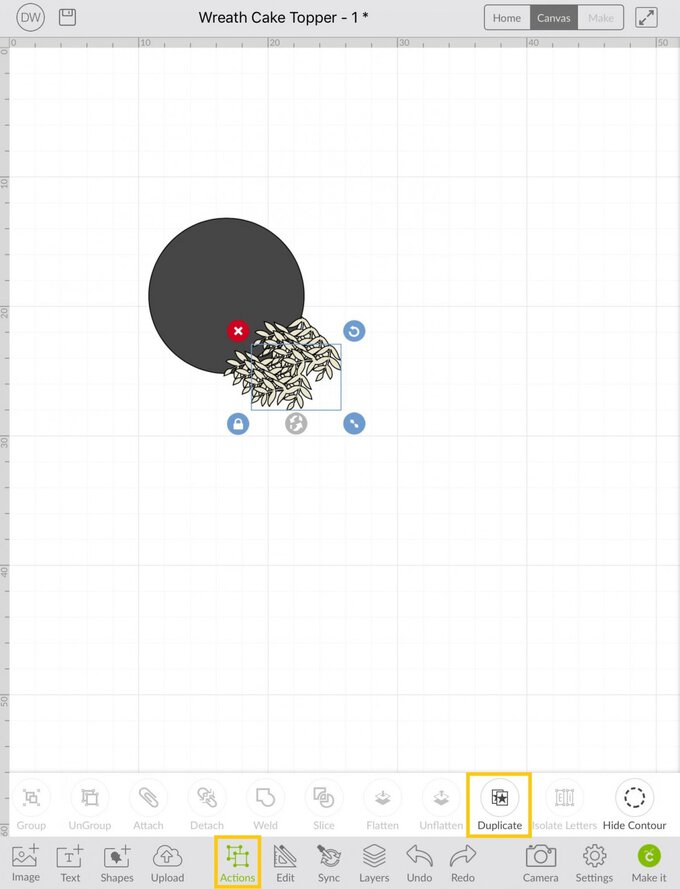
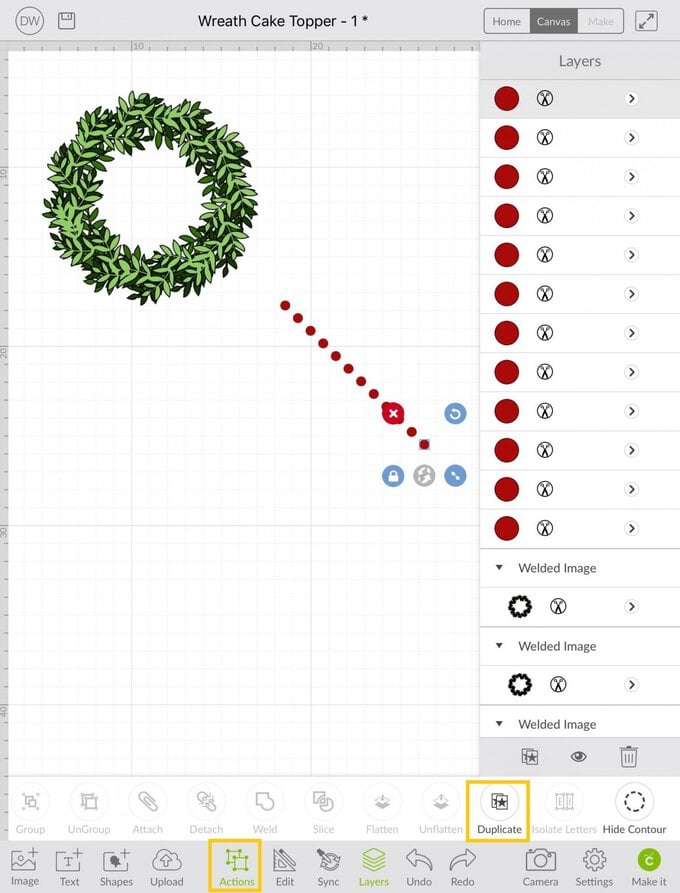
Go into the 'Actions' menu at the bottom of the screen and selct the 'Duplicate' function to replicate the leaf border. You will need six in total, and will therefore need to click the 'Duplicate' button five times.
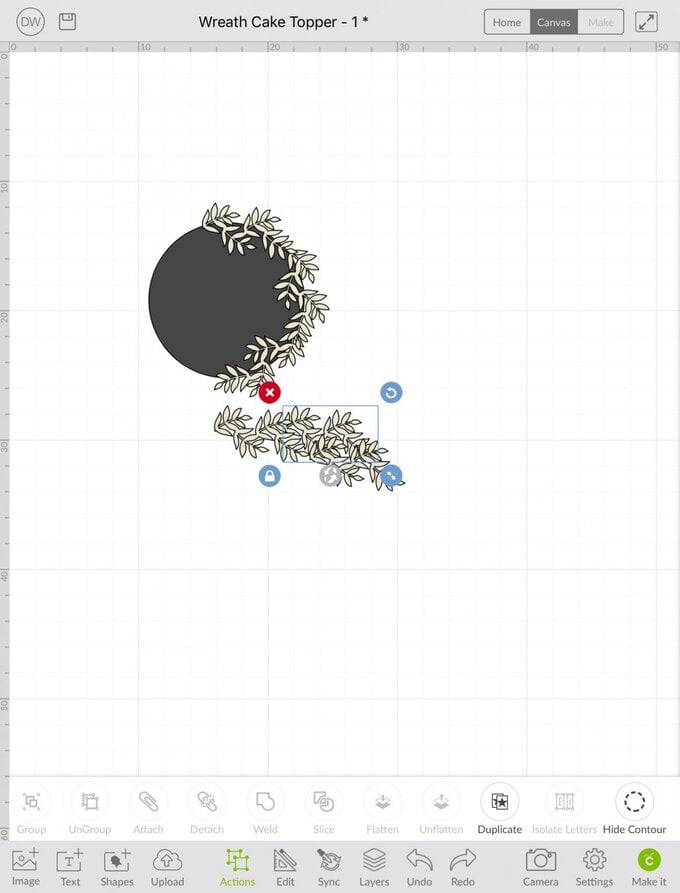
Rotate each of the leaf borders to follow the outside edge of the circle, overlapping some to create a complete wreath shape
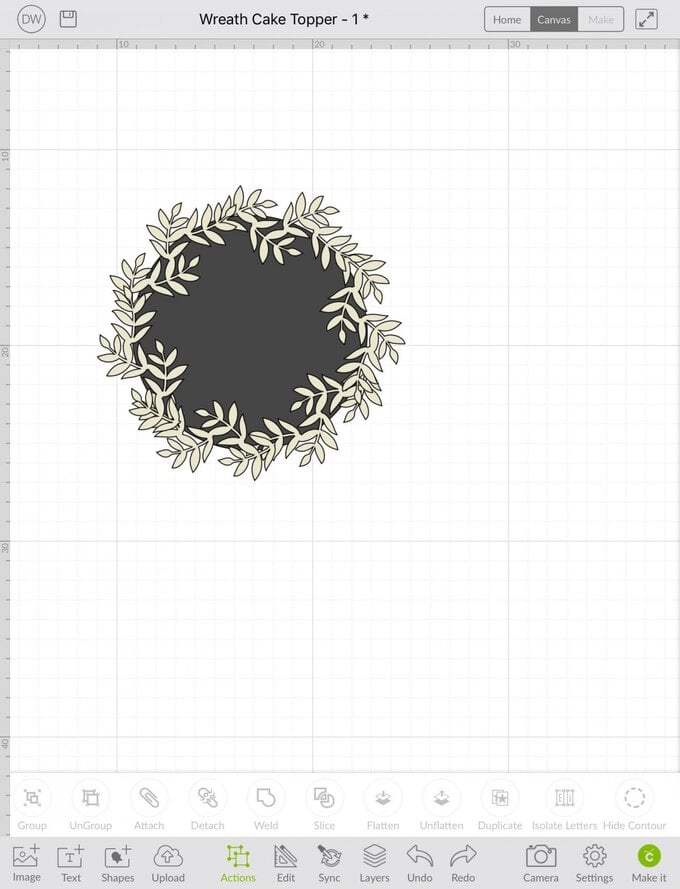
Once the wreath is complete. Open up the 'Layers' menu from the toolbar at the bottom of the screen. Select the circle and then click the trash can to remove it.
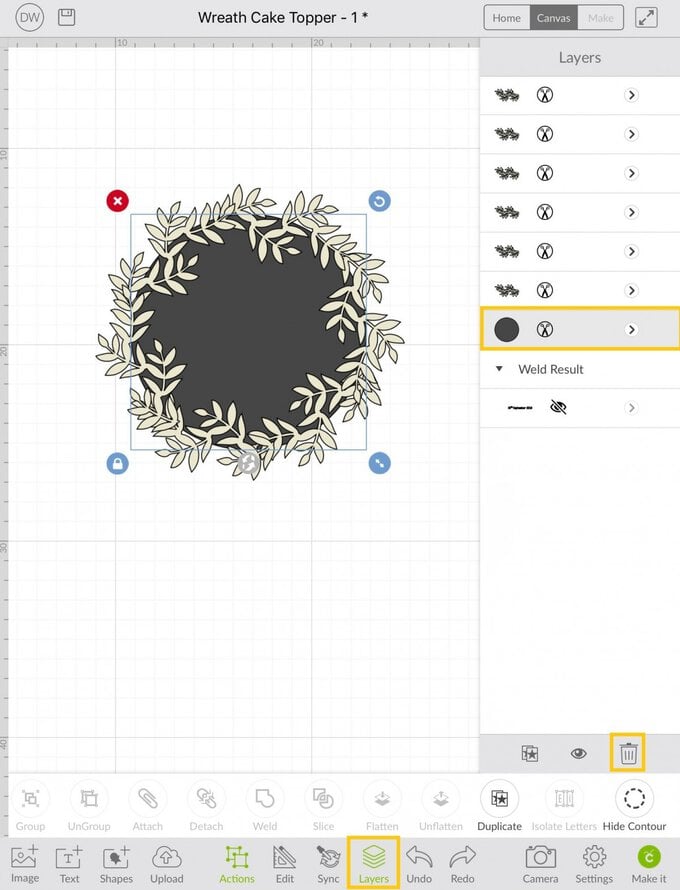
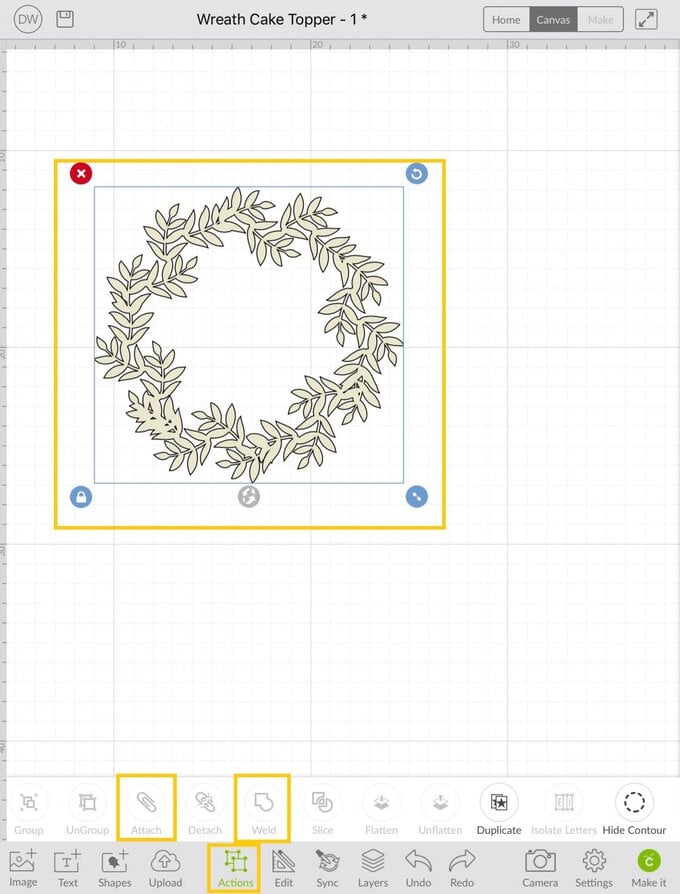
Drag a box over the wreath design and select 'Attach' and 'Weld' from the 'Actions' menu in the toolbar at the bottom of the screen.
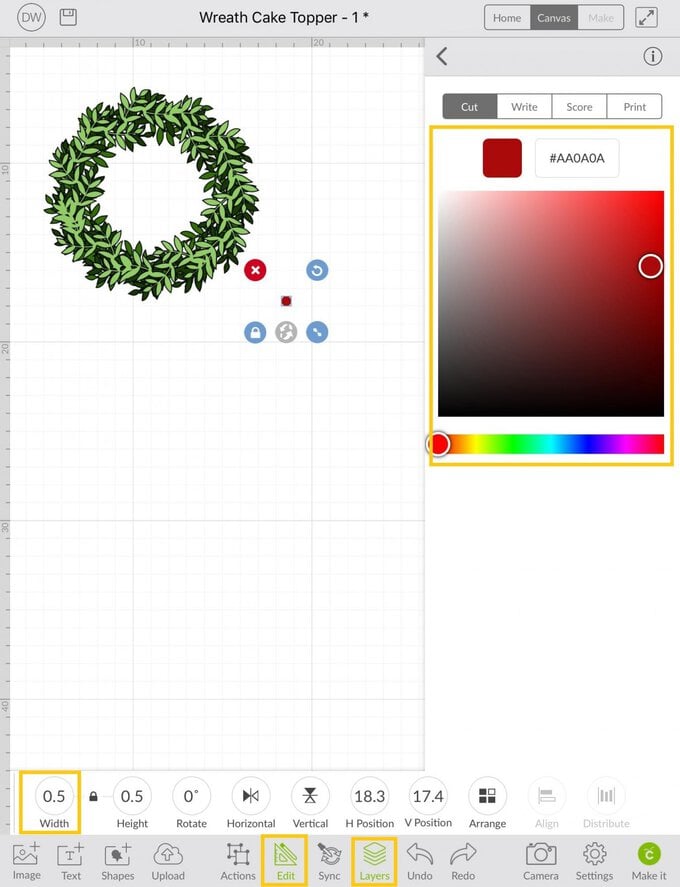
Open the 'Layers' menu and change the colour of the wreath to a green of your choice
With the wreath selected amend the width of the design to 12cm ensuring the padlock is locked so that the wreath resizes proportionately. Duplicate the wreath design twice, changing the colour of both to different shades of green.
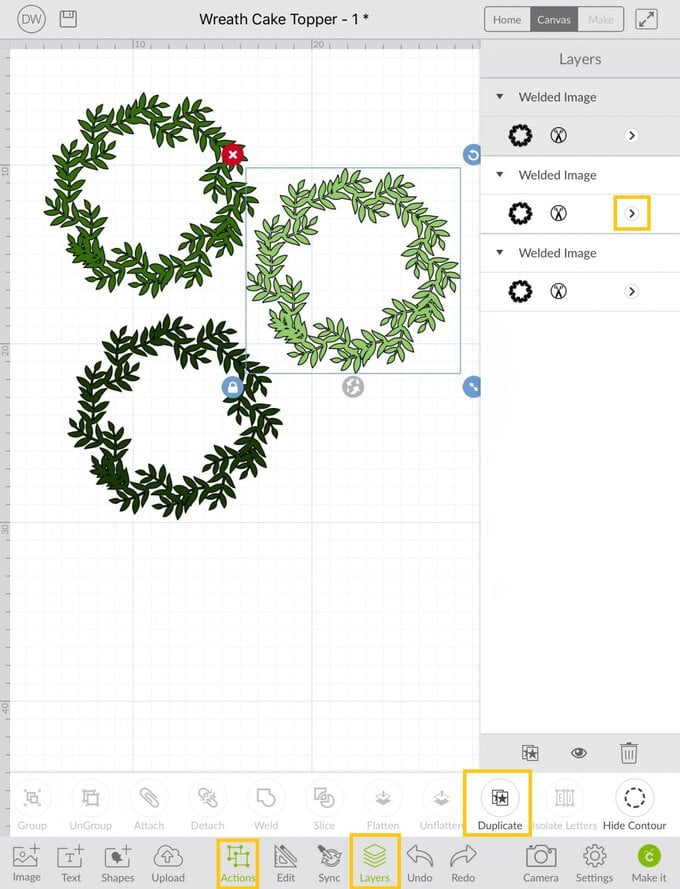
Position the wreaths on top of one and other rotating slightly so that they do not align. This helps to visualise the project before cutting to make sure you're 100% happy with the design. To create the red holly berries. Add a circle to the canvas and re-size to 0.5mm wide. Change the colour of the circle to red in the 'Layers' menu and duplicate the shape 11 times.
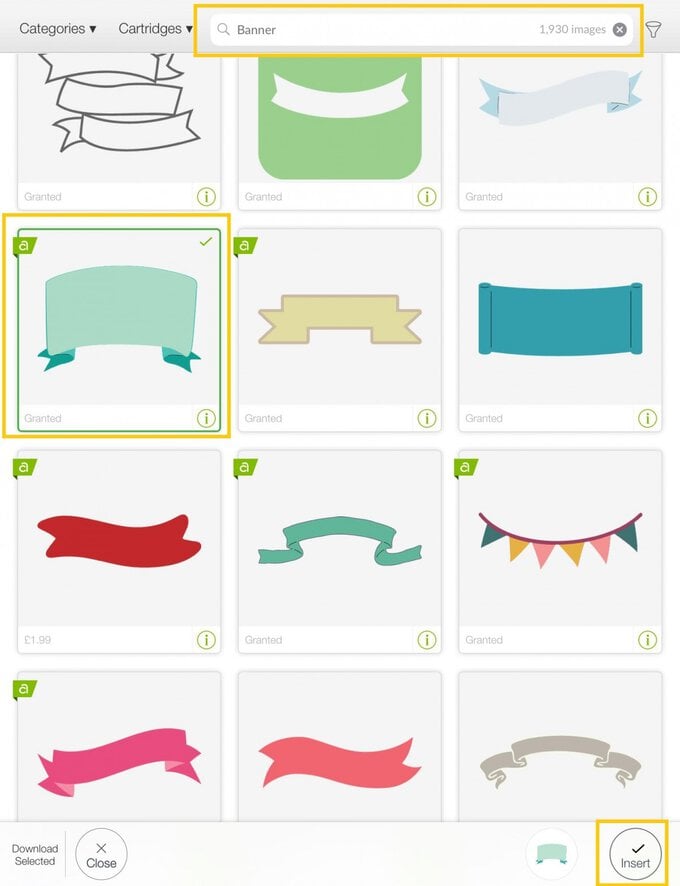
The next step is to create the banner. Select 'Images' from the bottom toolbar and type 'Banner' into the toolbar at the top of the screen, scroll down until you find the below design.
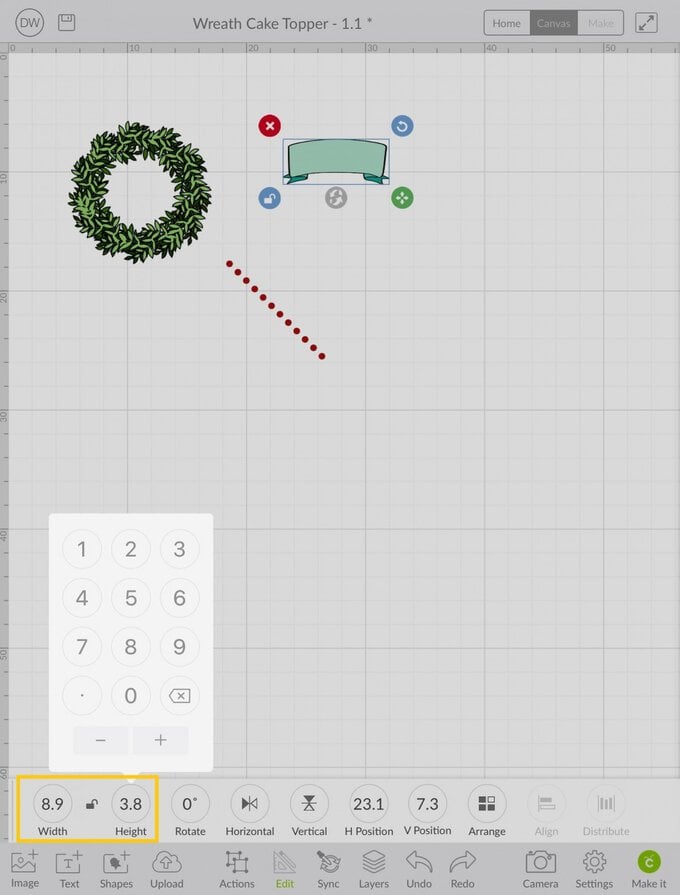
Resize the banner to 8.9cm wide by 3.8cm high, ensure that the padlock is unlocked when altering the dimensions.
Add your text to the canvas by selecting the 'Text' menu from the bottom toolbar, select the Babette font, then begin to type the first half of your greeting 'Christmas 2018 with the'.
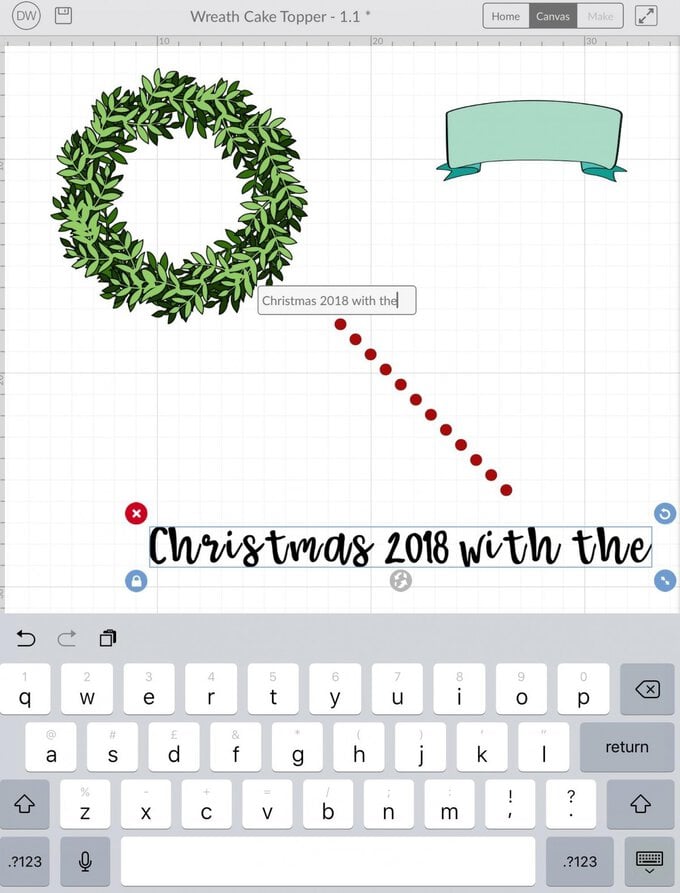
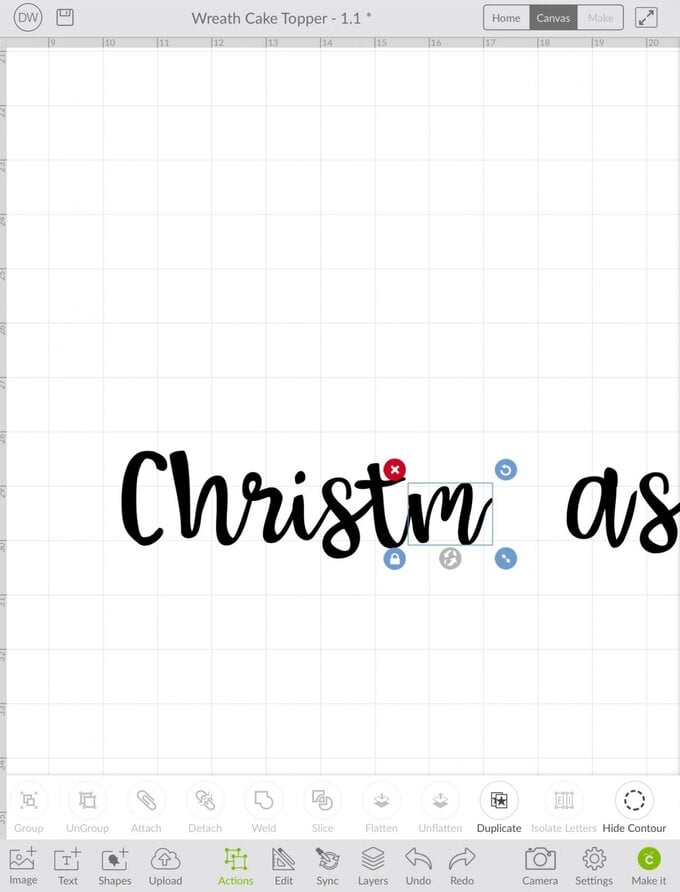
Once complete. Open the 'Actions' menu from the toolbar at the bottom of the screen and select 'Isolate Letters', this will allow you to select each of the letters individually and move them closer together and join them up.
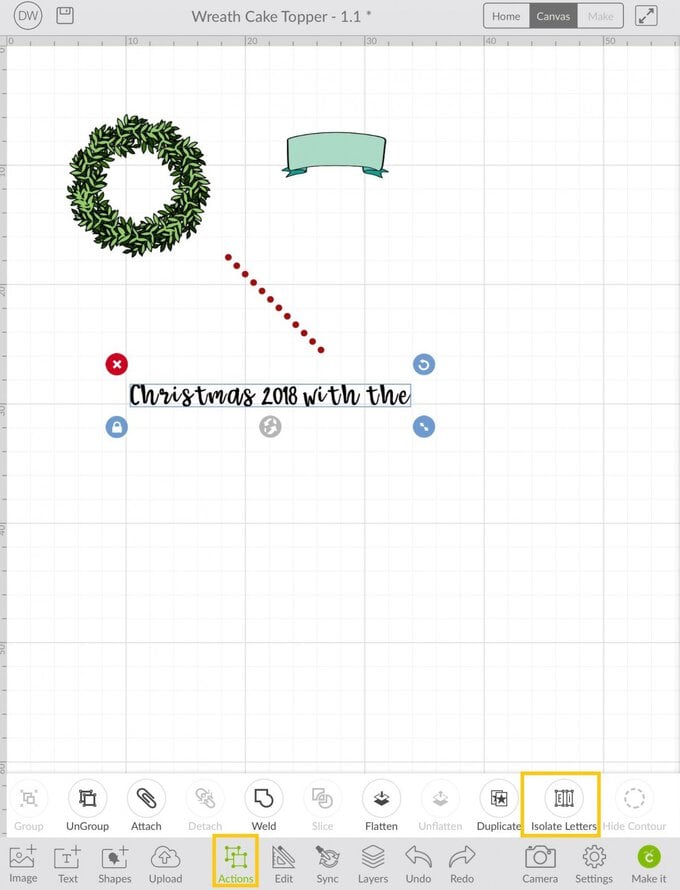
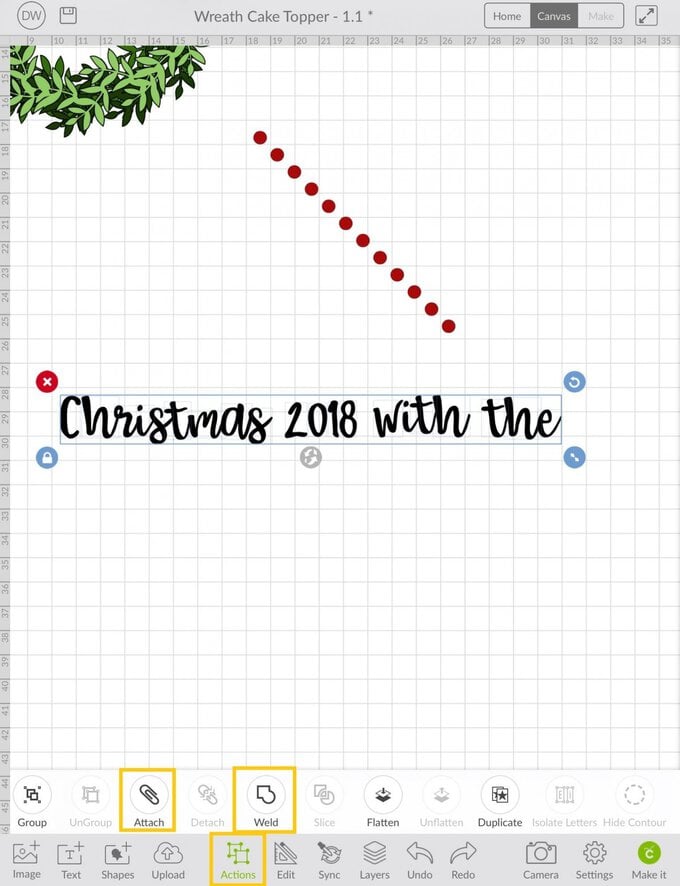
Once you are happy with the alignment and spacing of the letters, drag a selection box over the entire greeting and click on 'Weld' and 'Attach' in the 'Actions' menu.
Open the 'Layers' menu and click on the arrow to the right of the text image. Select 'Write' from the top menu, then select the pen you'll be writing with. Repeat the same process with the second half of the greeting.

Position both parts of the greeting onto the banner, re-sizing the text as desired, by clicking on the arrows on the bottom right of the selection box. Once happy with the positioning of the text, select the banner, and from the 'Actions' menu select 'Detach'. Move the two bottom layers of the banner away from the top layer.
Drag a selection box over the top part of the banner along with the text and select 'Attach' from the 'Actions' menu, this will ensure that the text is written into the correct position on the banner.
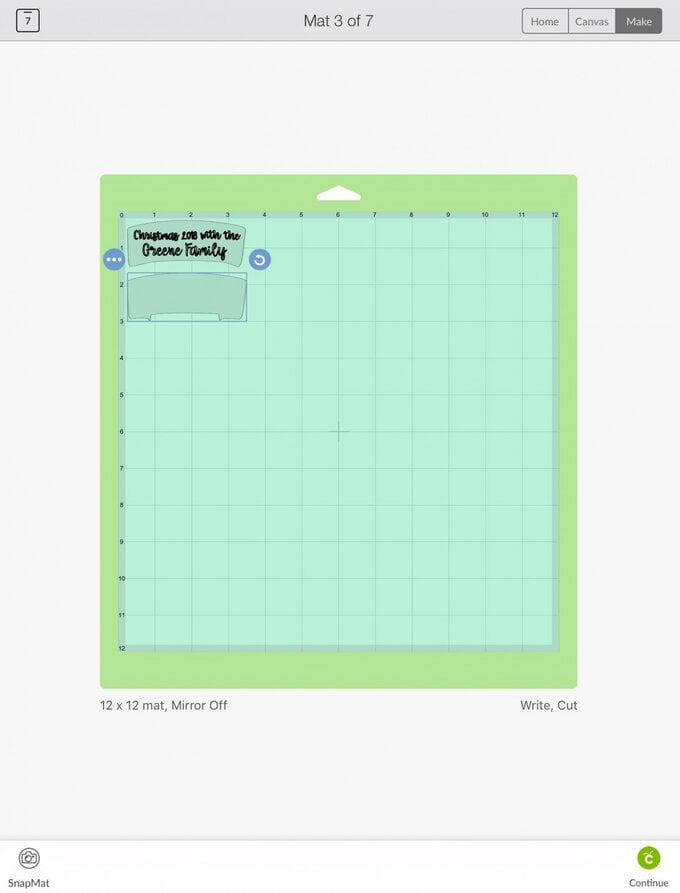
The project is now ready for cutting! Select the green 'Make it' button from the bottom of the screen. You will then be presented with a preview of each of the mats. As all of the banner layers are to be cut from kraft card, all of these parts of the design can be positioned on the same mat. To do this swipe right until you arrive at mat four, select the banner and click on the three dots icon in the top left-hand corner. Select 'move to another mat'.
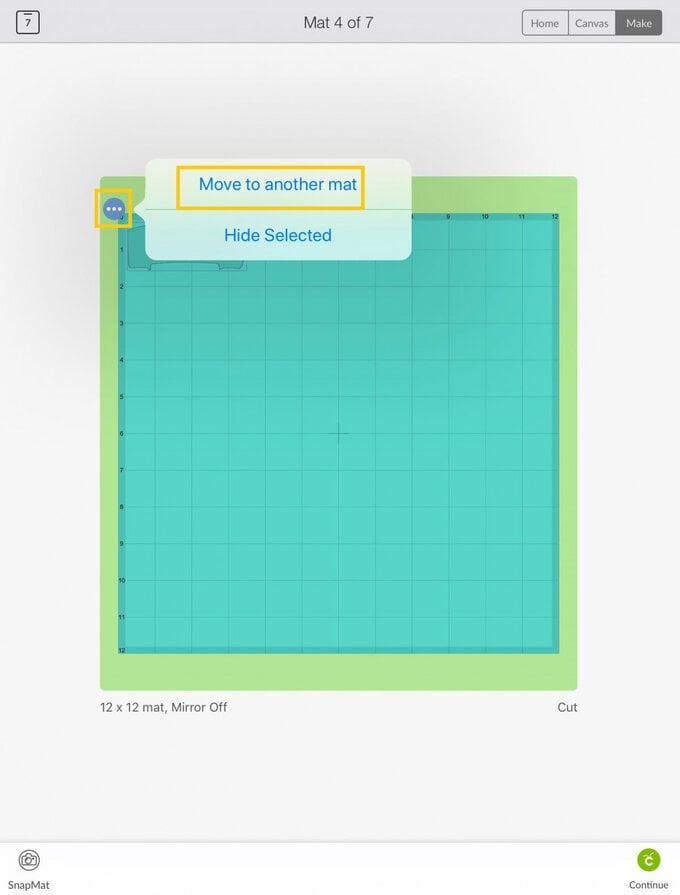
Move the selected image to mat three and position so that it does not overlap the banner with the text on it. Repeat the same process with the third and final banner layer on mat six.
Follow the on-screen instructions to cut out all of the project components.
To construct the topper, secure each of the wreaths on top of each other with a glue pen, off-set each wreath slightly so that they do not align. Add each of the red berries to the wreath, once more using a glue pen. Add a small amount of the glossy accents on top of each berry, leave to dry.
Construct the banner using foam pads in-between each layer, once complete secure this centrally to the wreath.
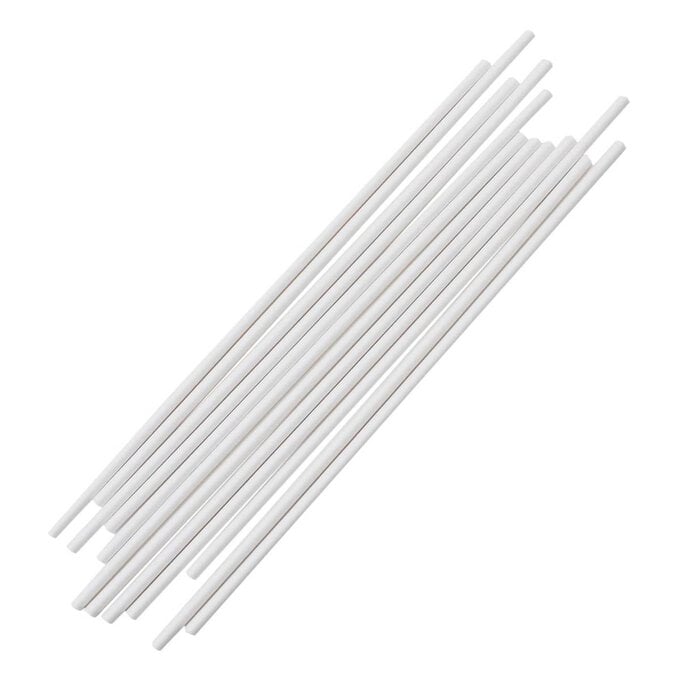
Adhere two lollipop sticks to the reverse of the wreath using a hot melt glue gun.

Related Products

Is $ 2.49


Is $ 7.49

Is $ 10.00