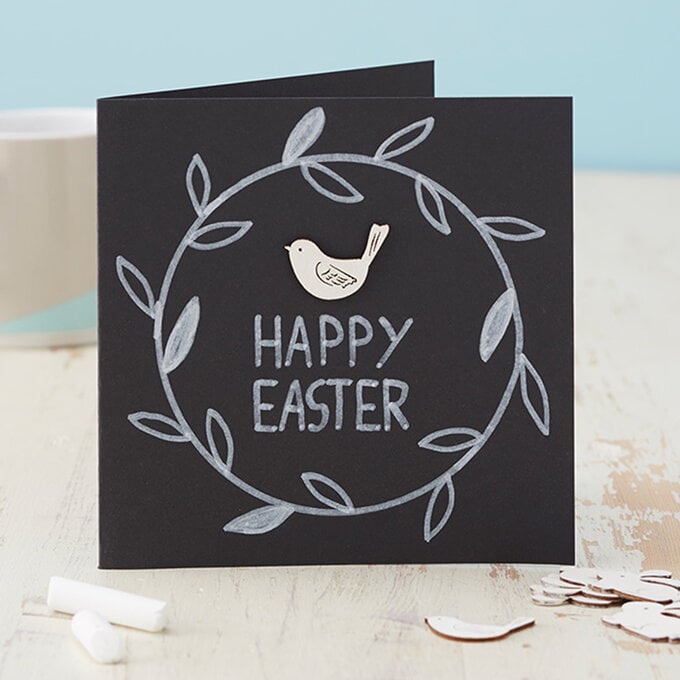
Cricut: How to Make a Quick Easter Greetings Card
This quick and easy card design is perfect for sending your Easter greetings in or using it to invite guests to your Easter Egg Hunt.
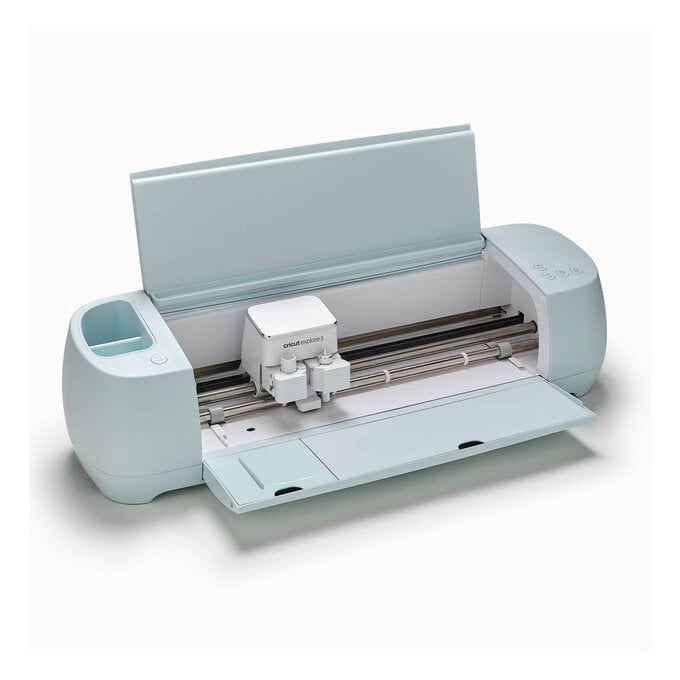
It is easily made from cardstock cut and scored using the Cricut Explore Air 2 and the Design Space app, which means multiple cards can be created quickly and easily.
Discover more Easter Cricut projects here >
This project includes paid for Design Space content
You will need
Subtotal
Is $ 422.00
Subtotal
Is $ 15.00
Subtotal
Is $ 24.00 , was $ 32.00
Subtotal
Is $ 1.49
How to make
* Cricut Explore
* Basic Cricut Tools
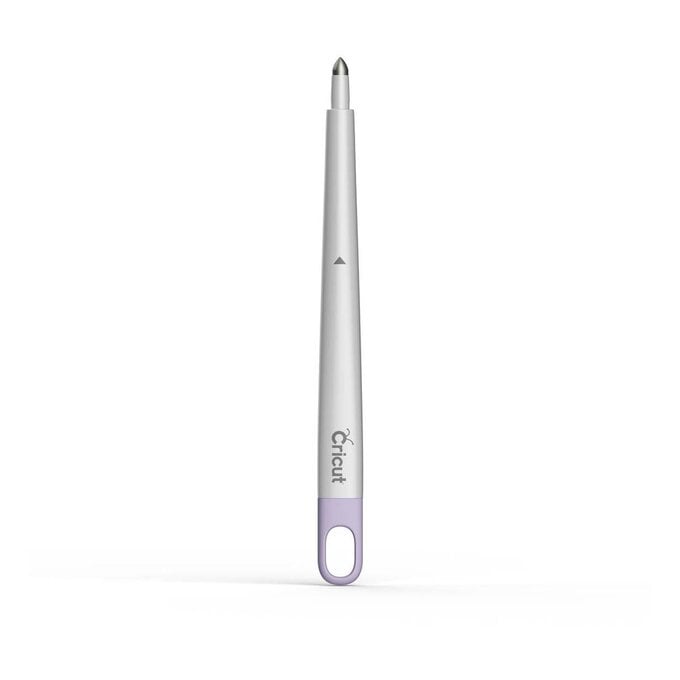
* Cricut Scoring Stylus
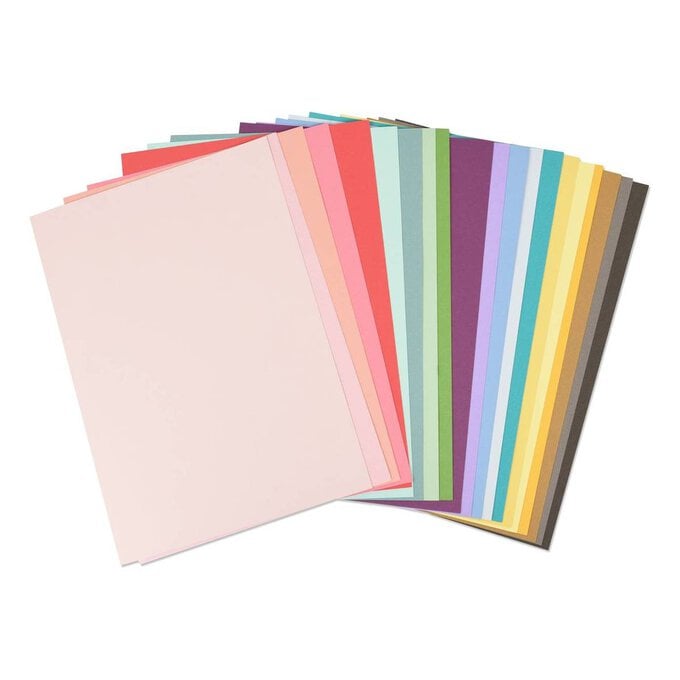
* Coloured Cardstock A4
* Double Sided Sticky Tape
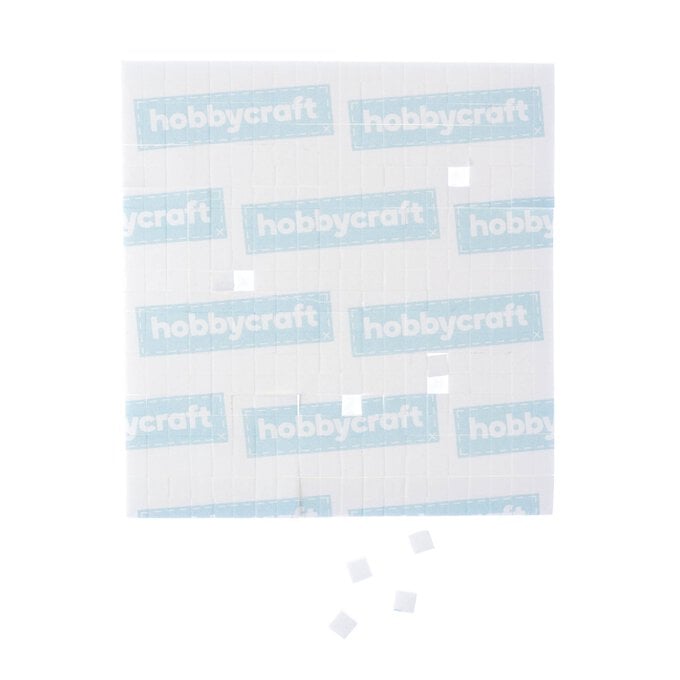
* Adhesive Foam Pads

Using a laptop/Mac/iPad/iPhone/Android device, log on to your Design Space™ account and make sure you are connected to your Explore Air 2.
Search for 'All Things Easter Card' within the project library.
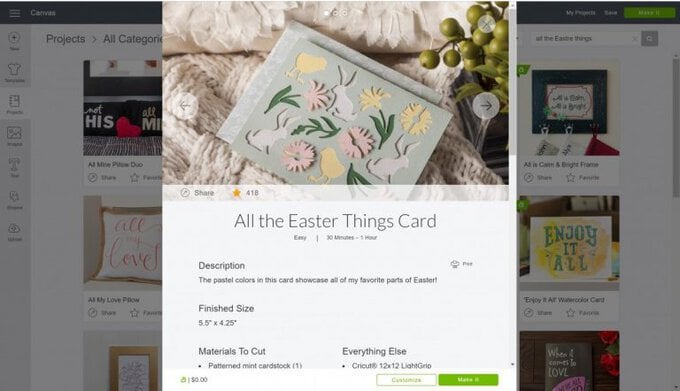
The project makes a card measuring approximately 5.5” x 4.25”. Click customise to resize or alter the image or 'make it' to cut it as designed.
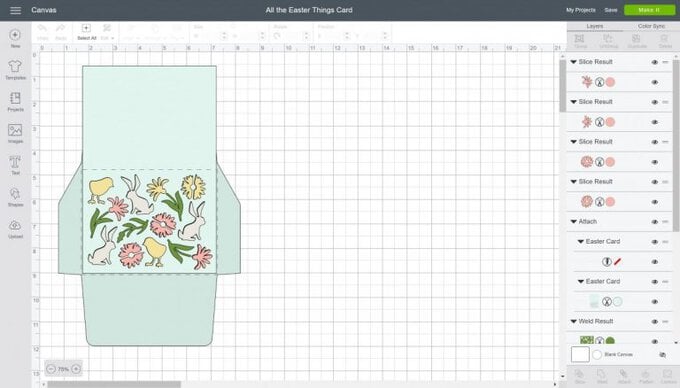
Cut the layers from the appropriate coloured cardstock, inserting the scoring stylus into the accessory port A when prompted.
Top Tip - Use the scraper tool to apply the cardstock to the cutting mat
Carefully remove each cut image from the cutting mat, using the silicone side of the scraper tool to fold the card base along the score line.
Top Tip - Save the cut outs and use them as confetti for your Easter table!
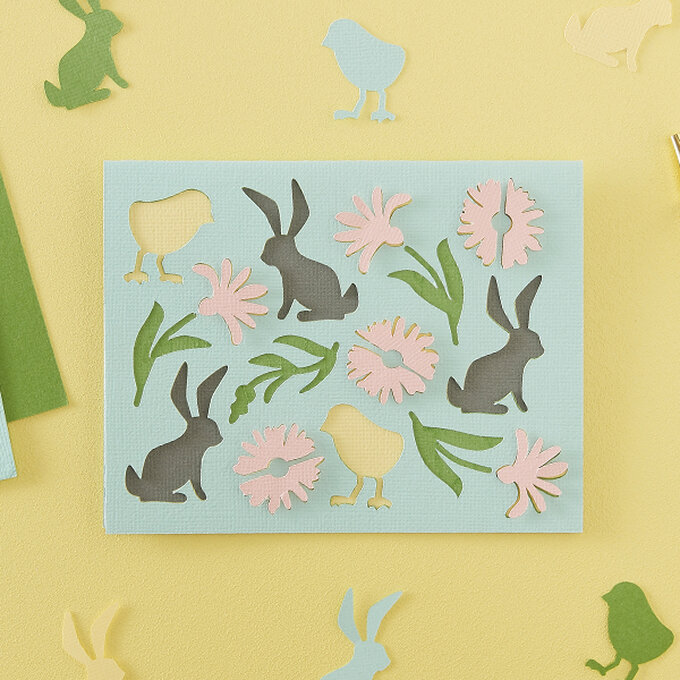
Using double-sided tape to secure each of the cardstock layers in place in the following order inside the card front; yellow, green and white. Then use adhesive 3D foam pads to attach the pink flowers.
Fold the envelope along the score lines and secure the bottom and sides together.
Related Products