Cricut: How to Make Personalised Trainers with the Mini EasyPress
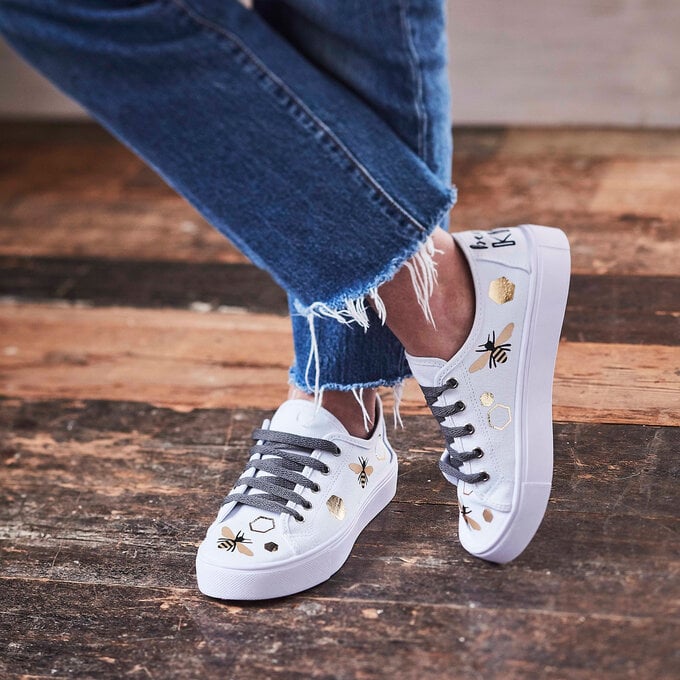
Walk in style in these glittery bee-themed customised shoes! This project uses the Cricut Mini EasyPress to add sparkling iron-on details to a pair of plain white trainers, transforming them into a sparkly pair of personalised trainers that will be the envy of everyone.
This project was made with the Cricut Maker machine, however you can also craete it using the Explore Air 2.
Project and how-to make instructions by Emma Jewell
Please note: the project contains paid content from Cricut's Design Space app.
Screen reference images are taken from the desktop version of Design Space.
You will need

Subtotal
Is $ 40.00
Subtotal
Is $ 20.00

Subtotal
Is $ 52.00
Subtotal
Is $ 29.00

Subtotal
Is $ 606.00
How to make
You will also need:
White Canvas Trainers
Cricut Design Space app installed on a laptop, PC, Tablet or mobile device
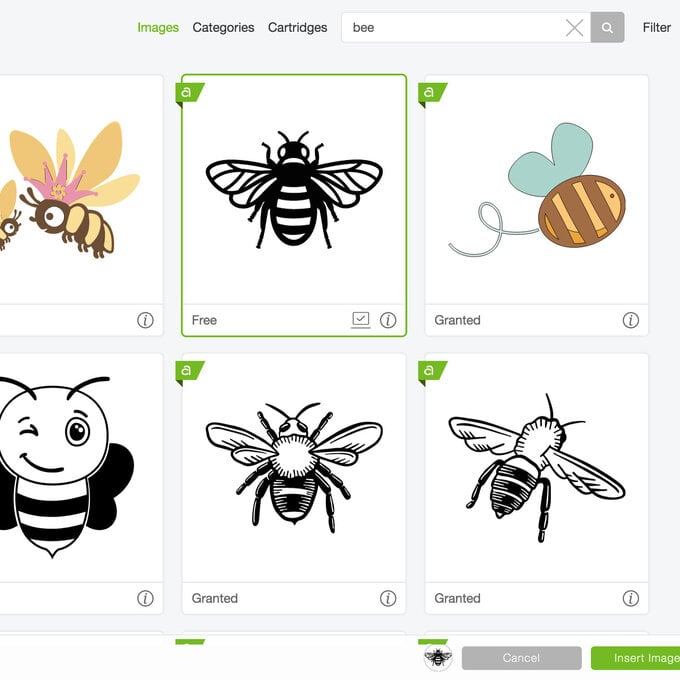
In Cricut Design Space search in the images library for the Bee Image (#MF7274FA) and add it to the canvas by clicking the green "Insert" button.
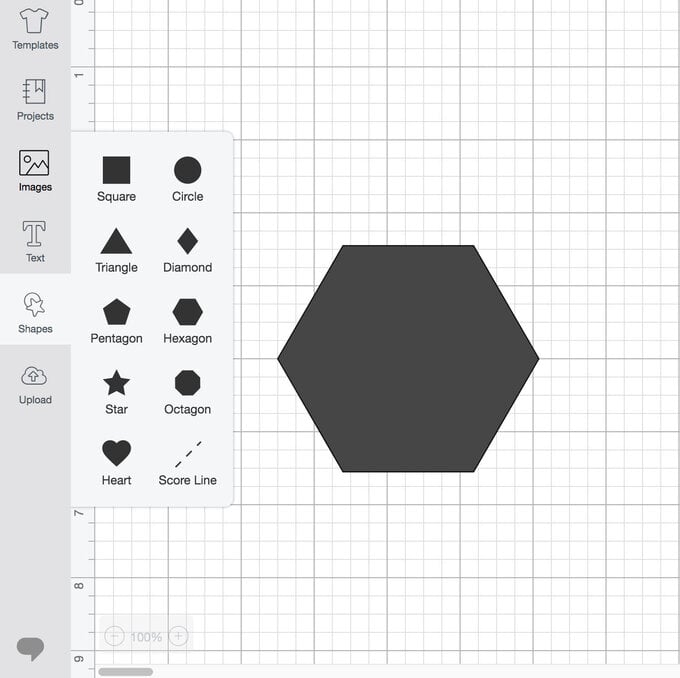
Once back through to the canvas, add two hexagons from the "Shapes" menu.
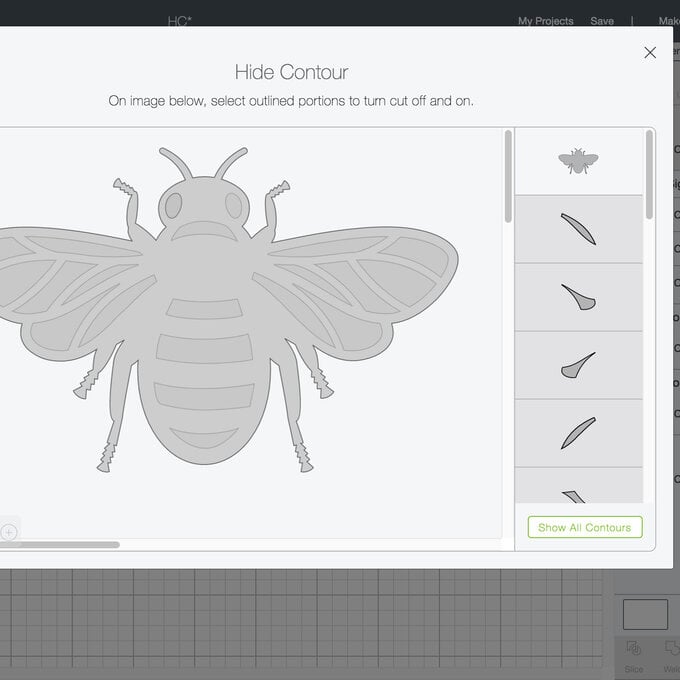
Select the bee image then click the contour button in the tools panel, click 'hide all contours' so that only the outline of the bee remains.
Once you have the outline of the bee, use the "Duplicate" function so that you have three bees on the canvas.
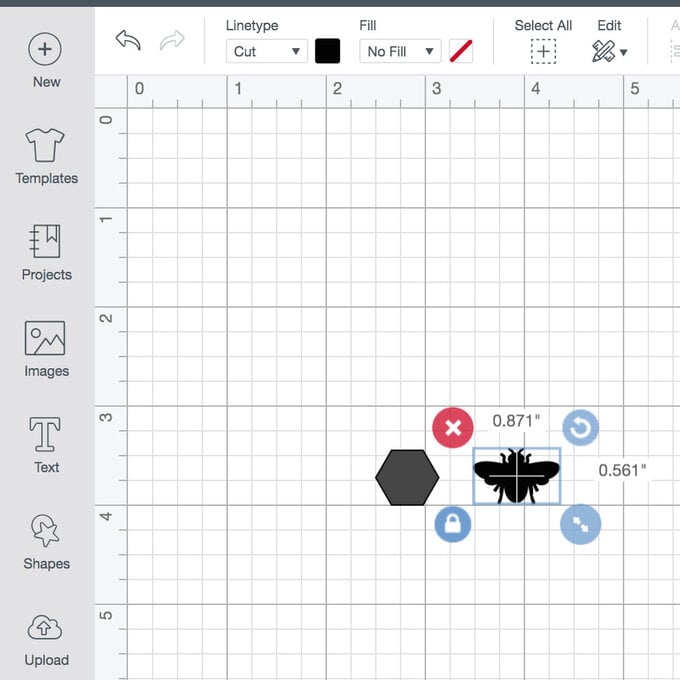
Re-size the bees and hexagons so that you have a variety of sizes. Make sure that the bees and two hexagons are all the same colour as they will all be cut out of the same gold glitter iron-on vinyl.
Top Tip: When re-sizing the elements make sure to take into consideration the space available on your trainer, use a tape measure to help with this.
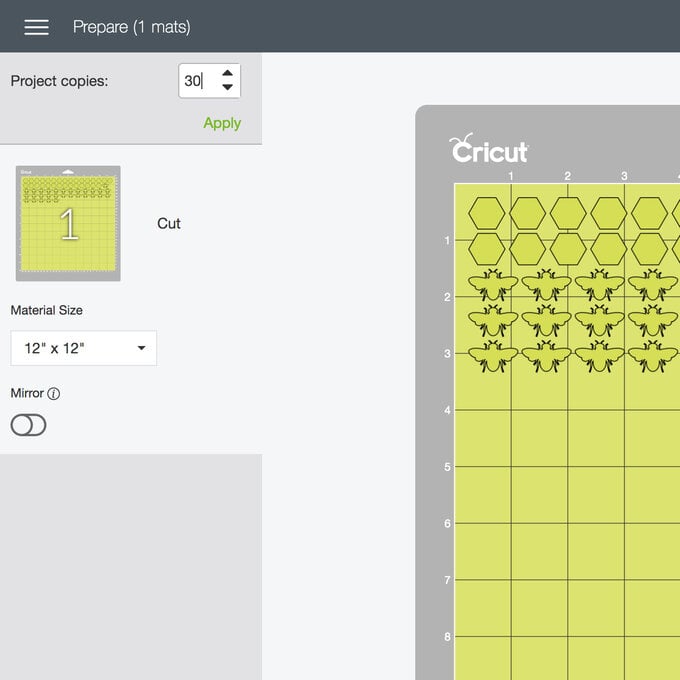
Once happy with the size of the elements, click "Make it" and change the "Project Copies" quantity to 30, then click the green "Continue" button.
There is no need to mirror the project as all of the images are symmetrical.
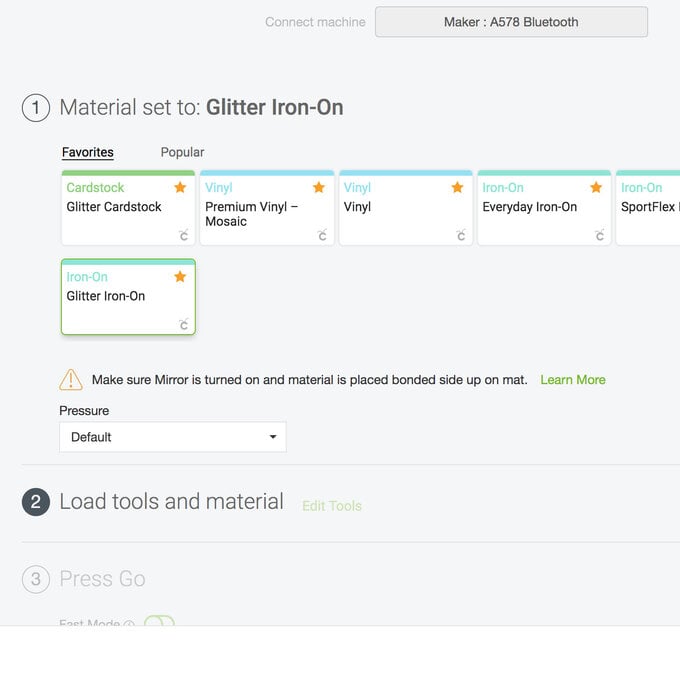
Once through to the machine set up screen, choose Glitter Iron-on from the materials list.
If you're using an Explore Air 2 turn the Smart Set Dial to custom to enable the full materials listing.
Place a sheet of Glitter Iron-on shiny side down onto the cutting mat, use the Cricut scraper tool or brayer to ensure that all of the iron-on vinyl is secure on the mat.
Load the mat it into the machine and start cutting.
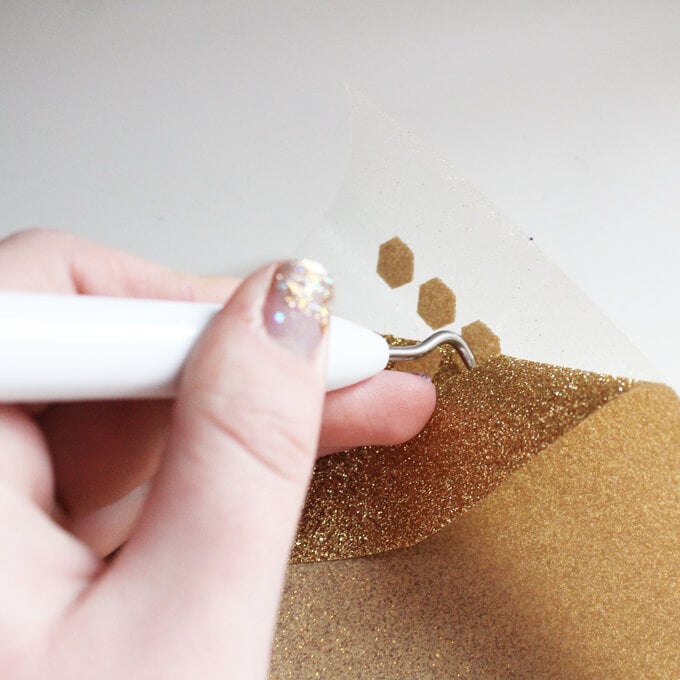
Once cut, use your weeding tool to weed away the excess iron-on vinyl, leaving only the bees and hexagons on the carrier sheet.
Carefully cut up the carrier sheet, so that all of the images are individual pieces.
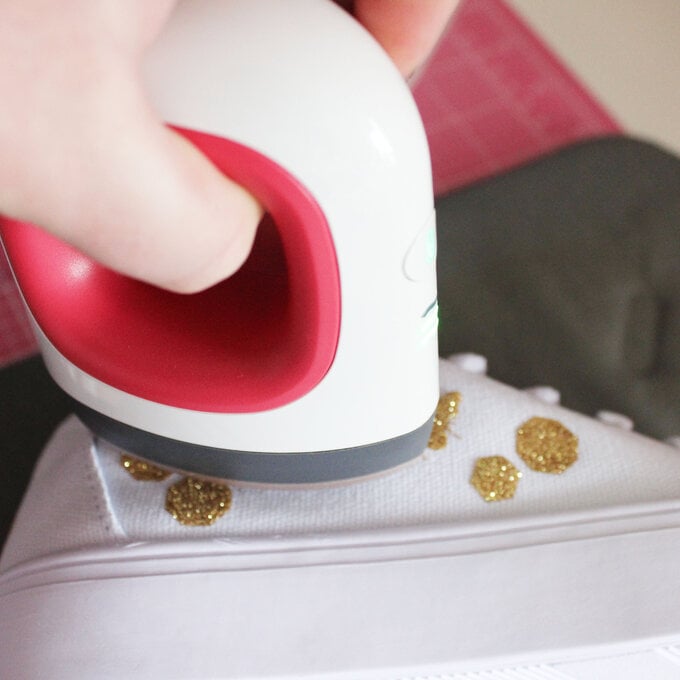
Use the Mini EasyPress on the second heat setting to adhere each image to the trainers, keeping the Mini EasyPress moving at all times.
Be careful to avoid any parts of the shoe, like the sole, that could melt!
Keep pressing until both trainers are covered with glittery bees and honeycombs!
Related Products