Skip to Content (Press Enter) Skip to Footer (Press Enter)

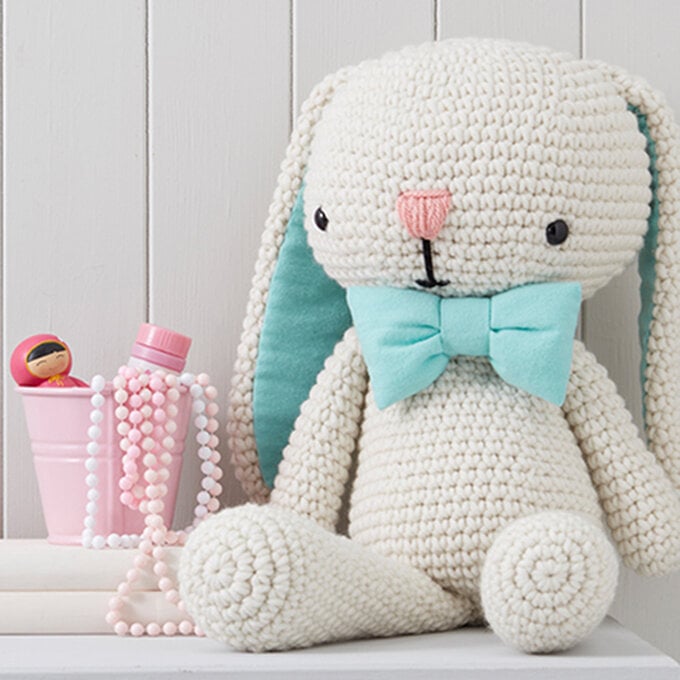
How to Crochet an Amigurumi Hamster

Level
Intermediate
Time
1+ days
Budget
10 - 30

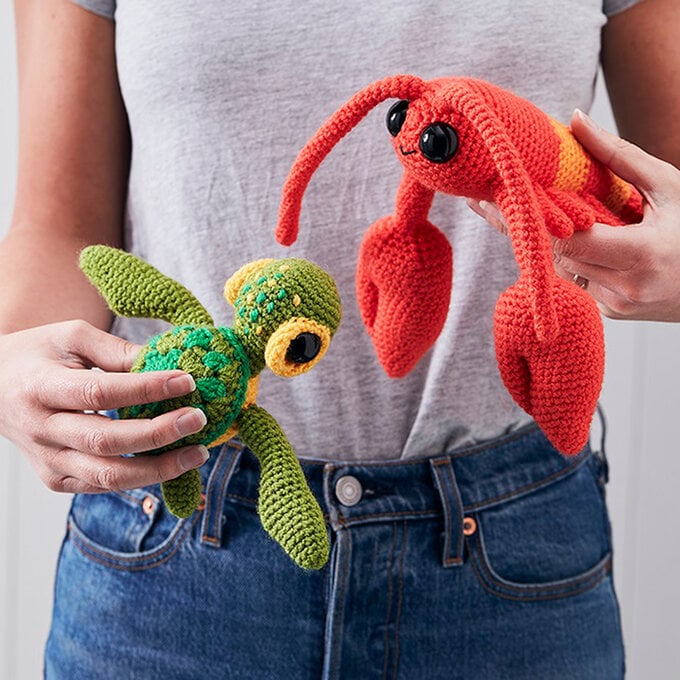
Get your crochet hook ready to create this hungry hamster designed by Irene Strange. A fun project that can brighten up your home or become a great gift for Easter.

You will need

Is $ 9.49

Quantity: 1

Subtotal

Is $ 9.49

Is $ 5.49

Quantity: 1

Subtotal

Is $ 5.49

Is $ 6.49

Buy 2 Selected Soft Toy Filling for £8
Quantity: 1

Subtotal

Is $ 6.49

Is $ 1.49

Quantity: 1

Subtotal

Is $ 1.49

Is $ 1.49

Quantity: 1

Subtotal

Is $ 1.49

Is $ 1.49

Quantity: 1

Subtotal

Is $ 1.49

Is $ 1.49

Quantity: 1

Subtotal

Is $ 1.49

Is $ 3.49

Quantity: 1

Subtotal

Is $ 3.49

Is $ 4.49

Quantity: 1

Subtotal

Is $ 4.49

You’ve viewed 2 of 9 products

You’ve viewed 4 of 9 products

Total:

How to Make

Abbreviations:

Ch- chain

Dc- double crochet

Inc- increase

Inv dec- Invisible decrease

Head Step-1

Make in Beige.

Step-2
Rnd 1: start 6 dc in a magic ring [6] Rnd 2: inc in each stitch around [12] Rnd 3: (1dc, inc in next st) six times [18]
Step-3
Rnd 4: (2dc, inc in next st) six times [24] Rnd 5 – 10: dc around Rnd 11: (inc in next 6 st, 6dc) two times [36]
Step-4
Rnd 12: (6dc, inc in next 2 st, 10dc) two times [40] Rnd 13 -15: dc around Rnd 16: (4dc, inv dec five times, 6dc) two times [30]
Step-5
Rnd 17: (1dc, inv dec) ten times [20] Add safety eyes between Rnds 10 and 11, add toy stuffing. Rnd 18: inv dec ten times [10]
Step-6
Rnd 19: inv dec five times [5] Fasten off and sew up the end.
Body: Step-1

Make in Beige

Step-2
Rnd 1: start 6 dc in a magic ring [6] Rnd 2: inc in each stitch around [12] Rnd 3: (1dc, inc in next st) six times [18]
Step-3
Rnd 4: (2dc, inc in next st) six times [24] Rnd 5: (3dc, inc in next st) six times [30] Rnd 6 – 11: dc around
Step-4
Rnd 12: (3dc, inv dec) three times, dc in all rem st [27] Rnd 13: (2dc, inv dec) three times, dc in all rem st [24] Rnd 14: (1dc, inv dec) three times, dc in all rem st [21]
Step-5
Rnd 15: inv dec three times, sl st in next st, miss the rest. Fasten off, leave a tail for sewing.
Nose: Step-1

Make in Beige

Step-2
Rnd 1: start 6 dc in a magic ring [6] Rnd 2: inc in next 3 st, 3dc [9] Rnd 3: dc around
Step-3
Rnd 4: 3dc in next st, 4dc, 3dc in next st, 3dc [13] Rnd 5: dc around Fasten off, leave a tail for sewing.
Cheeks Step-1

Make in Cream Rnd 1: start 6 dc in a magic ring [6]

Step-2
Rnd 2: inc in each stitch around [12] Rnd 3: (1dc, inc in next st) six times [18] Fasten off, leave a tail for sewing.
Tummy Step-1

Make in Cream Rnd 1: start 6dc in a magic ring [6]

Step-2
Rnd 2: inc in each stitch around [12] Rnd 3: (1dc, inc in next st) six times [18] Rnd 4: (2dc, inc in next st) six times [24] Fasten off, leave a tail for sewing.
Arms Step-1

Make in Beige Rnd 1: start 6dc in a magic ring [6] Rnd 2: dc around

Step-2
Rnd 3: inc in next st, 5dc [7] Rnd 4: dc around Rnd 5: inc in next st, 6dc [8]
Step-3
Rnd 6-7: dc around. Fasten off, leave a tail for sewing.
Legs: Step-1

Make in Beige Rnd 1: start 6dc in a magic ring [6]

Step-2
Rnd 2: dc around Rnd 3: 3dc in next 3 st, 3dc [12] Rnd 4: 3dc, inc three times, 6dc [15]
Step-3
Rnd 5: dc around Fasten off, leave a tail for sewing.
Tail: (Optional) Step-1

Make in Cream Rnd 1: start 6 dc in a magic ring [6]

Step-2
Rnd 2: dc around. Fasten off, leave a tail for sewing.
Ears Step-1

Make in Beige Rnd 1: start 5dc in a magic ring, turn [5]

Step-2
Rnd 2: ch1, inc in each st, turn [10] Rnd 3: ch1, dc around Fasten off, leave a tail for sewing.
Inner Ears (optional): Step-1

Make in Cream Rnd 1: start 5dc in a magic ring [5] Fasten off, leave a tail for sewing.

Teeth (Optional): Step-1

Make in White Ch3, start 2nd ch from hook.

Step-2
Rnd 1: 2dc, turn. Rnd 2: ch1, 2dc. Fasten off, fold in half and sew the ends together.
Carrot Step-1

Make in Orange Rnd 1: start 6 dc in a magic ring [6] Rnd 2: (1dc, inc in next st) three times [9]

Step-2
Rnd 3: (2dc, inc in next st) three times [12] Rnd 4: dc around Rnd 5: (3dc, inc in next st) three times [15]
Step-3
Rnd 6 – 8: dc around Rnd 9: (1dc, inv dec) five times [10] Add toy stuffing
Step-4
Rnd 10: inv dec five times [5] Fasten off, sew up the end.
Carrot Top: Step-1

Make in Green Ch 5, start 2nd ch from hook.

Step-2
Row 1: dc in each ch, ch4, miss 1st ch, 3dc, 1dc in last dc from starting ch, ch4, miss 1st ch, 3dc, 1dc in last dc from last 4ch. Fasten off, leave a tail for sewing.
Assembly: Step-1

Start by putting together the head. First sew the nose to the lower half of the head along the middle. Sew the cheeks either side of the nose, adding a tiny bit of stuffing underneath.

Step-2
Add the ears to the top of the head and the extra white detail inside each ear – for the smallest details you could use a small pieces of felt.
Step-3
Next sew the body to the head, the rounder section of the body making the tummy. Sew the tummy detail to the front of the body. Sew the arms either side of the tummy detail close to the top.
Step-4
Add the legs to the base of the body. Sew the tail to the back, checking that it helps hamster sit up.
Step-5
Embroider a pink nose with embroidery thread or waste yarn. Sew the little teeth underneath the nose and tidy up any loose ends to finish to finish.
Step-6
Add the green tops to the carrots and attach one of the carrots to hamster's arms if you want to pose him.

Related Products

  • bvseo_sdk, dw_cartridge, 18.2.0, p_sdk_3.2.0
  • CLOUD, getReviews, 19ms
  • reviews, product
  • bvseo-msg: Unsuccessful GET. status = 'ERROR', msg = 'Not Found.'; Unsuccessful GET. status = 'ERROR', msg = 'Not Found.';
Top