17 Quick Easter Crafts for Kids
Little ones rarely have the patience to focus on long craft projects – sometimes you just need a five minute craft to keep them happy when they're bored at home. So we thought we would share a fab collection of 17 kids craft activites to keep them happy until Easter Sunday!
Browse the Easter projects below and get crafting. Most projects use items that you may already have in your craft stash!
You will need
Subtotal
Is $ 8.49
Subtotal
Is $ 3.49
Subtotal
Is $ 4.49
Subtotal
Is $ 1.49
17 Quick Easter Crafts for Kids
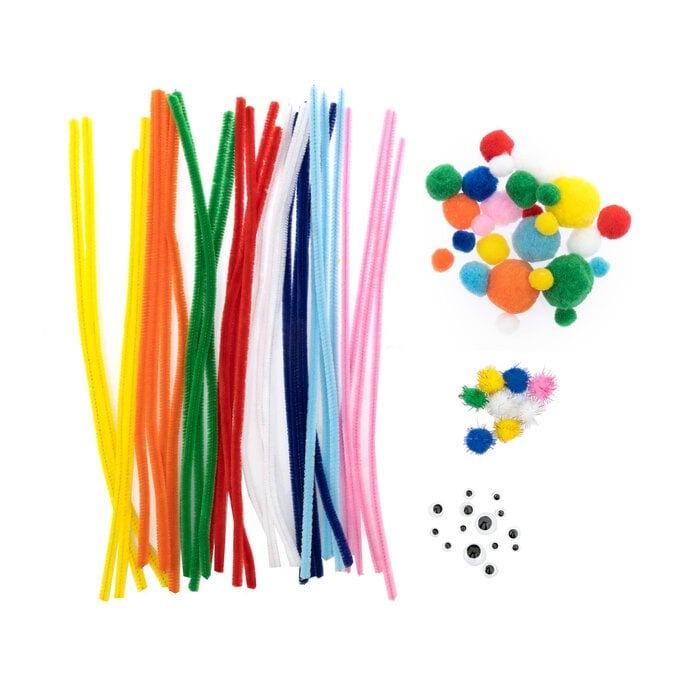
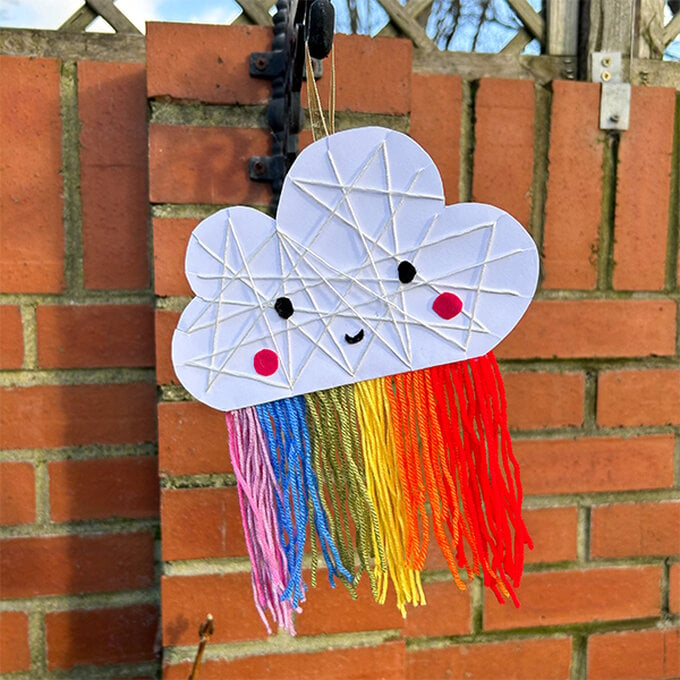
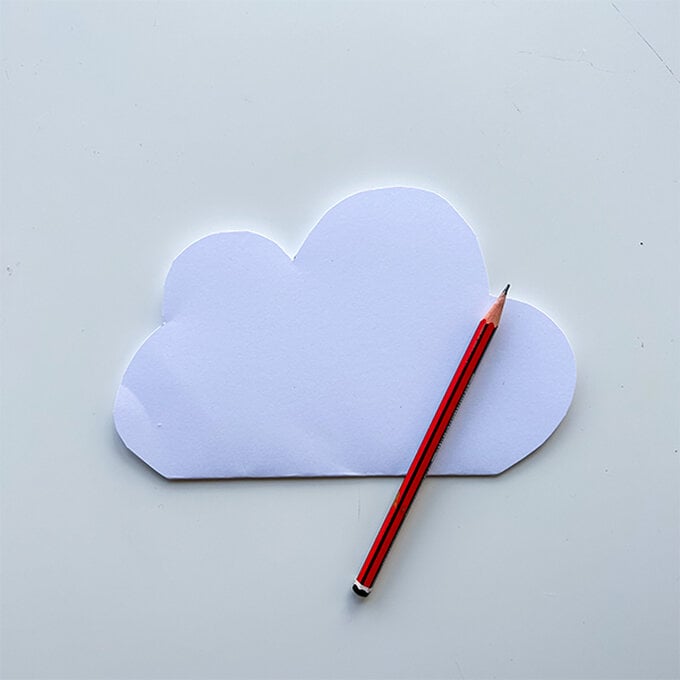
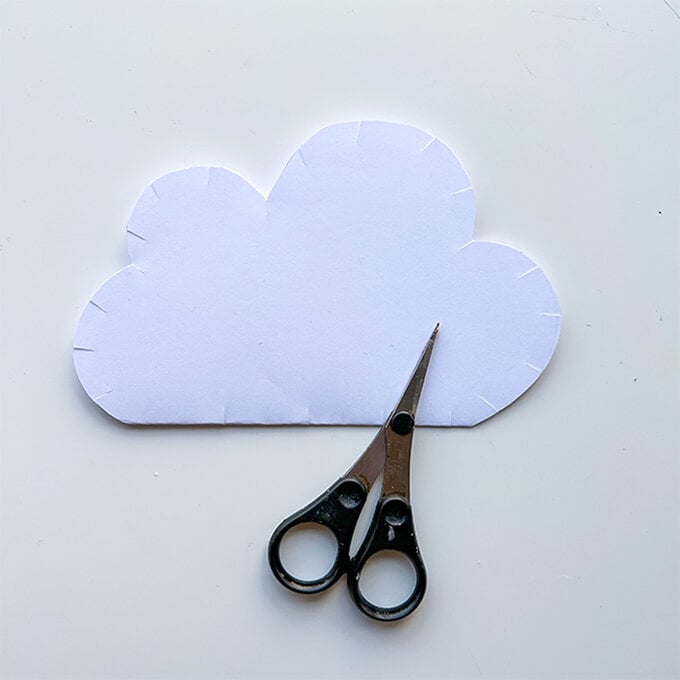
For this project you will need: white card, scissors, pencil, white and colourful wool, glue, black and pink felt sheets.
1. Fold over a piece of white card and draw a cloud shape. Cut the shape out, leaving the bottom edges attached.
2. Cut 1cm incisions around the cloud.
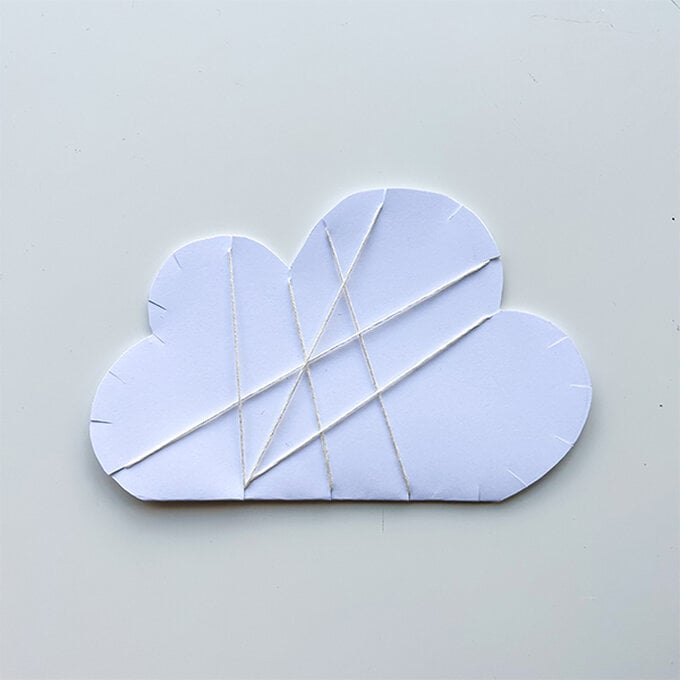
3. Wrap white wool around the cloud using the incisions.
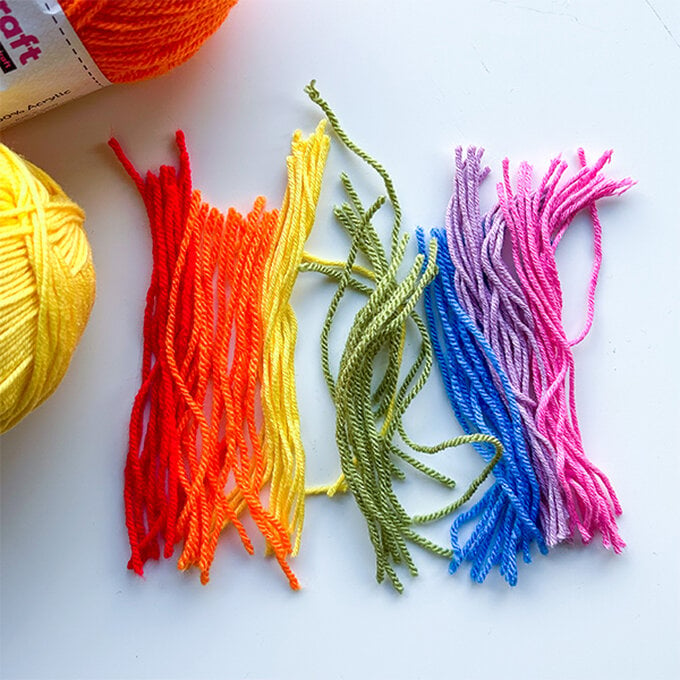
4. Cut equal lengths of wool in the colours of the rainbow and attach them to the back of the cloud using glue.
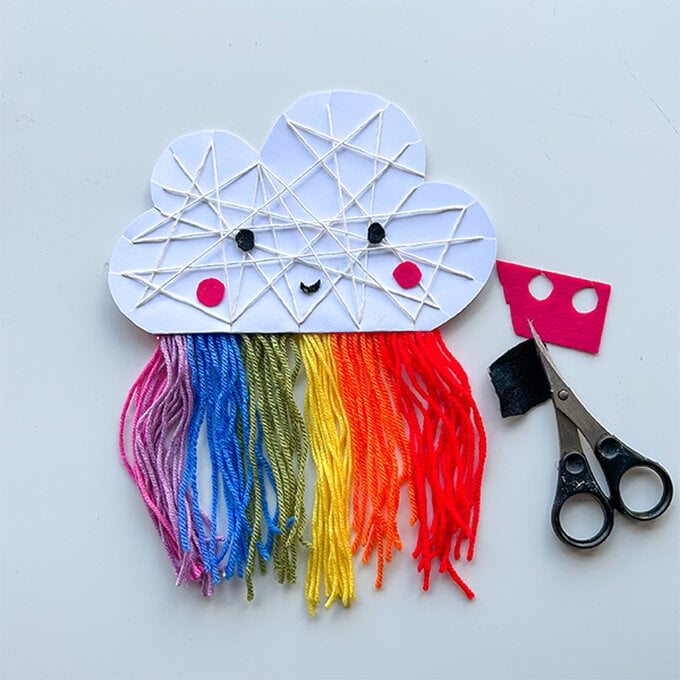
5. Cut eyes, a mouth and some rosy cheeks from felt and stick them on to the cloud. Add a loop of ribbon or string to the top and you have a cute cloud hanging for your little one's wall!
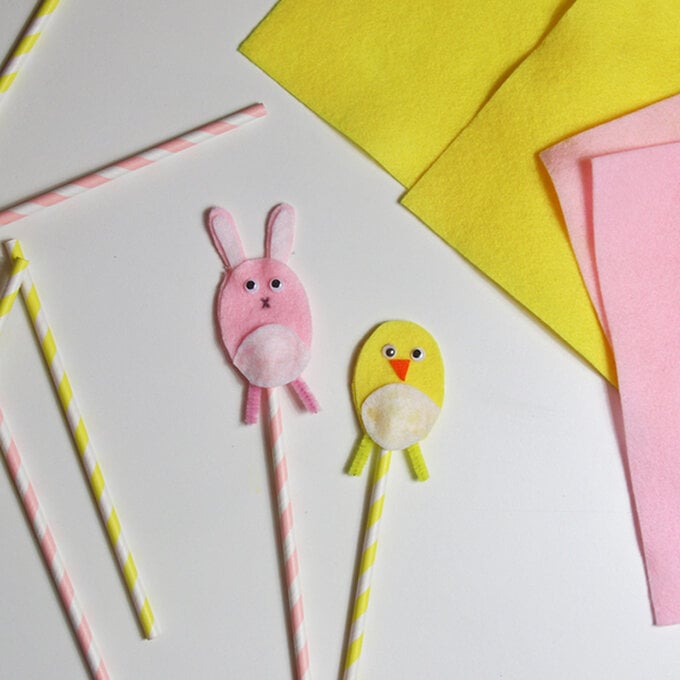
For this you will need: yellow felt, orange felt, white felt, pink felt, glue, yellow pipe cleaners, pink pipe cleaners, a pencil, scissors and paper straws.
1. For the chick, Draw an egg shape onto yellow felt (about 8cm high) and cut two of these out. Cut a small triangular nose from orange felt and a white felt tummy.
2. For the bunny, cut two egg shapes as before from pink felt. Cut two pink ears and two white inner ears and a white felt tummy.
3. Arrange the beak, tummy and ears onto the front pieces for the chick and bunny and glue in place.
4. Cut an 8cm piece of yellow pipe cleaner, bend it in the middle and glue under the bottom of the chick. Repeat for the bunny with the pink pipe cleaner
5. Glue the straw to the bottom of the back piece of felt then glue and sandwich the front and back pieces together. You can hold them in place with a couple of pegs whilst they dry if you need.

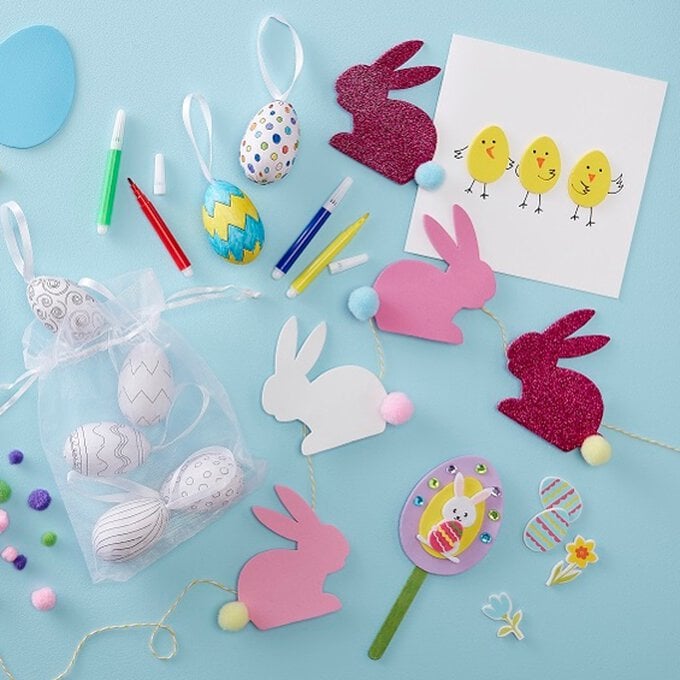
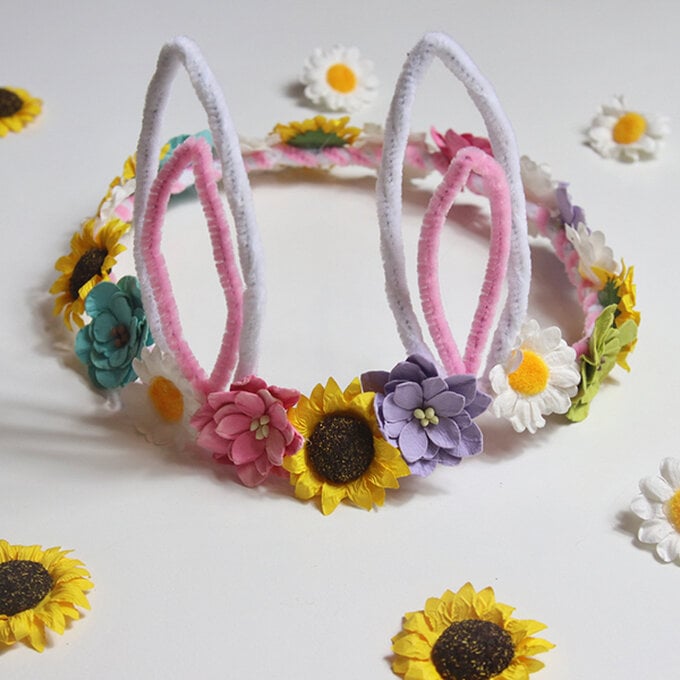
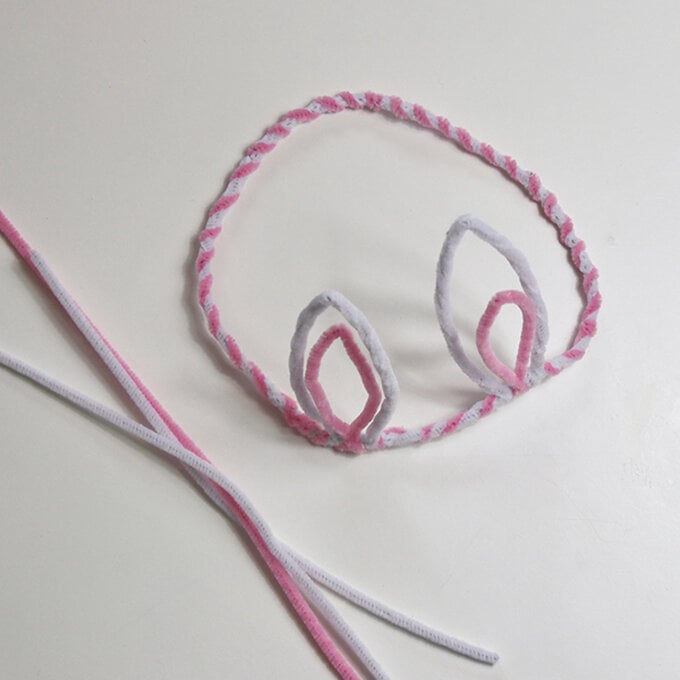
For this you will need: white pipe cleaners, pink pipe cleaners, glue and flowers.
1. To make the base of the crown, twist together 2 or 3 white pipe cleaners into a circle and check that it fits onto your head. Twist any ends in so there are no sharp bits sticking out.
2. To make the ears, bend a white pipe cleaner in half and open out to the shape of a bunny ear. Twist onto the crown. Repeat with another pipe cleaner for the other ear, making sure they're the same height.
3. Make some smaller pink pipe cleaner ears to go inside the white ones and fix onto the crown.
4. Twist pink pipe cleaners around the base of the crown.
5. Glue a mixture of flowers all the way around the crown.
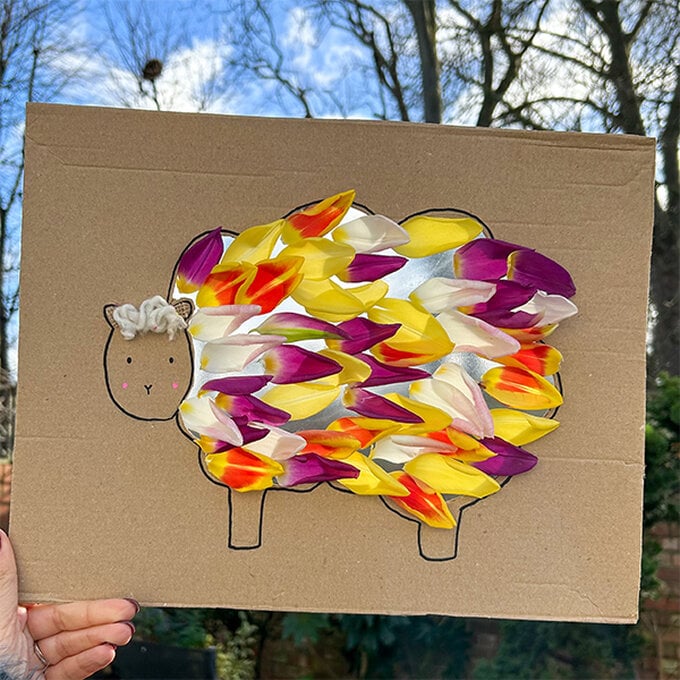
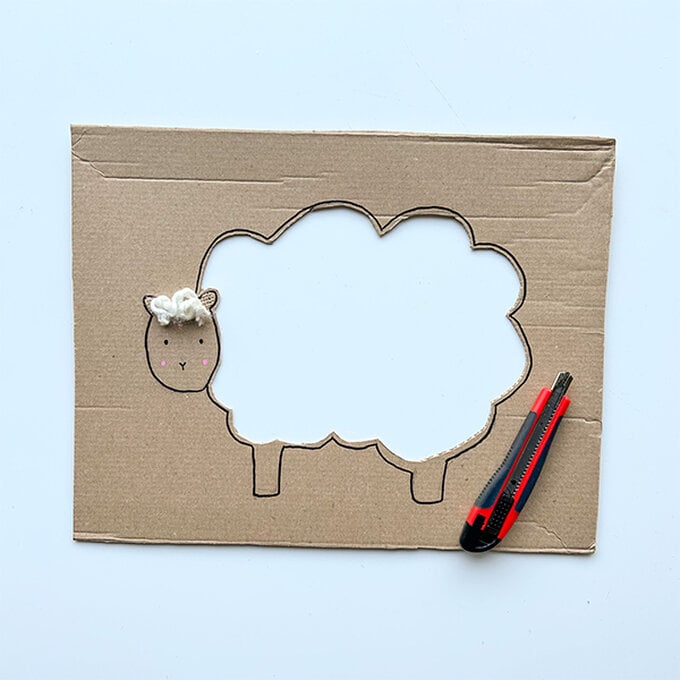
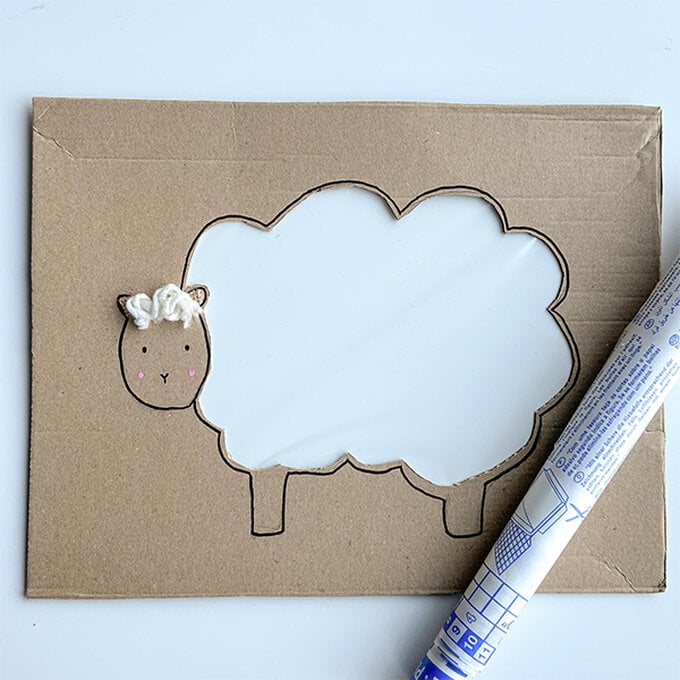
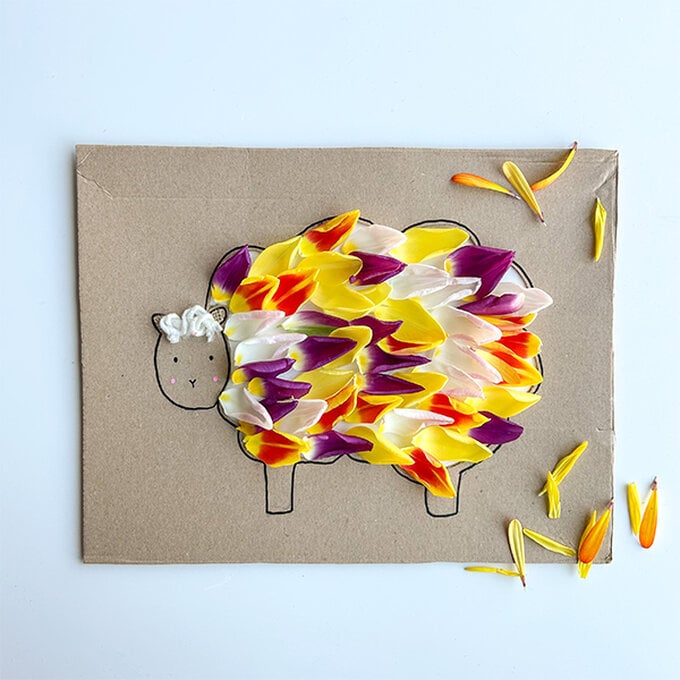
For this project you will need: a pencil, scissors/craft knife (adult help required), cardboard, sticky back plastic and foraged petals.
1. Draw the outline of a sheep onto a piece of cardboard and cut it out using a craft knife.
2. Turn the cardboard over, and attach a sheet of sticky back plastic. The sticky side shout be the same side up as the sheep's face.
3. Using your nature finds, stick petals on to the sticky back plastic to create a flowery sheep! Get as creative as you like with the petals and different colours you find.
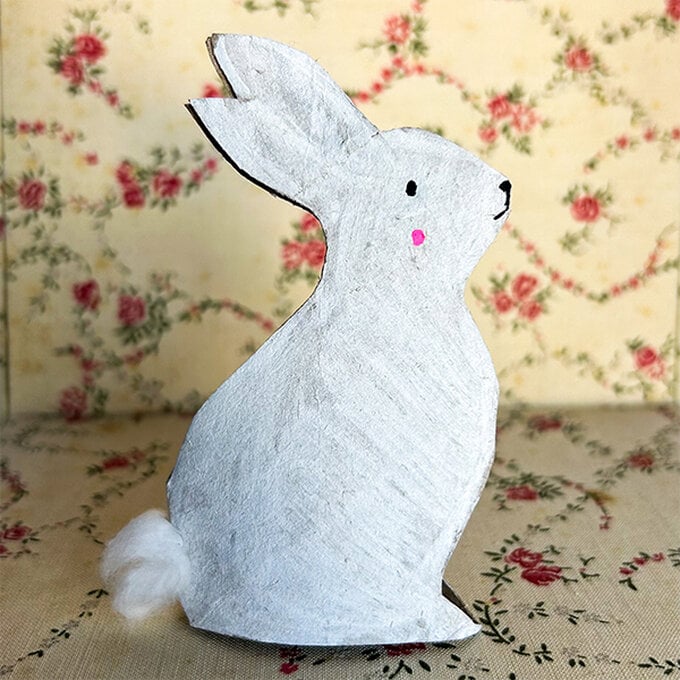
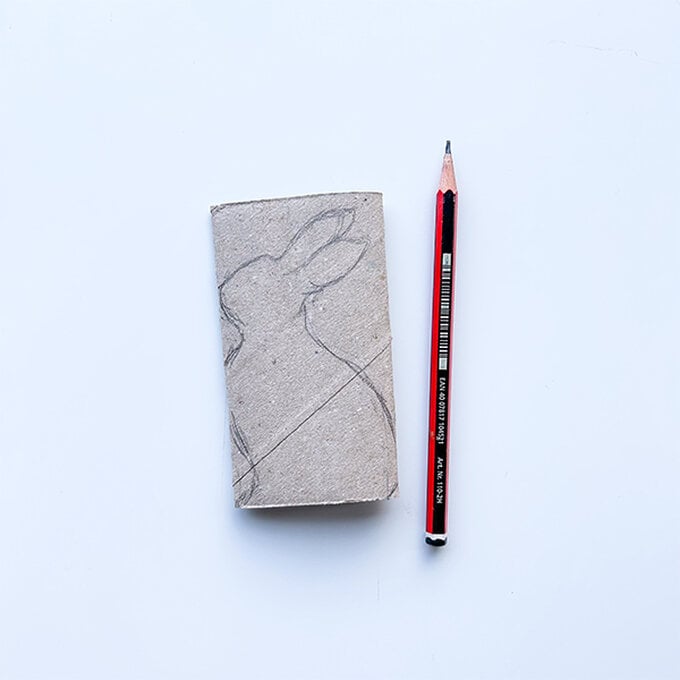
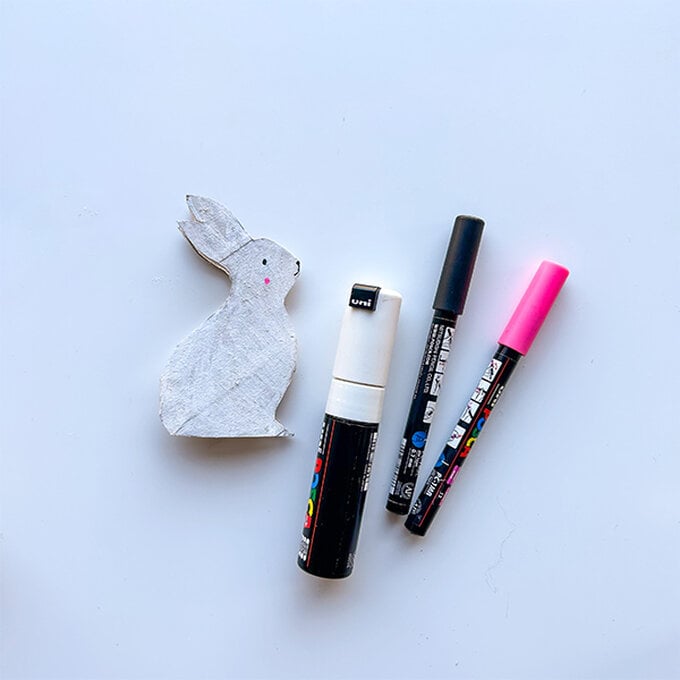
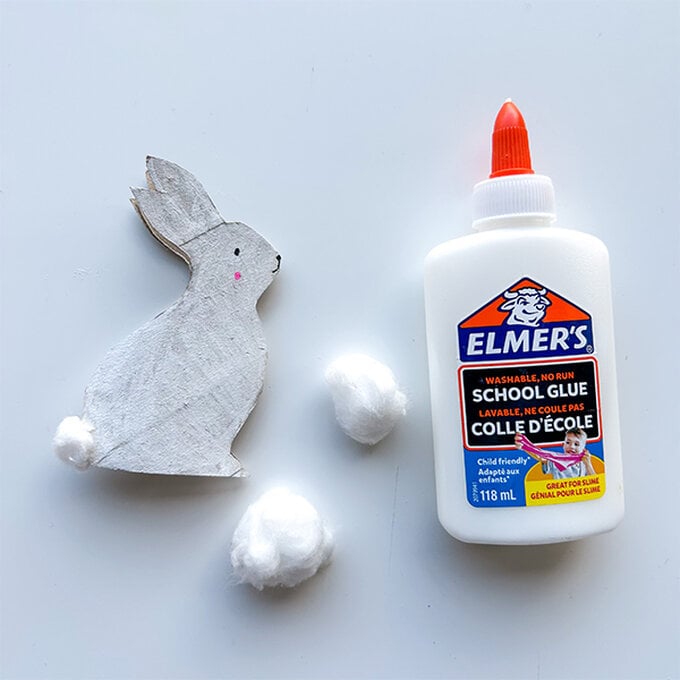
For this project you will need: cardboard tubes, white, black and pink POSCA Pens, glue, scissors and cotton wool.
1. Flatten a paper roll and draw the outline of a bunny. Cut around it, making sure some of the edges remain joined.
2. Once you've cut the bunny out, colour or paint it and draw the face details. Get as creative as you like with the design!
3. Using some glue, attach a small piece of cotton wool as the tail. There you have it, a standing Easter bunny!
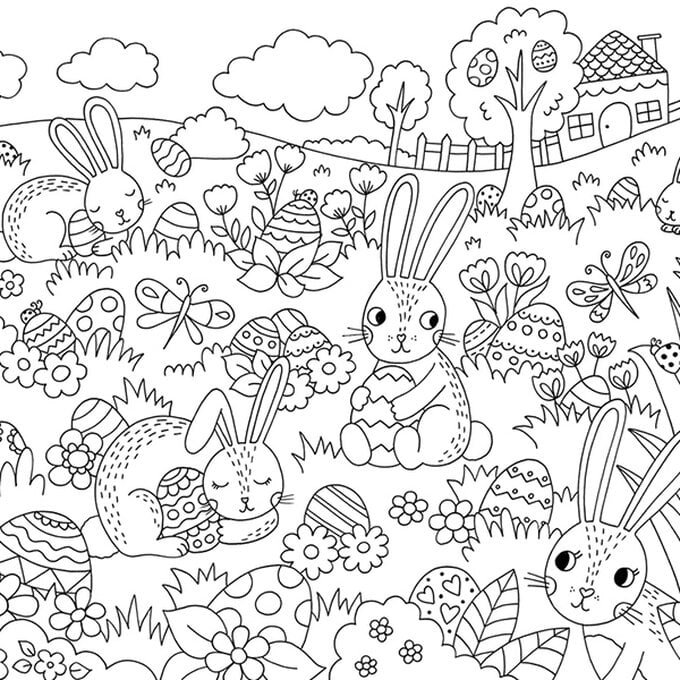
Keep the kids entertained over the Easter holidays with a fun but chocolate-free Easter egg hunt colouring project!
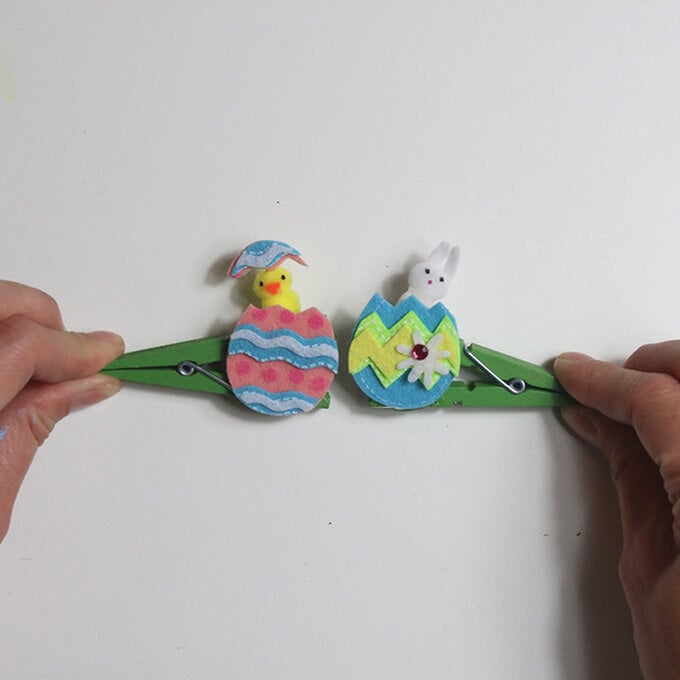
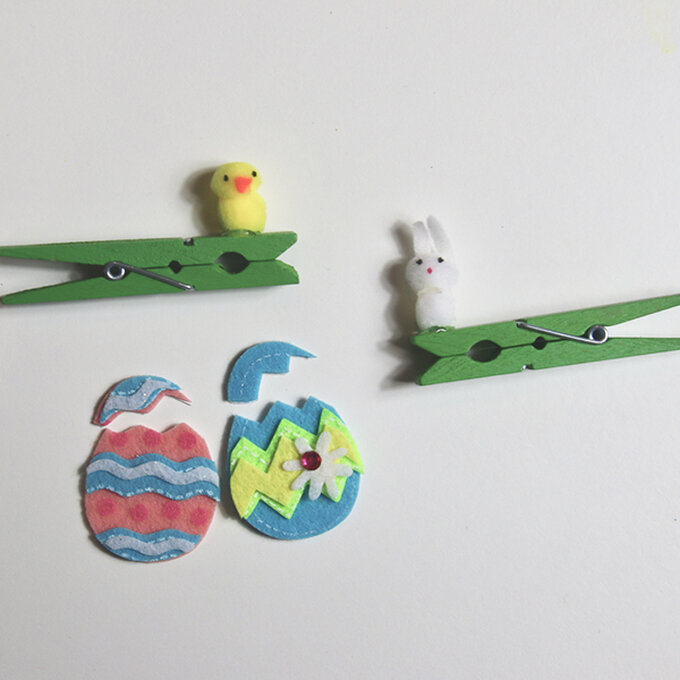
For this you will need: glue or double sided tape, yellow pom poms, orange felt, white felt, a black pen, a pencil, scissors, pegs, mini felt eggs
1. Begin by glueing a pair of yellow pom poms together to make the chick, then repeat for the white pom poms for the bunny. If you don't want to wait for the glue to dry you could use double sided tape instead.
2. Cut a tiny orange felt beak and glue to the chick. Cut some white ears and glue to the Add a dot of black pen for each eye.
3. Glue the chick and bunny onto the top of each peg
4. Cut the top off the eggs, with a jagged edge to make them look like they've cracked.
5. Add glue to the bottom section of the peg and glue the eggs on so that they hide the animals. Make sure the peg is still able to open.
6. If you like you can add the top of the shell to the chick's head for added cuteness. Now when you pinch the pegs the little animals peek out to say hello!
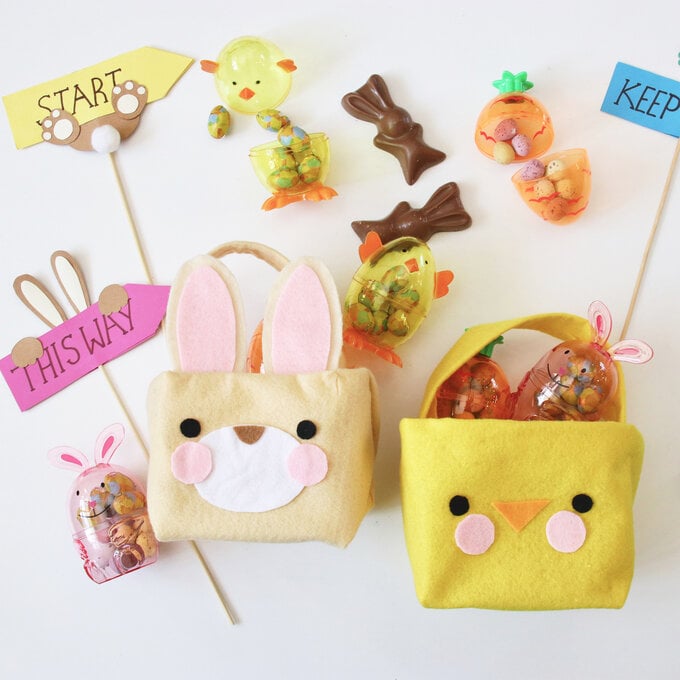
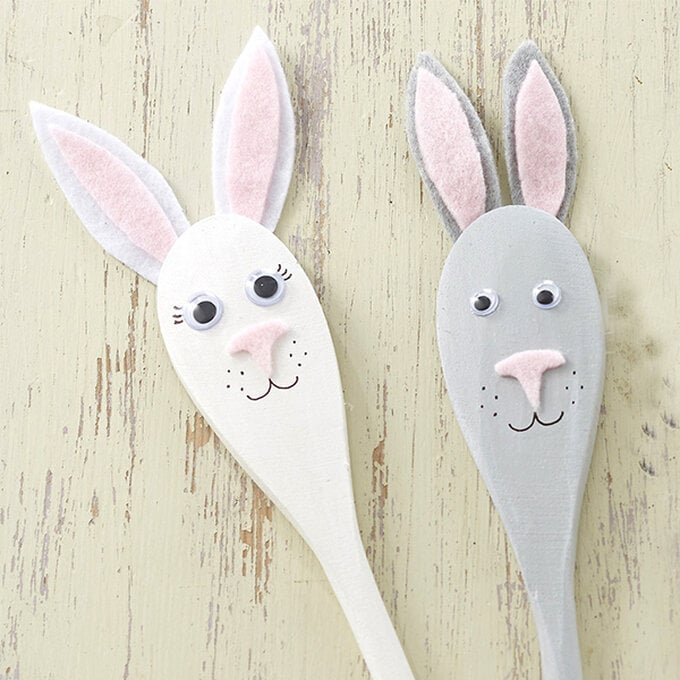
Easter wouldn't be complete without an Easter bunny or two around the house, and these bunny spoon puppets are no exception! Upcycle old wooden spoons to create an activity kids will love.
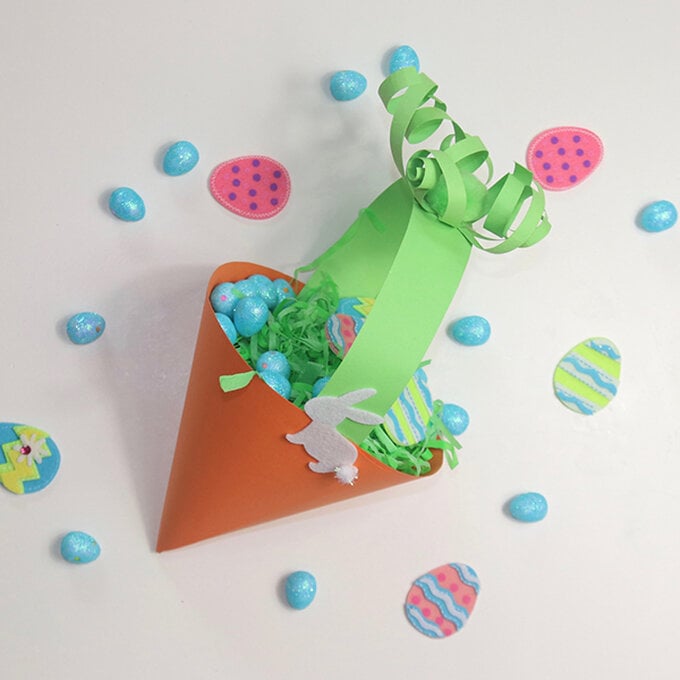
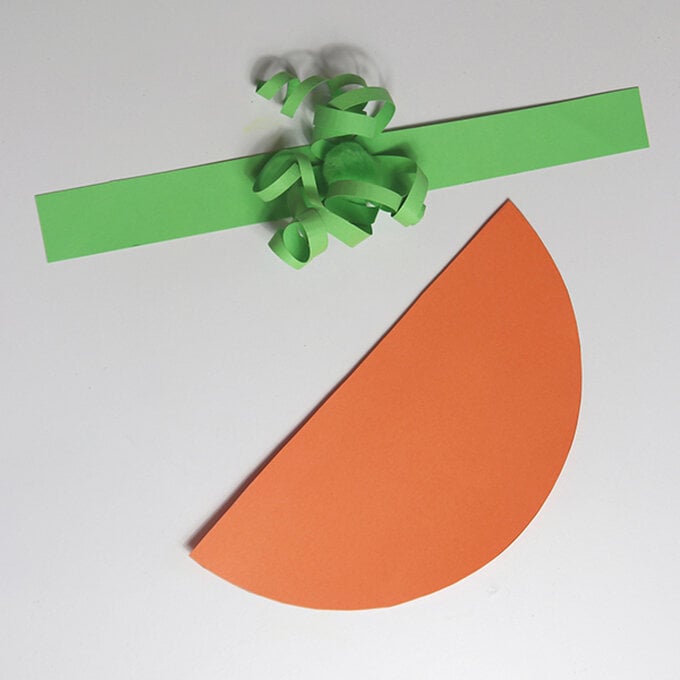
For this you will need: A4 card, double sided tape, scissors, a pencil and bunny stickers.
1. Place a dinner plate over half a piece of A4 card – it should fill the paper. Draw around it and cut out.
2. Roll into a cone shape and stick together using double sided tape.
3. To make the handle cut a strip (about3cm wide) from the long edge of the green card. Tape each end inside the top of the carrot.
4. Cut about thinner strips of green card and wrap them around a pencil to curl them. Tape onto the top of the handle, then pop a pom pom on top.
5. Stick bunny stickers on each side of the basket. Stuff with green shredded paper and get egg hunting!
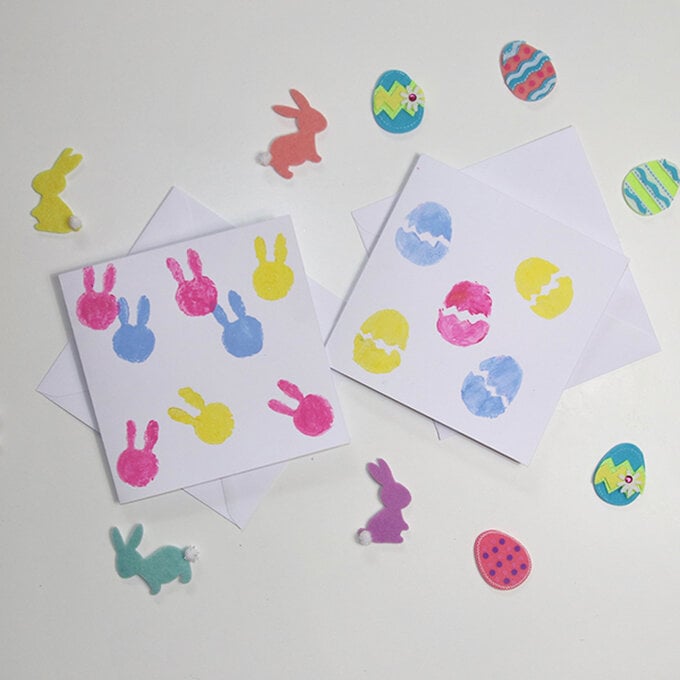
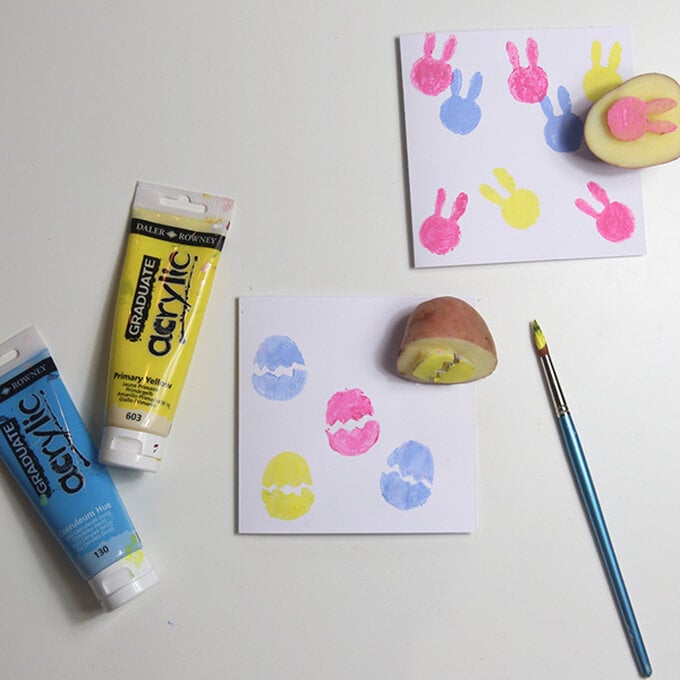
For this you will need: a potato, a pencil, a knife, a card blank, paint and a paintbrush.
1. Ask an adult to cut a potato in half. Use a pencil to draw a bunny and an egg shape onto the potato.
2. Ask an adult to gently cut along the pencil lines and then slice away the potato around them to create a stamp.
3. You can now either dip the potato into some paint or use a paintbrush to add paint to your stamp. Print onto the card. Try to keep the stamp still when it's on the card and gently remove it. Fill in any gaps in the print with a paintbrush.
4. If you like you can add decorative dots by dipping the back of a paintbrush or rubber on a pencil into the paint and using it to stamp on the card.
5. Once the paint has dried you can also add detail using coloured pens.
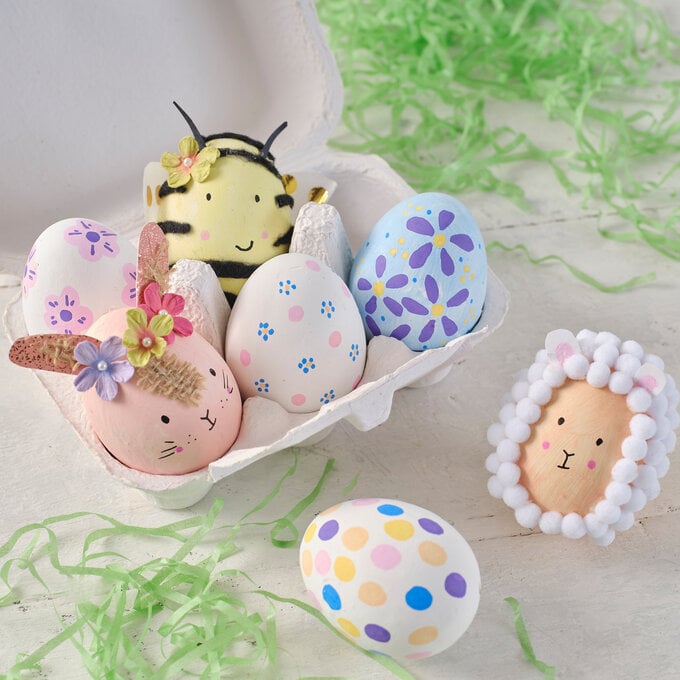
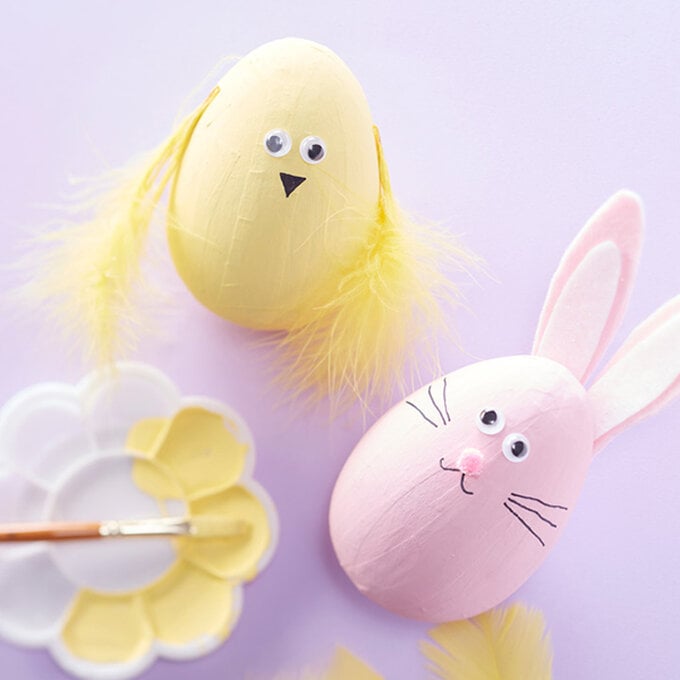
Mache eggs don't have to be decorated or used just by adults; why not get the kids involved in some Easter crafts and have a go at making some super cute decorations?
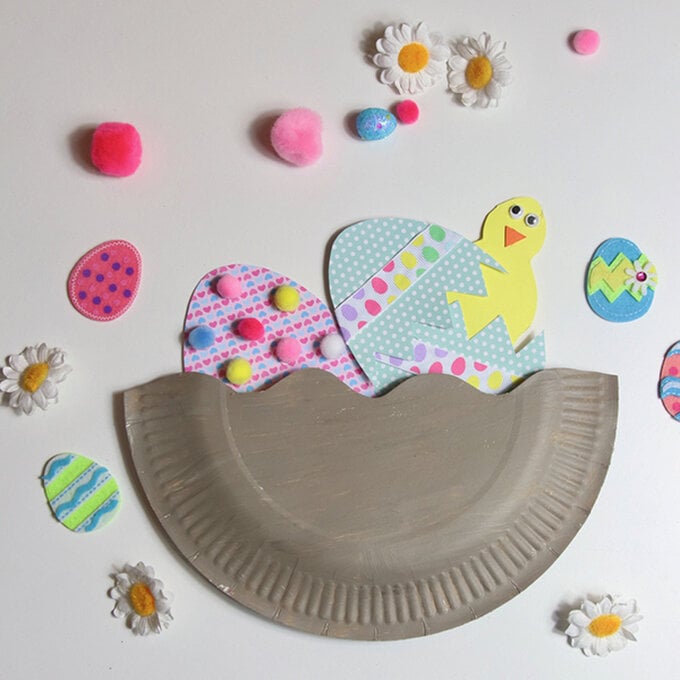
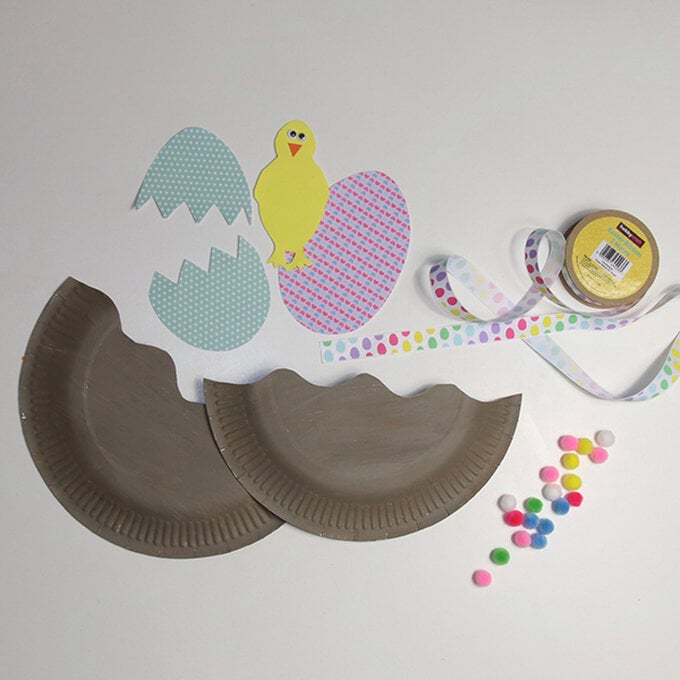
For this you will need: a paper plate, grey paint, card, googly eyes, glue, mini pom poms, easter ribbon, scissors and a pencil.
1. For the nest, paint the front and back of the paper plate grey and leave to dry. Once dry, cut in half with a wavy line.
2. Draw two eggs to fit in your nest on the patterned card. Cut them out and cut one if half so it looks like it's been cracked.
3. Draw a chick shape onto yellow card and cut it out. Glue on a pair of googly eyes and a small orange beak cut from card.
4. Decorate the eggs by glueing on mini pom poms and adding Easter ribbon.
5. Glue the two paper plates together around the rim to form the nest. Pop the eggs and chick inside and glue in place. You can leave the chick loose if you want to be able to take it out.
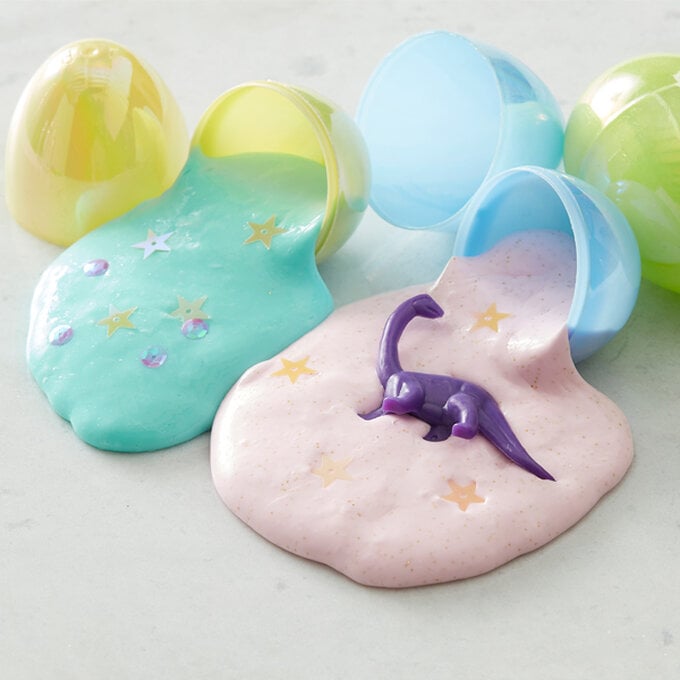
Roll up your sleeves and make these super fun pastel, slime-filled eggs for an alternative take on the classic Easter egg.
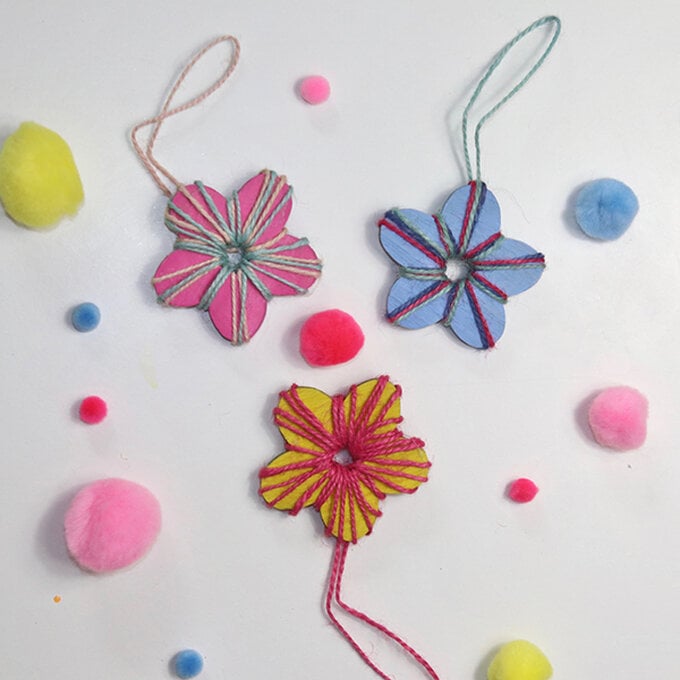
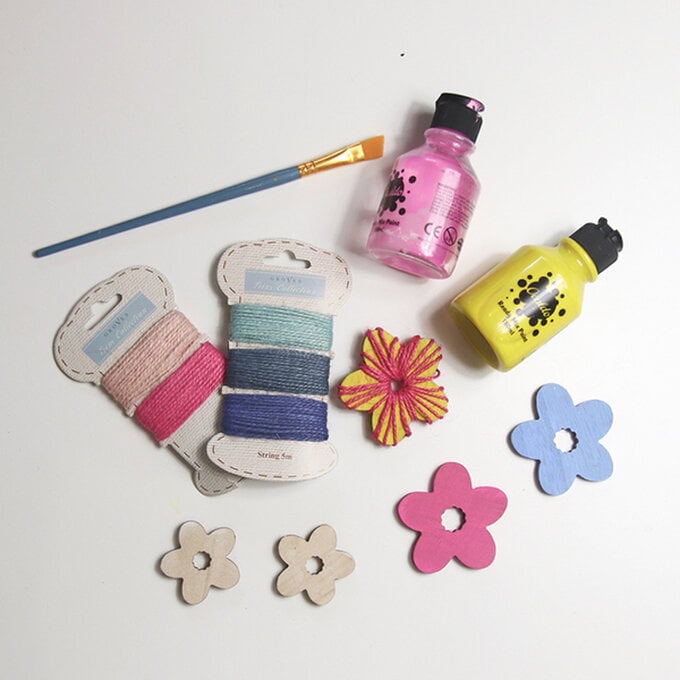
For this you will need: cardboard, paint, a paintbrush, yarn, scissors, a pencil and glue.
1. Begin by painting the front, back and sides of the flowers with paint. Leave to dry.
2. Tie a piece of yarn onto the back of the decoration and wrap it through the centre and around the flower. You can keep to one colour or add as many as you like.
3. Once you've filled up your flower either tie or glue down the end of the yarn onto the back of the decoration.
4. Cut a piece of yarn for a hanging loop, fold in half and glue onto the back of the decoration.
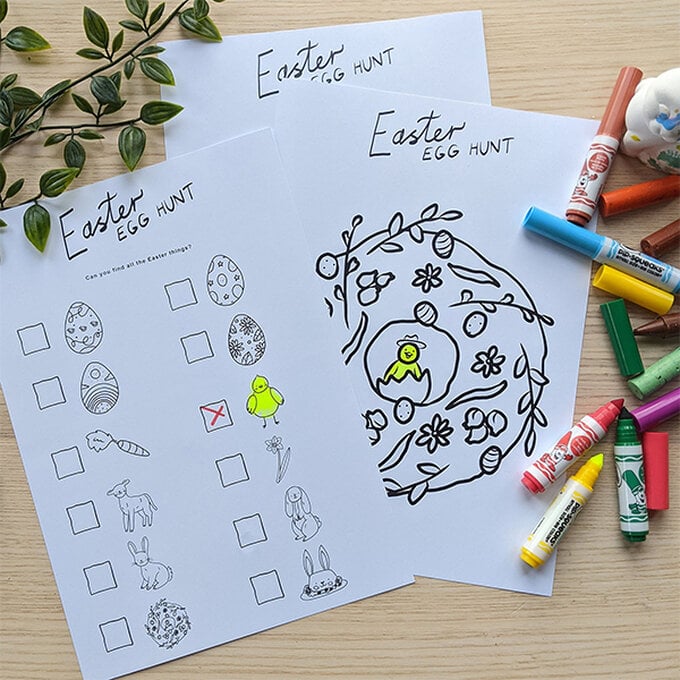
Create a fun Easter egg hunt without the need for chocolate eggs. Print out the pages at home, decorate each design and place it around your home for the children to find!
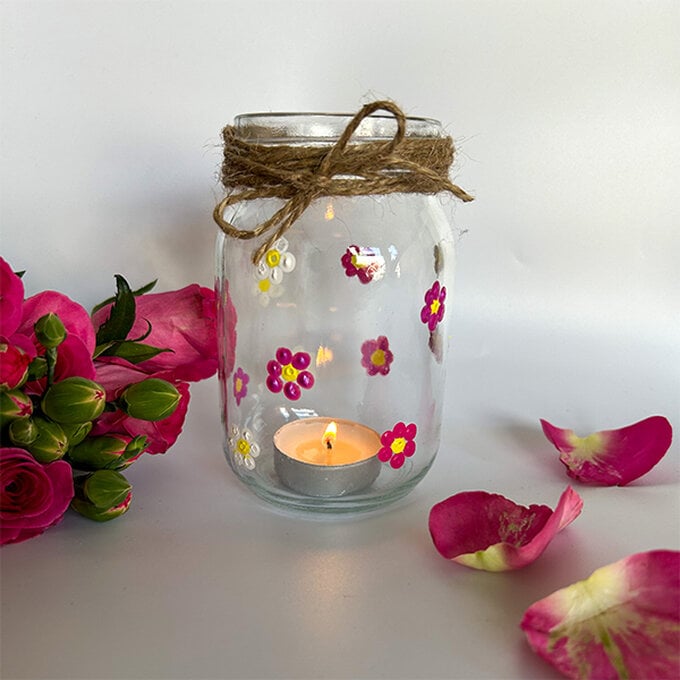
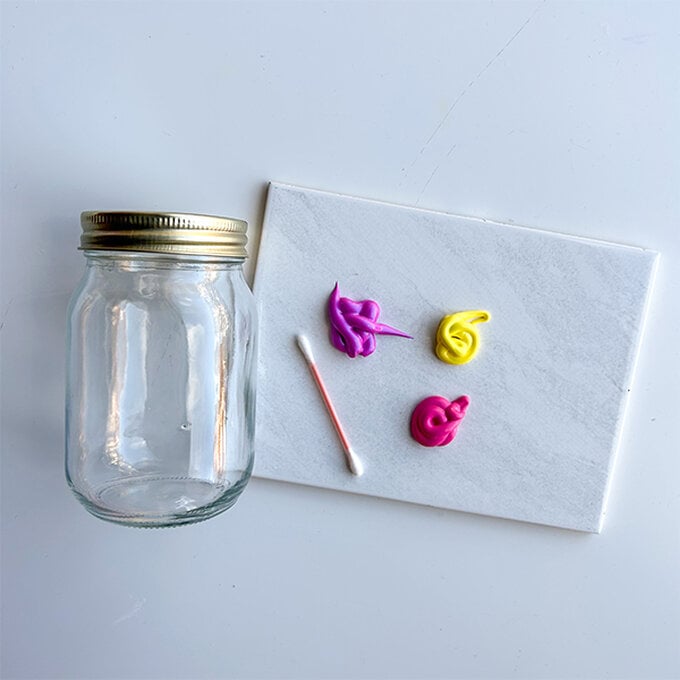
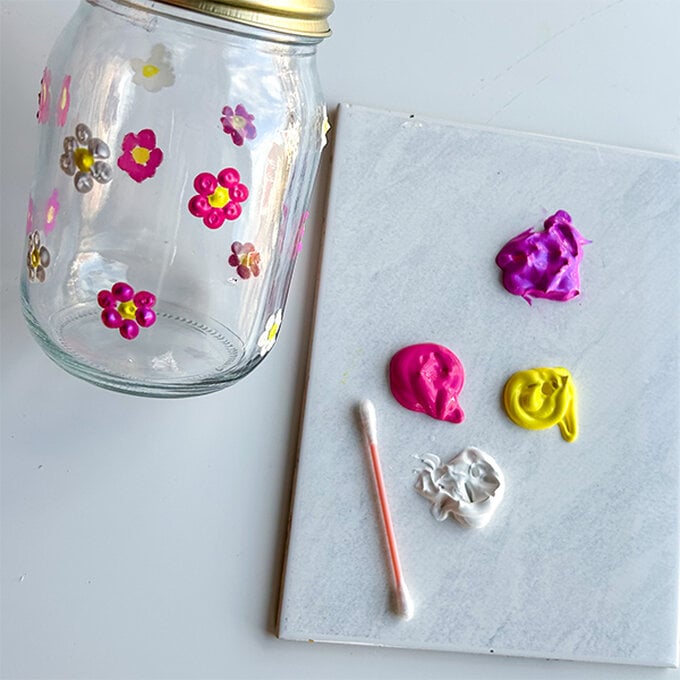
For this project you will need: a jar, cotton buds, paint, LED tea light.
1. First make sure your jar is clean and dry.
2. Using a cotton bud, create a flower design on the jar. Do one yellow dot in the centre, and four pink on the outside to create a flower. Repeat this design around the jar and leave to dry.
3. Once dry, tie some brown string around he top and pop your LED tea light inside for the perfect DIY candle holder!
Related Products