Skip to Content (Press Enter) Skip to Footer (Press Enter)

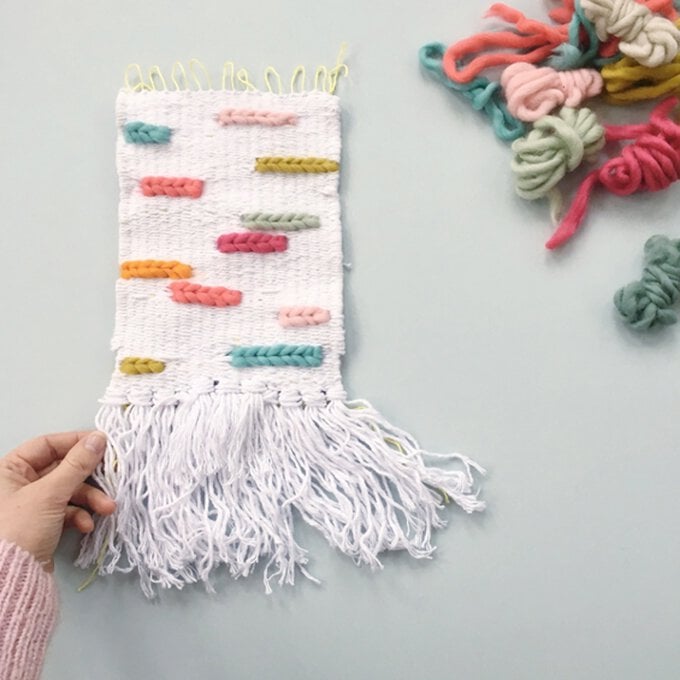
How to Make a Soumak Colour Pop Weave

Level
Beginner
Time
1+ days
Budget
10 - 30
Once you have got to grips with basic weaving you now need to explore new techniques to create amazing wall art. Follow the tutorial below by Lindsey (@lottieandalbert) to learn how to master soumak weaving.

You will need

Is $ 9.49

Quantity: 1

Subtotal

Is $ 9.49

Is $ 5.49

Quantity: 1

Subtotal

Is $ 5.49

Is $ 10.00

Quantity: 1

Subtotal

Is $ 10.00

You’ve viewed 2 of 3 products

Total:

How to make

How to Set Up Your Loom: Step-1

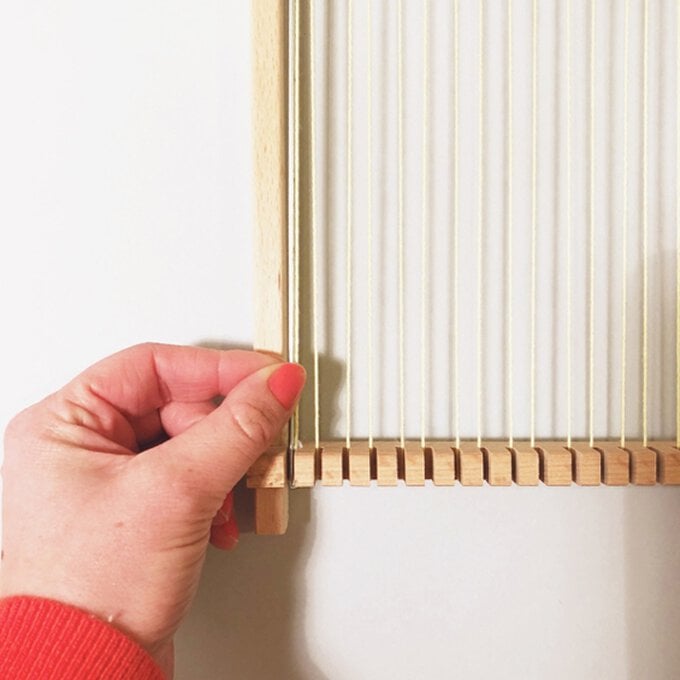
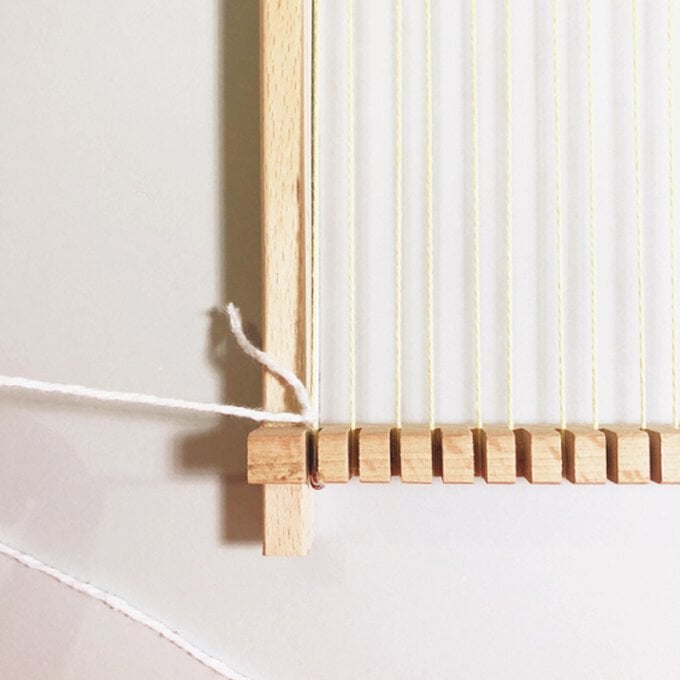
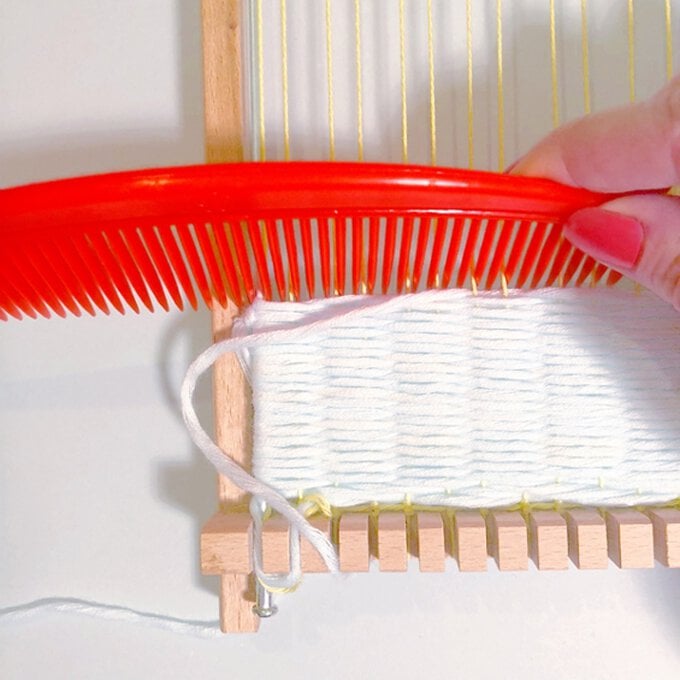
Start by attaching the metal rods included in the Rico Small Weaving Loom to the outermost slots in the loom and tightening them. This will stop your weave from pulling in at the sides.

bag-12-768x1024.jpg?sw=680&q=85
Step-2
Using your warping thread or 4ply cotton, tie to the bottom or top of the loom, through the first of the slots, then wrap the thread over and under every other slot, keeping it fairly taught, until you get to the last slot. Tie off your thread. You should now have the thread (your warp thread) running vertically up and down the loom – and you’re ready to start!
Step-3
Using Yarn A, wind off a piece that is a few arm lengths long. We are now going to tie this in knots to secure the bottom of the loom. Starting bottom left, tie Yarn A around your first warp thread. At the second warp thread, take yarn A over the warp, wrap it behind the same warp, and then bring it underneath to the front between the first and second warp threads, as shown in the picture. Repeat this process again on the same warp.
Step-4
Now move across your loom to the right, wrapping Yarn A twice around each warp thread until you get to the end, tie off your yarn.
How to Make Tassels: Step-1

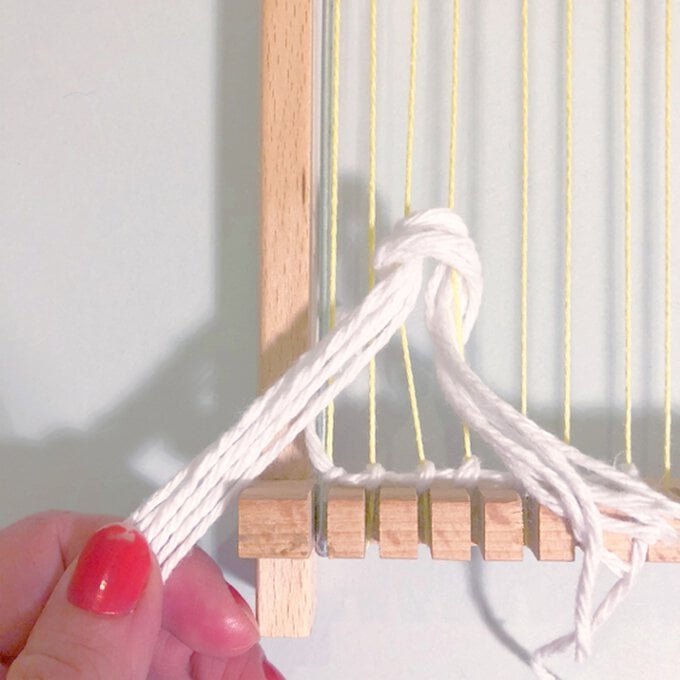
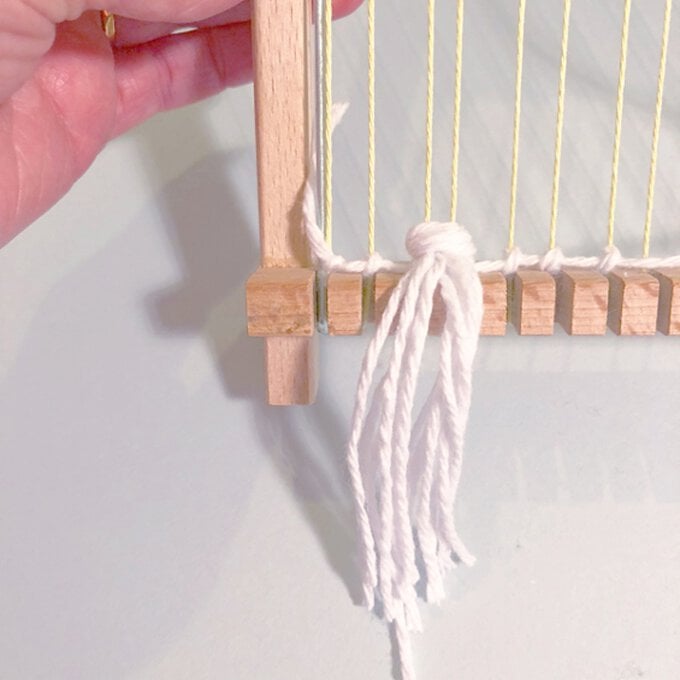
If you would like to add tassels to your weave, here's how! Wrap Yarn A around your hand (or piece of card if you would like a longer tassel) several times. I wrapped mine approx. six times – the more you wrap, the thicker your tassel will be.

Step-2
Slide the yarn off and cut through all lengths at the bottom. Holding all the lengths in the middle, lie the threads over two warp threads. Now pull all the threads on the right-hand side under one warp thread and through the middle. Repeat with all the threads on the left-hand side, pulling them under and into the middle, as seen in the picture.
Step-3
Now pull your tassel down to the bottom to secure! You can trim your tassels at the end when the weave is off the loom
How to Soumak: Step-1

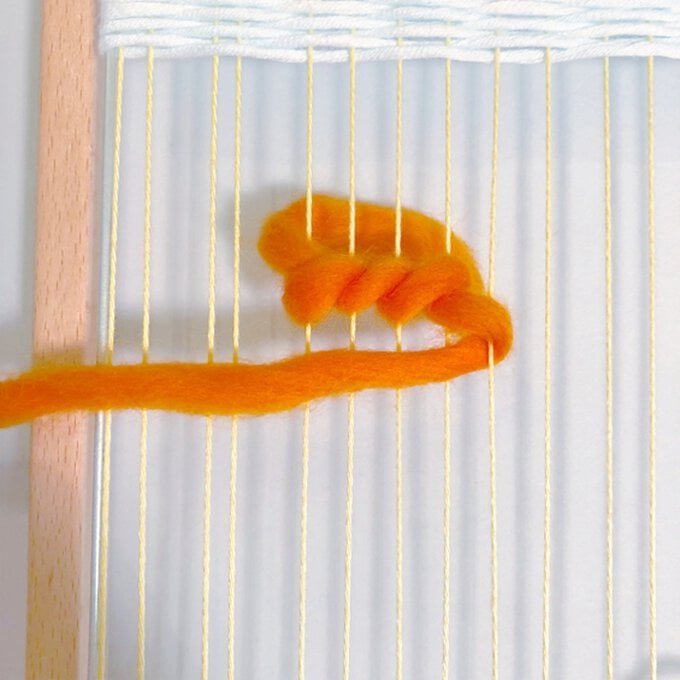
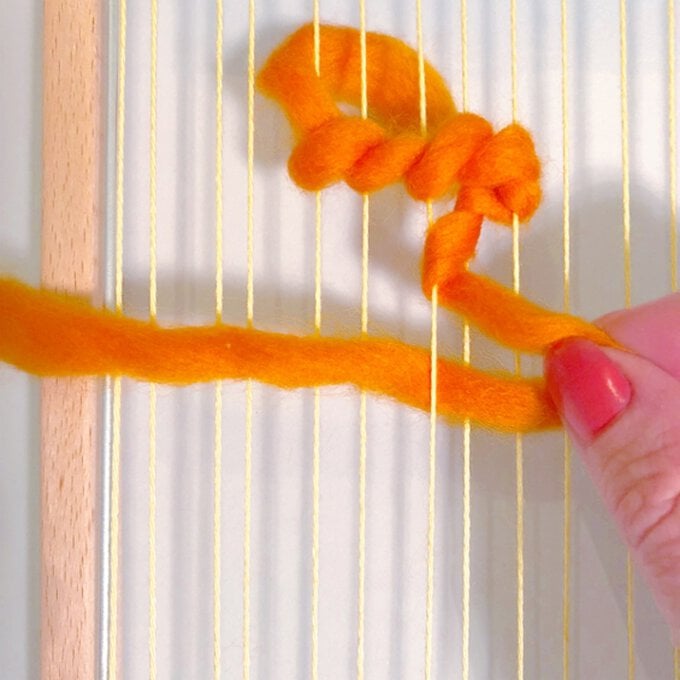
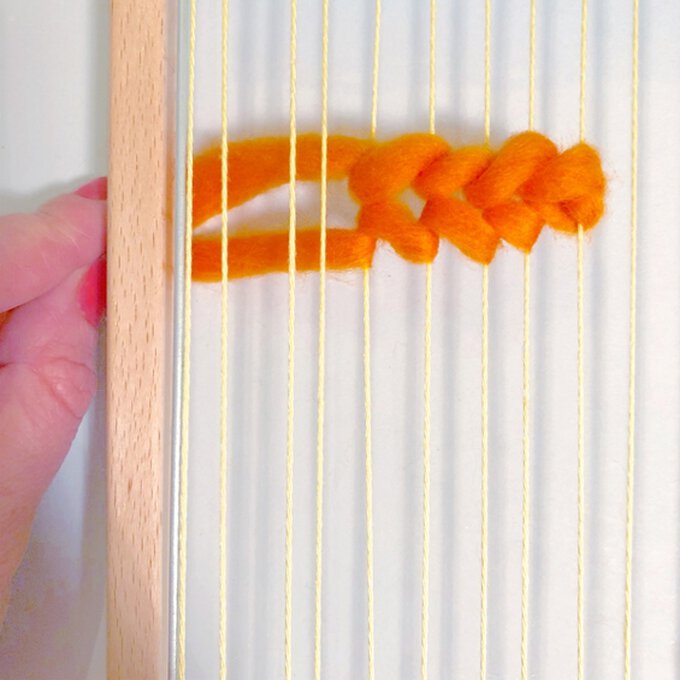
I made all my soumaks first, so that I could plan my colours and check I was happy with the layout before I did the main body of the weaving.

Step-2
Using Yarn B, start from the back of the weave and leave a long tail, which you will weave in later. Pull Yarn B from behind your weave, up and over the top of two warp threads. Loop Yarn B down and under the second warp thread so that Yarn B comes back out in between the first and second warp threads. Pass Yarn B over two more warp threads to the right, and repeat the process. Continue in this way until your soumak is the desired length – I made mine all around 6-8 warp threads wide.
Step-3
To return your soumak and make the row underneath, the next time you wrap over two warps and bring your yarn underneath and in between them, repeat the above but wrap Yarn B over and under the warp threads back in the opposite direction, to the left, as seen in the picture.
Step-4
When you reach the end, bring your tail end to the back of the weave and tie to the first Yarn B tail. Weave these in at the end.
How to Tabby Weave: Step-1

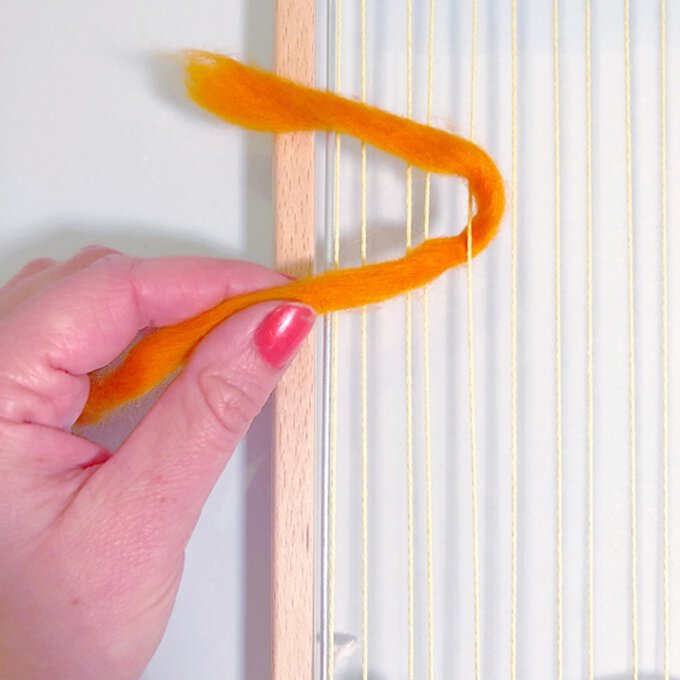
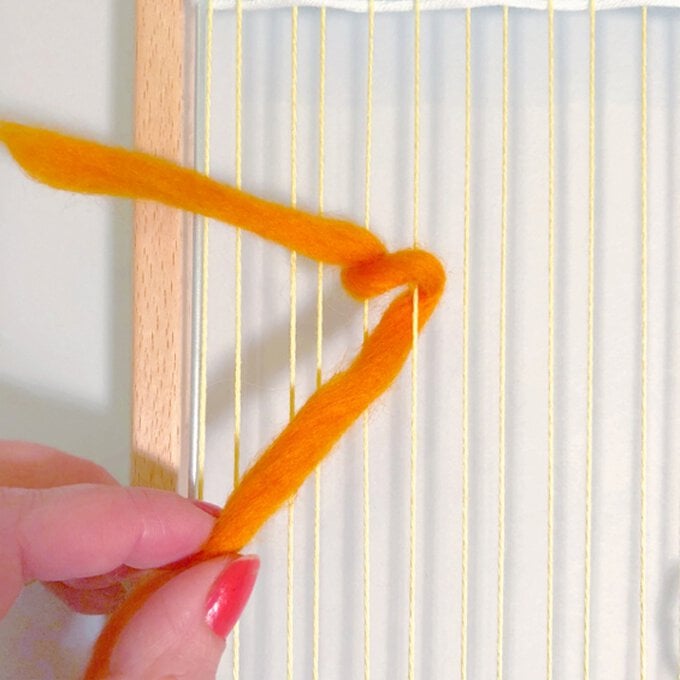
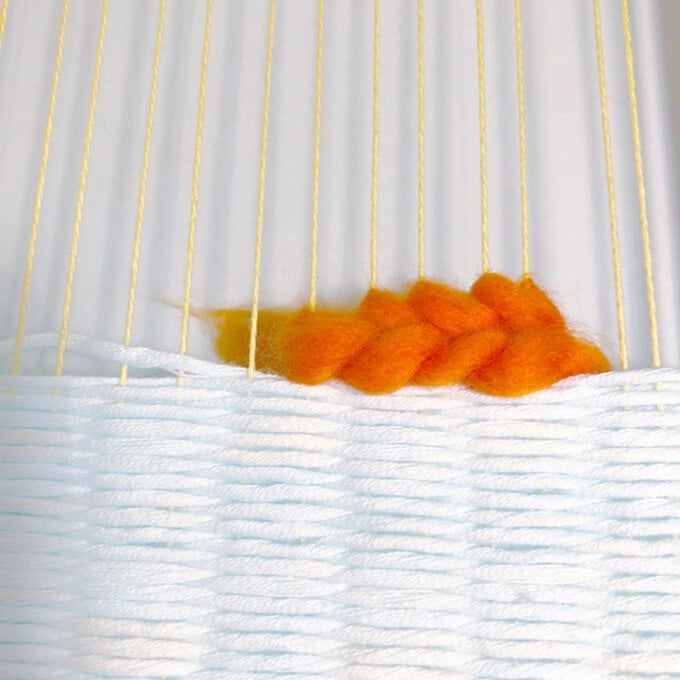
Tabby weaving is the most basic form of weaving, taking the weft thread over and under the warp thread. When you reach the edge of the loom and work back in the opposite direction, make sure you are doing the opposite to the row before and weave under and over the warp threads that you wove over and under previously.

Step-2
When you get to the edges and the metal rods, you will want to wrap your yarn around the rods – these will be removed at the end.
Step-3
Take a few arm lengths of Yarn A at a time, and wrap them around the large wooden weft needle supplied with the loom. If you don’t have a wooden weft needle, try using large tapestry or yarn needle with an eye wide enough for your yarn.
Step-4
When you reach the soumaks, carry the Yarn A you are tabby weaving with underneath the soumak on the back of the work. Keep an eye on your tension, you will want it taught enough not to sag behind the soumaks, but not so tight that you are pulling on the metal rods at the edges.
Step-5
Continue tabby weaving and filling in around the Yarn B soumaks using Yarn A until you reach a few centimetres from the top, or your desired length.
Finishing: Step-1

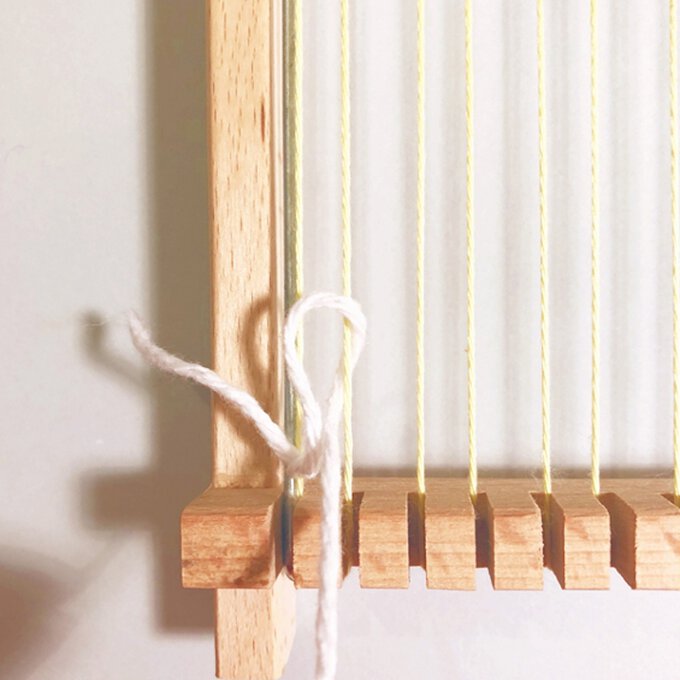
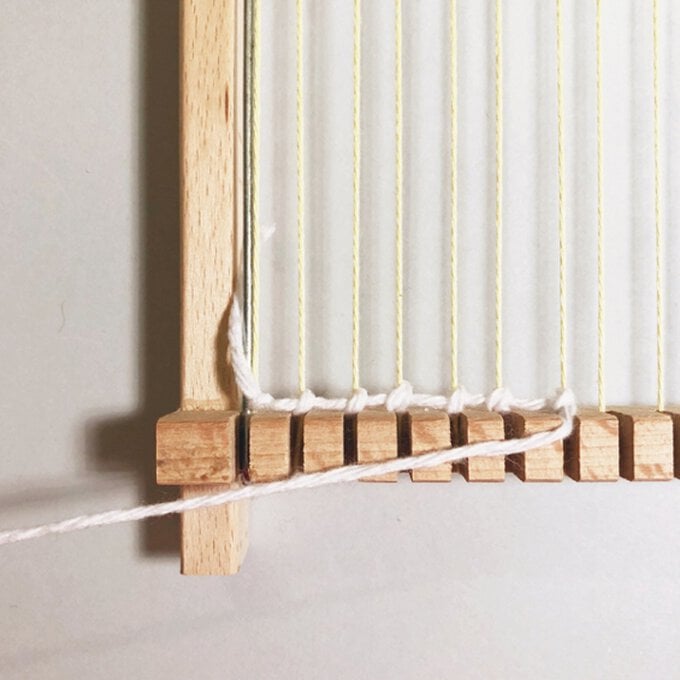
Using a few lengths of Yarn A, tie a series of knots along the top of your work, as you did at the base. Now gently unscrew and slide out the metal rods along the side of your work.

Step-2
You do not need to cut the warp threads at the bottom of the piece – instead simply slide them off the loom.
Step-3
At the top of the loom, you may want to use the warp threads to tie around a length or wood or stick, to hand your loom from. If you do, cut your warp threads at the top of the loops, and tie two together around your chosen hanger, until you reach the end.
Step-4
Weave in any ends, and trim your tassels.
IMG_2325.jpeg?sw=680&q=85
  • bvseo_sdk, dw_cartridge, 18.2.0, p_sdk_3.2.0
  • CLOUD, getReviews, 19ms
  • reviews, product
  • bvseo-msg: Unsuccessful GET. status = 'ERROR', msg = 'Not Found.'; Unsuccessful GET. status = 'ERROR', msg = 'Not Found.';
Top