Skip to Content (Press Enter) Skip to Footer (Press Enter)

How to Weave with a Frame Loom

Level
Beginner
Time
1/2 day
Budget
10 - 30
Learn how to weave with a frame loom as textile artist Hannah Crocombe shows you just how easy it is. Weavings are a fun alternative way of using yarn and other materials to create something amazing - once you've got the hang of the technique, it's easy to get creative! Here's a little more about Hannah :
So many things in life inspire me; I love learning and using various techniques to push material boundaries and challenge perceptions. My passion is to inject life, surprise and love into everything i make! Working in an expressive and free spirited way, the creative process is integral to my work and unlocks new ideas for me to experiment with. My love for drawing has developed into the three-dimentional and using yarn in different ways, such as with crochet and weaving. I currently make and sell handwoven wallhangings and crocheted accessories.
Find Hannah on Etsy », Facebook », Instagram » and Twitter »

You will need

Is $ 6.49 , was $ 12.00

Quantity: 1

Subtotal

Is $ 6.49 , was $ 12.00

Is $ 9.49

Quantity: 1

Subtotal

Is $ 9.49

Is $ 5.49

Quantity: 1

Subtotal

Is $ 5.49

Is $ 20.00

Quantity: 1

Subtotal

Is $ 20.00

Is $ 9.49

3 for 2 on selected WI yarn
Quantity: 1

Subtotal

Is $ 9.49

Is $ 6.49

Quantity: 1

Subtotal

Is $ 6.49

Is $ 4.49

3 for 2 on selected WI yarn
Quantity: 1

Subtotal

Is $ 4.49

Out of stock

Is N/A

Quantity: 1

Subtotal

Is N/A

You’ve viewed 2 of 8 products

You’ve viewed 4 of 8 products

Total:

How to make

Step One - Stringing the Loom: Step-1

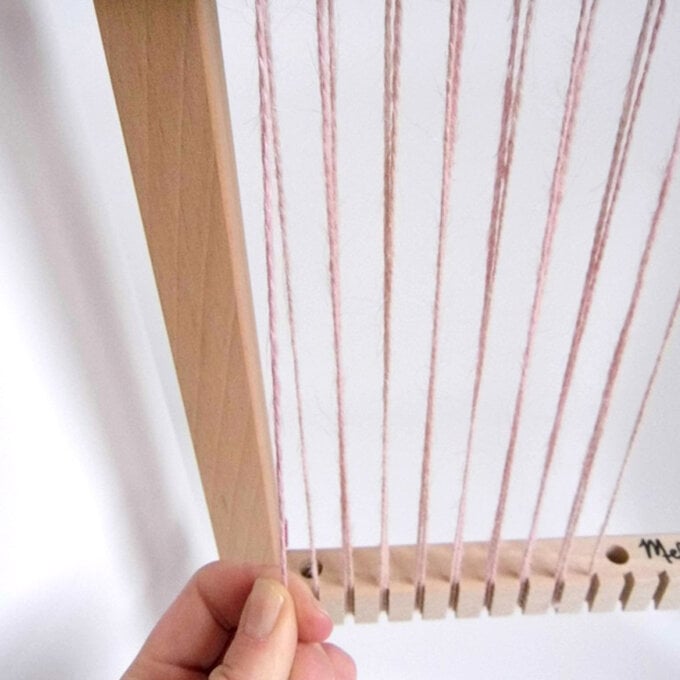
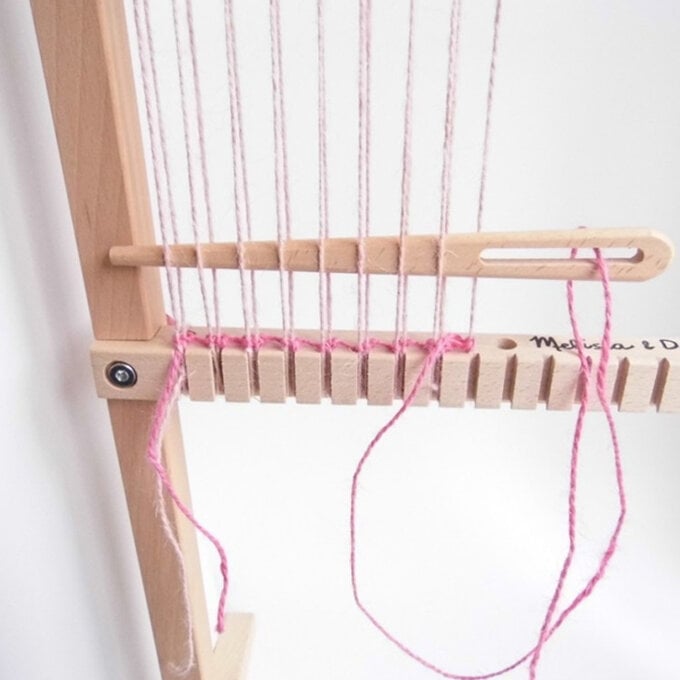
Assemble your loom so that one bar is along the top and one bar is along the middle, this will give you a weaving up to 15 cm long, not including the length of fringe. Follow the Dimensions Large Weaving Loom » instructions to construct your loom.

Step-2
Now you need to warp the frame. I like to use a strong yarn to warp my frame so that I know my weaving will hold well, I have used Pink Jute String » here. Tie a double knot around the top left side of your frame.
12.jpg?sw=680&q=85
Step-3
Pull the twine tightly down and up through the notches, from left to right with vertical strands. Do this across 8 notches.
21.jpg?sw=680&q=85
Step-4
Then you need to go back to the start with your twine, from right to left, up and down the notches that have not been strung. When you reach the beginning of the frame again, you should have 17 strands.
31.jpg?sw=680&q=85
Step-5
When you reach this point, tie a tight knot at the bottom leftside of the frame. Your warped strings should be fairly tight. Now your loom is strung, this is called double warping and will create a strong hold for the weave.
31.jpg?sw=680&q=85
Step Two- Stablishing the Weave: Step-1
To give rigidity to your weaving, the first row will be a series of knots. Use approx 1 m of twine threaded through your wooden needle. Starting with the first string, from the left hand side, go under the string, then back over it and under again- done loosely, this creates a loop, which you can hold with your finger.
Step-2
Then your needle needs to go from the lefthandside through that loop. Now pull this tightly downwards so that you have your first knot flush to the wooden frame. Repeat across across each warped string until you reach the end of the row.
71.jpg?sw=680&q=85
Step Three - Weaving the First Two Rows: Step-1

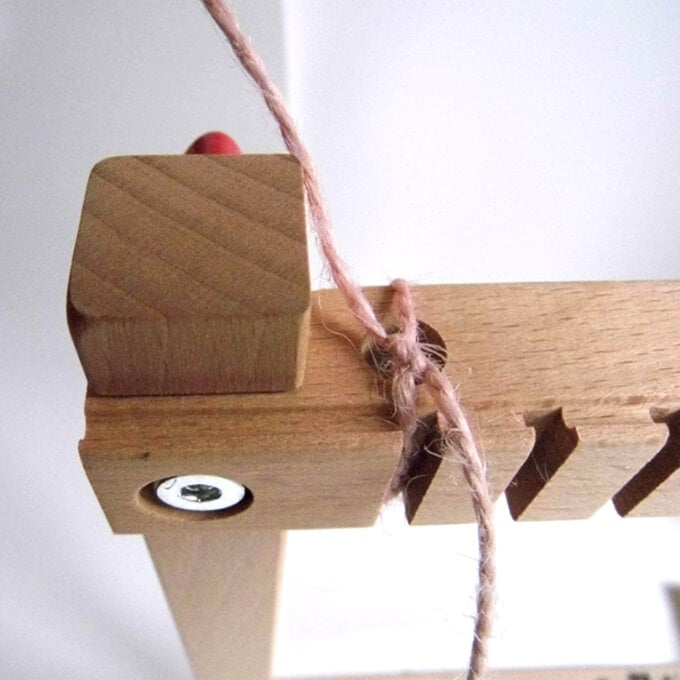
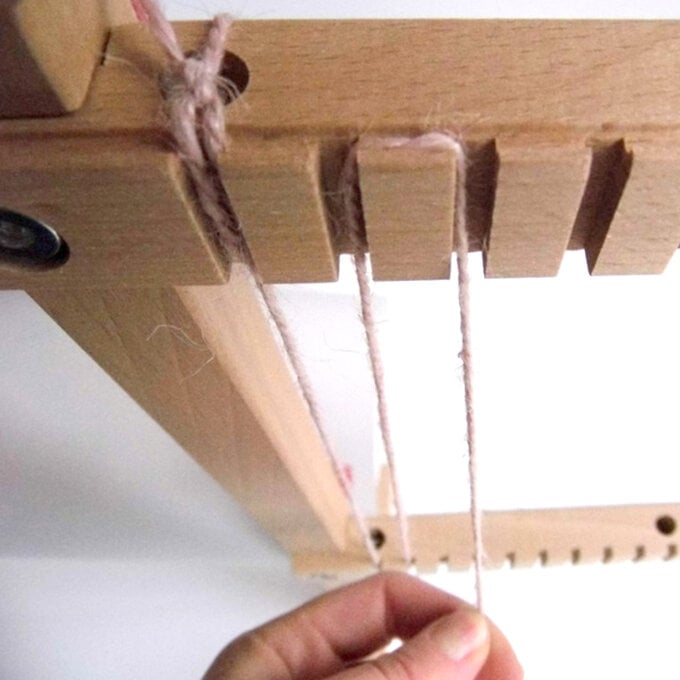
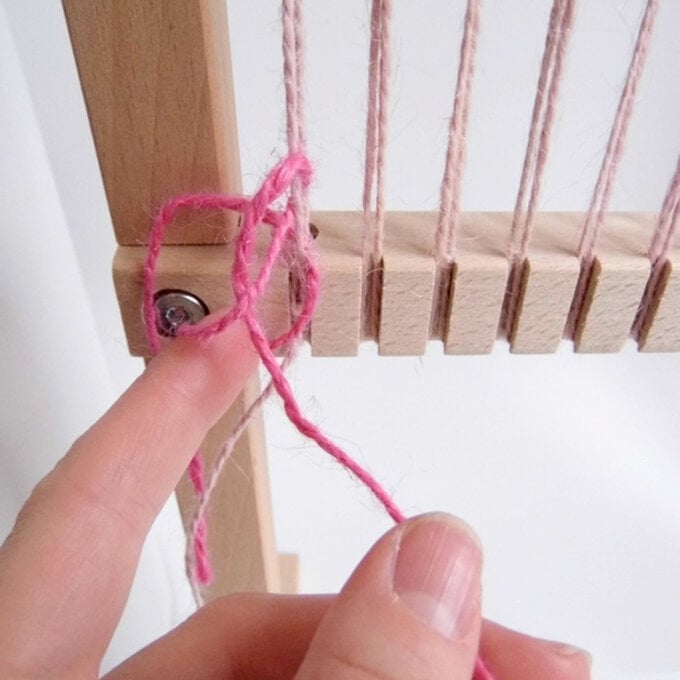
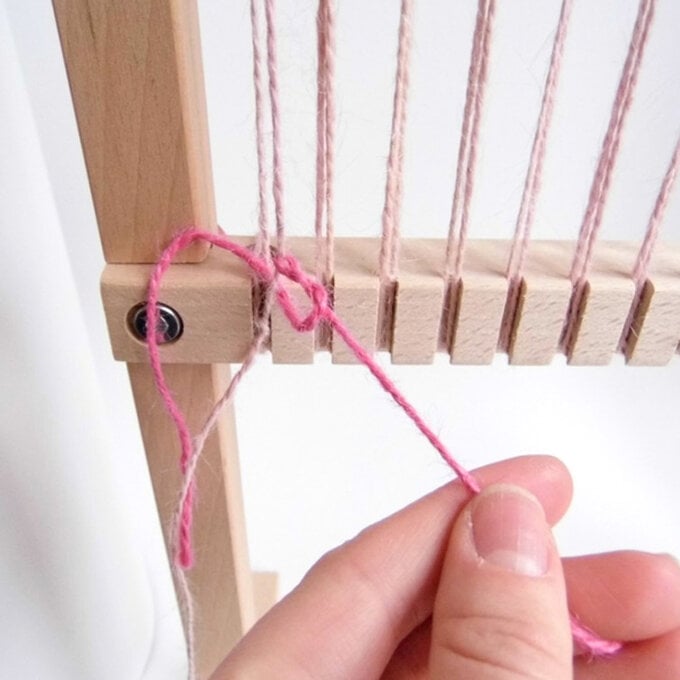
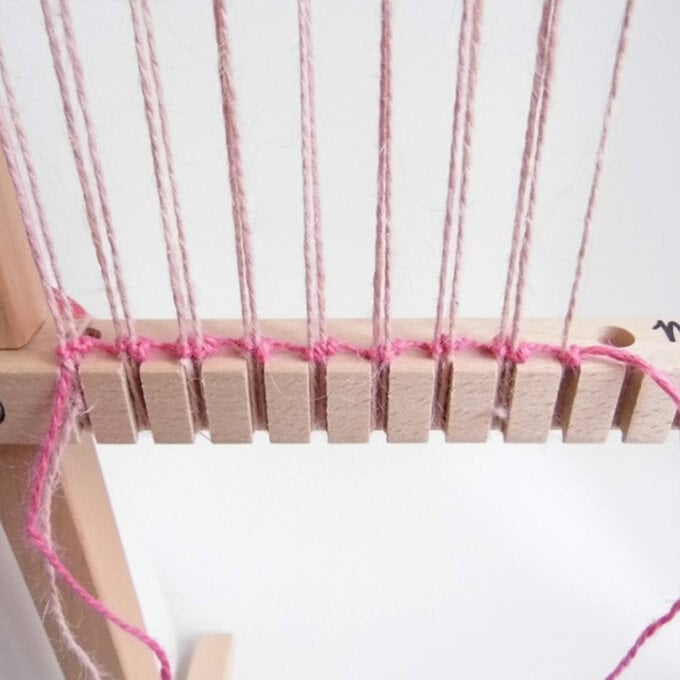
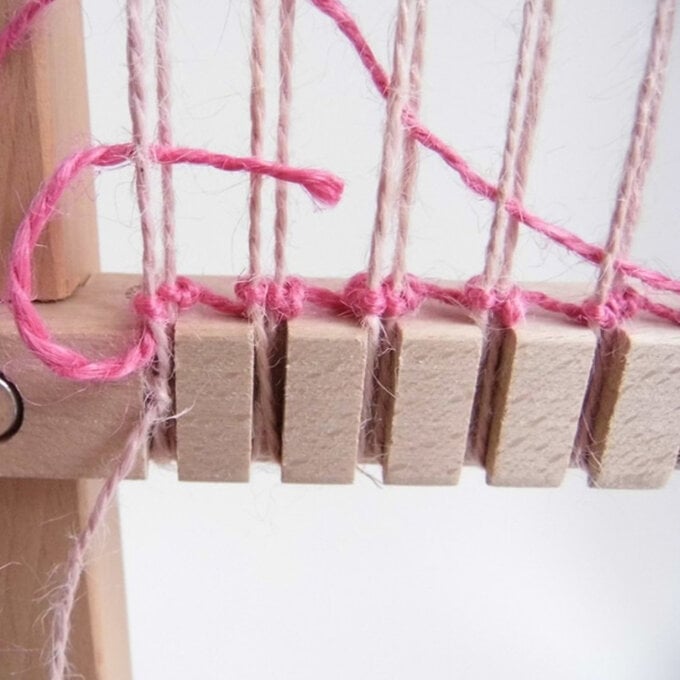
Using your wooden needle (with twine) and weaving from the right side to the left, take the needle under the first string, over the second, under the third and so on until you reach then end of the row.

8.jpg?sw=680&q=85
Step-2
Once you have pulled through all the excess twine, you are left with your first woven row. You will need to tuck in your slack twine left out from the row of knots – do this by weaving it over and under the strings and pushing it out to the back of your weave.
91.jpg?sw=680&q=85
Step-3
Now your row should be pushed down flush to the previous knots and it should look neat.
91.jpg?sw=680&q=85
Step-4
For your second weaving row, take the wooden needle from the left hand side, over the first string, under the next and so on until the end of the row. This should be alternate to your previous row. On the last string, tie a knot and tuck in the slack twine to the back as you did before.
10.jpg?sw=680&q=85
Step Four- Making the Fringe Step-1

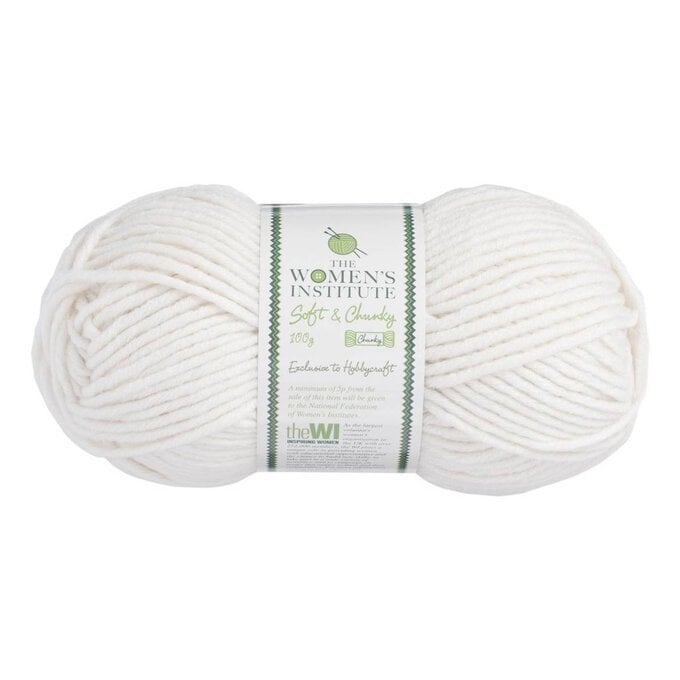
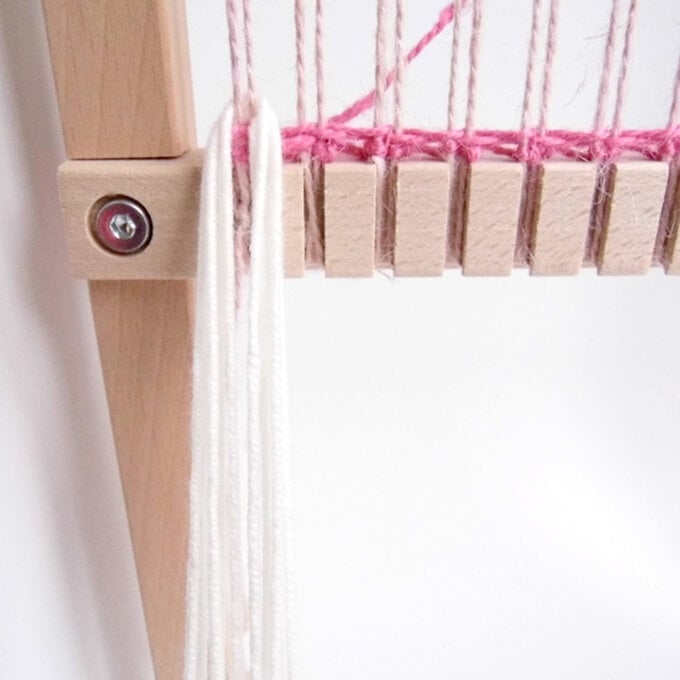
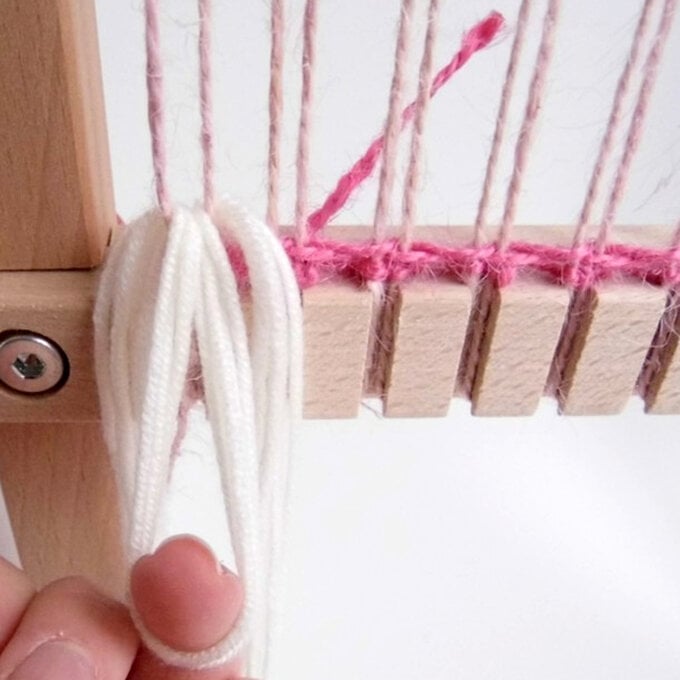
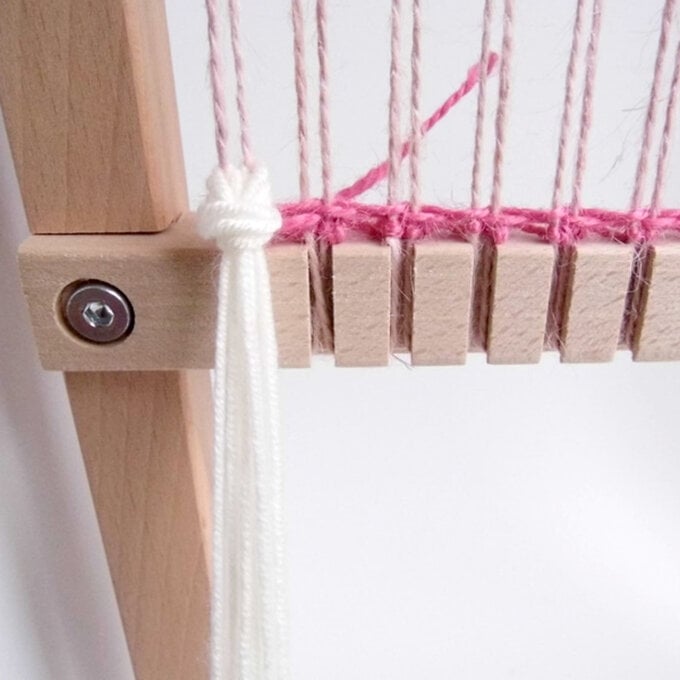
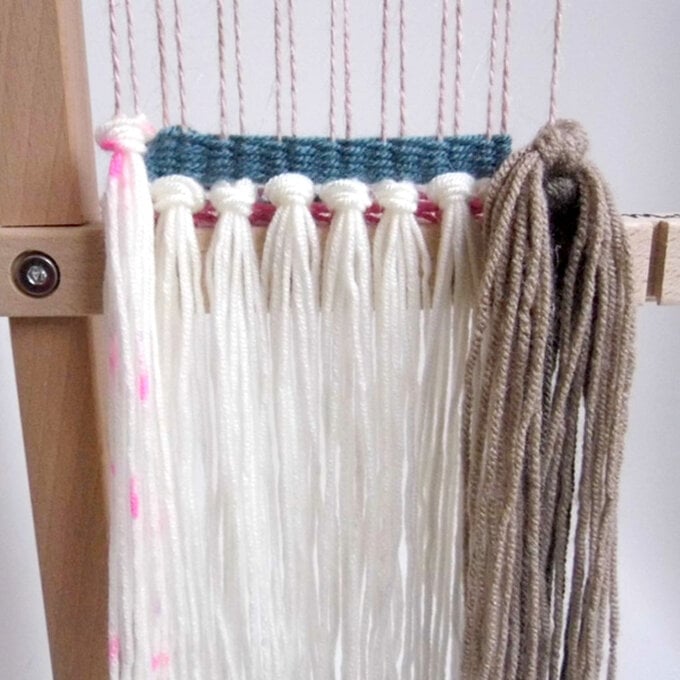
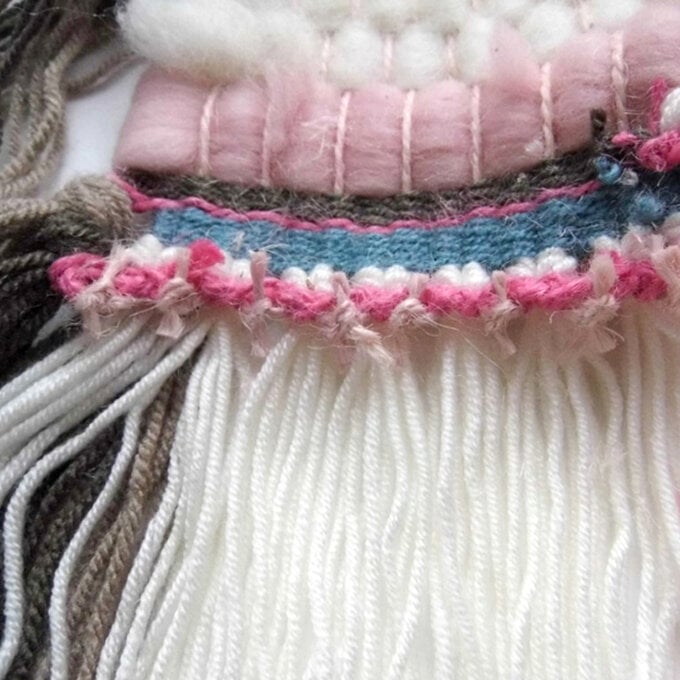
To make the fringe on your weave, decide what yarn and colours you want to have and how long you want the fringe to be. I decided I wanted the fringe to be 30 cm long. To do this I cut five pieces of yarn (WI Cream Soft and Chunky Yarn 100g ») at 60 cm long (you need to cut them double the desired length). With the five pieces of yarn together, from the left hand side of the weave, pull them under both the first and second strings so that the yarn hangs down both sides to measure 30 cm long.

111.jpg?sw=680&q=85
Step-2
Then pull through the middle of the two strings, the yarns to form a ‘U’ shape with your finger. Take both hanging sides of the yarn and pull down through the ‘U’ shape, make sure the length of the sides remains even and you should have a nice even fringe that sits flush to the previous row. Repeat this process eight times until you reach the last string.
Step-3
For the last string on its own, I used ten pieces of yarn (WI Premium Acrylic Yarn Choc ») at 60 cm long and tied them altogether in a knot around the string. Again I did the same above this fringe knot with the (WI Premium Acrylic Yarn Biscuit »). This is another way of adding fringing to your weave!
14.jpg?sw=680&q=85
Step Five - Adding to the Weaving: Step-1

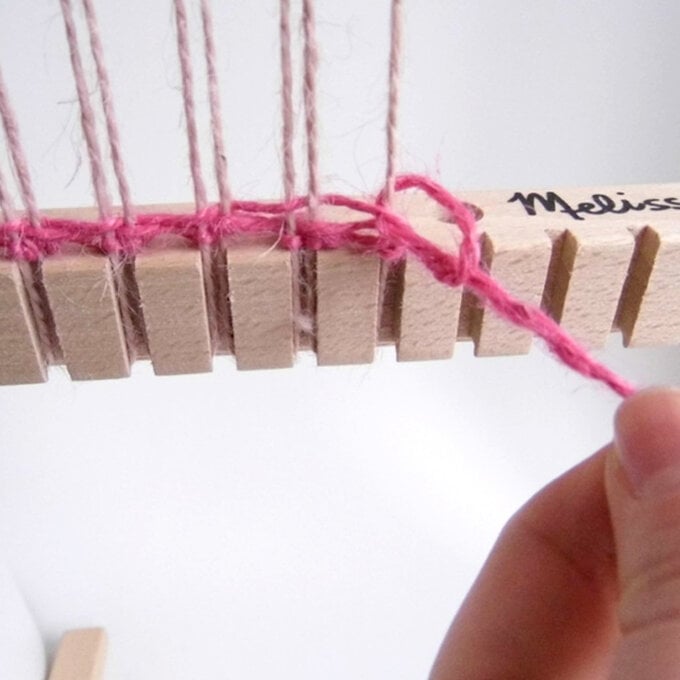
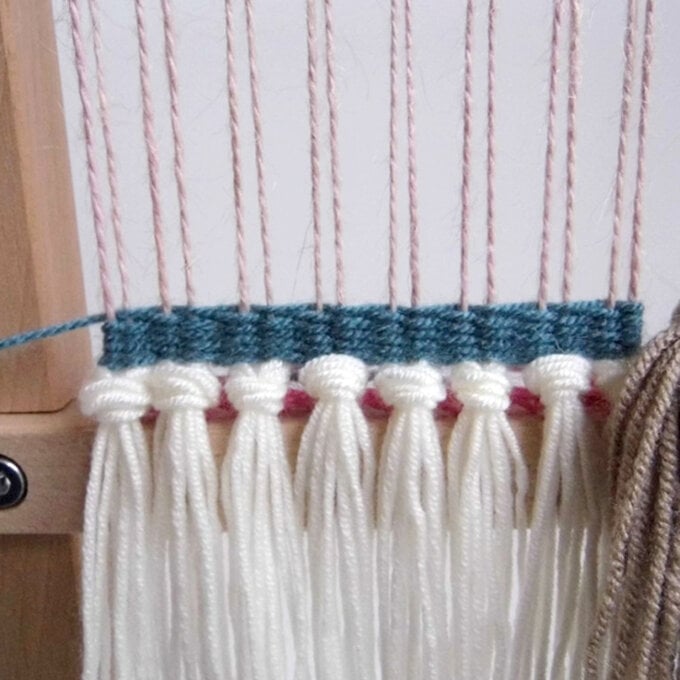
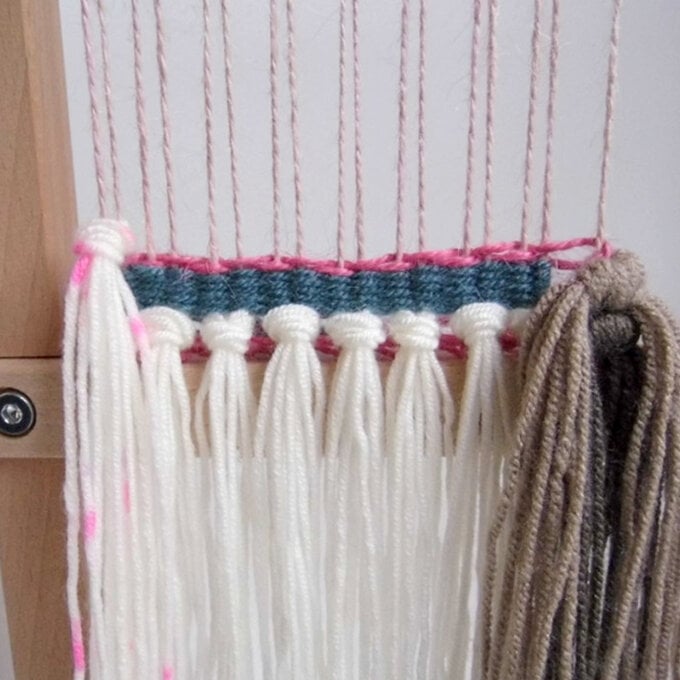
Choose your colour yarn to weave with (I am using WI Teal Soft and Chunky Yarn 100 g ») and cut a length of approx 2 m .With your threaded wooden needle, start from the left hand side and go over the first string, under the second, over the next and so on until you reach the second from last string on this row. (Ignore the last string as we now need to fill in this area with weaving until it is in line with the top of the large fringe knots on the last string).

Step-2
Now from the right hand side to the left, go back over, under, over and so on so that by the end of the row you should have two alternating rows. Remember to tuck in your slack yarn so that it comes out the back of your weave. Continue this weaving method for another eight rows so that you have ten rows altogether. Tuck in your end to the back of the weave.
151.jpg?sw=680&q=85
Step-3
Add one piece of fringe on the left hand side between the first and second strings of your weave (follow previous fringe instructions).
161.jpg?sw=680&q=85
Step Six - Constrasting Strip of Colour: Step-1

Using 60 cm of pink twine, weave from the third string, starting under then over and so on until then end of the row- this time including the final string and weave back alternately again. Tuck in the ends.

171.jpg?sw=680&q=85
Step-2
Starting from the third string (after the fringe piece) from left side until the very end, weave five rows of WI Premium Acrylic Yarn Choc » (approx 1 m).
161.jpg?sw=680&q=85
Step Seven - Weaving with Roving Wool: Step-1

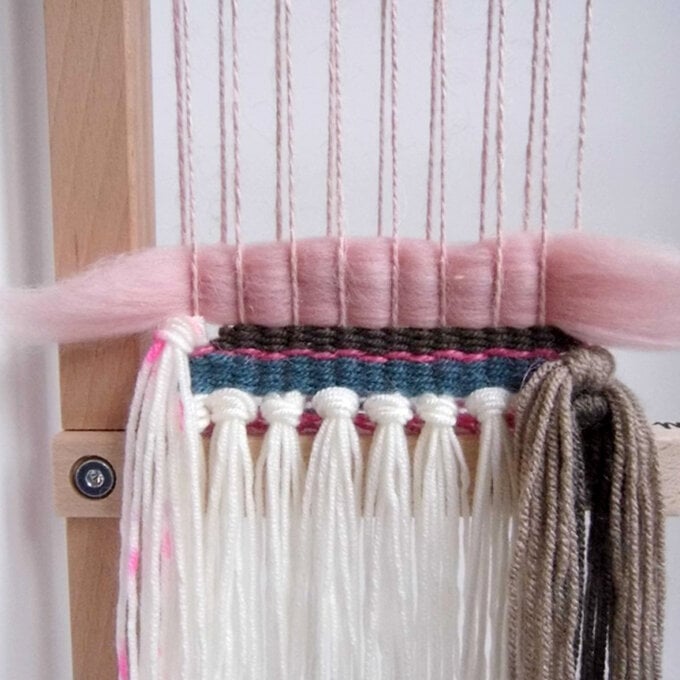
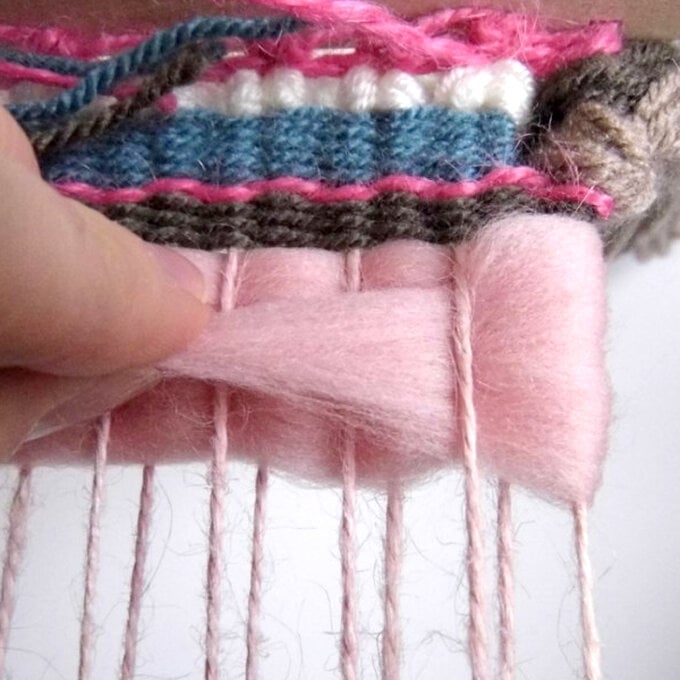
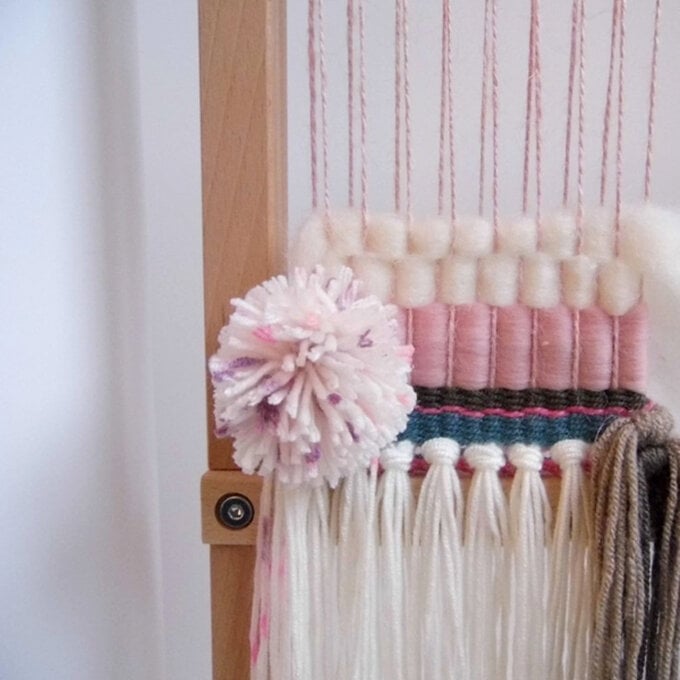
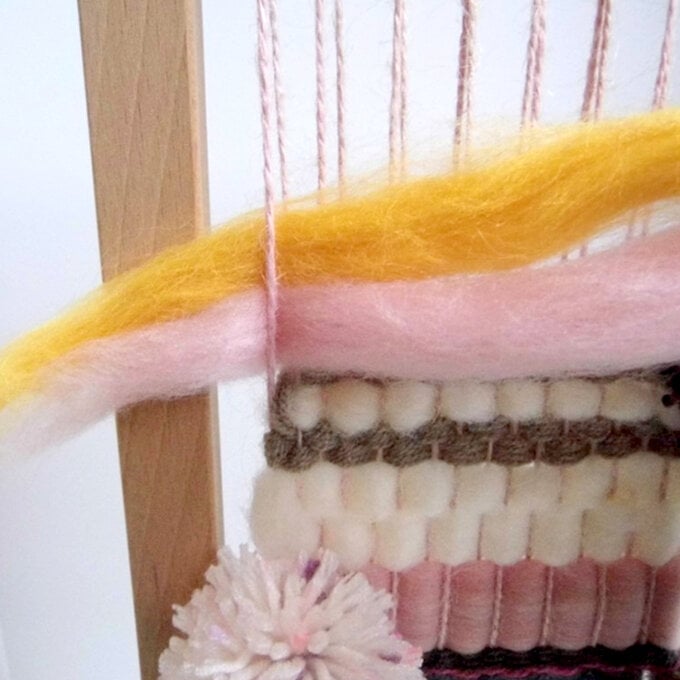
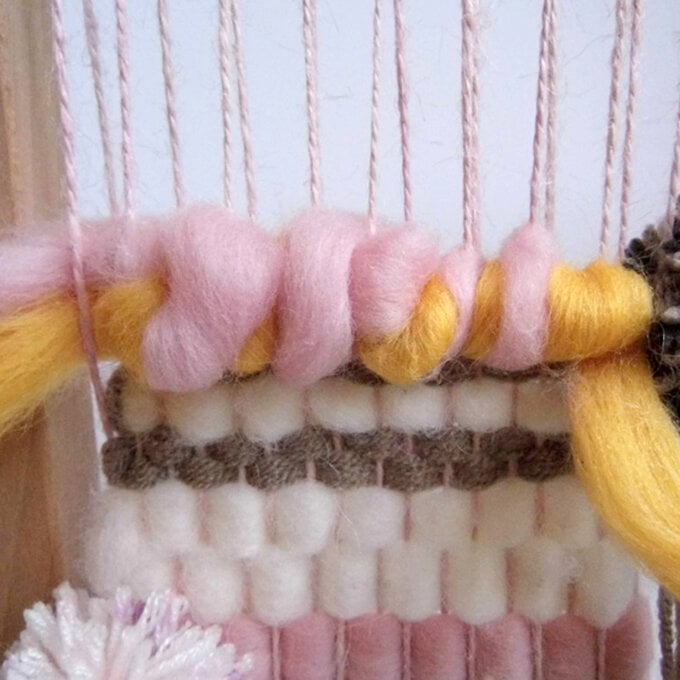
Your wool roving can be as thick as you like, I tore off a piece of Powder Pink Natural Wool Roving » approx 2.5 cm thick and a little wider than the width of the weaving so that it can be tucked in both ends. Weave your roving wool to create one thick, full length row.

19.jpg?sw=680&q=85
Step-2
Turn your loom stand round to access the back of your weave and tuck in the excess wool behind itself under the nearest string, at both ends.
20.jpg?sw=680&q=85
Step Eight - Adding a Pom Pom: Step-1

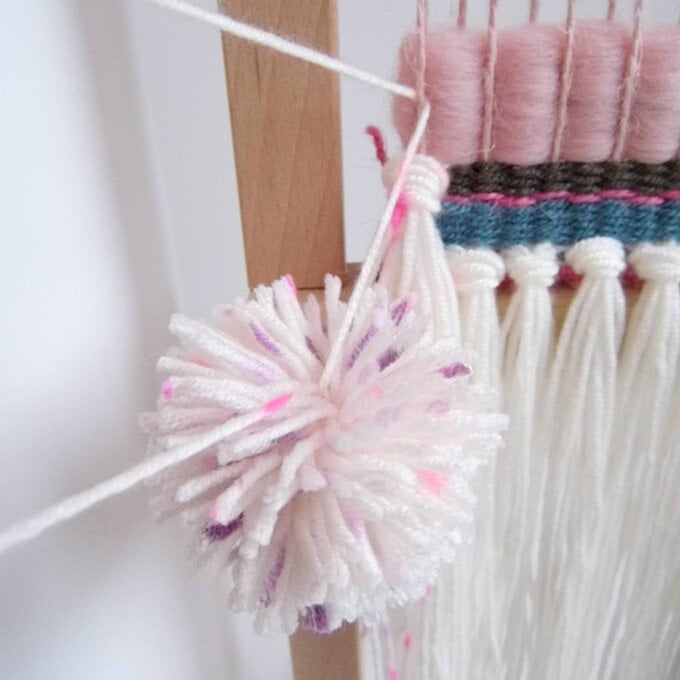
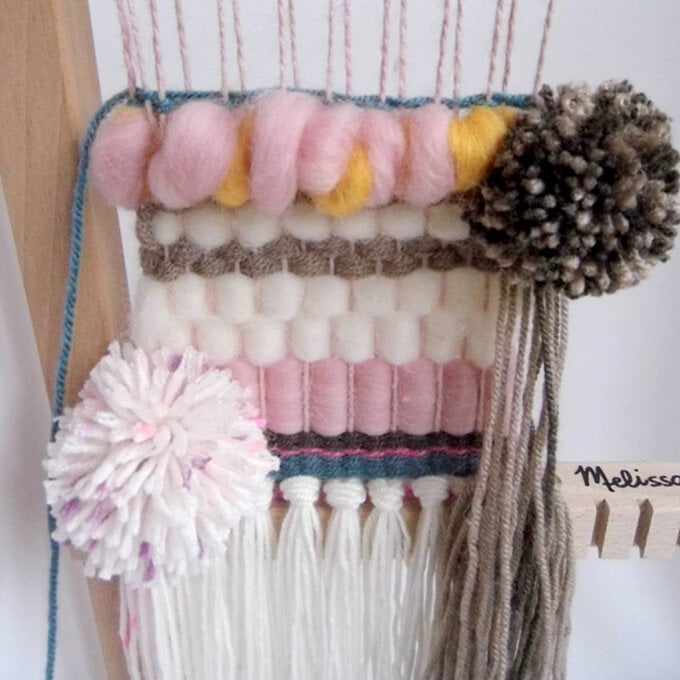
Using the Clover Pom Pom Maker », make a pompom with the WI Pink Flecks Soft and Cuddly Yarn », measuring approx 6.5 cm in diameter across. Add your pompom to the weaving by taking the excess two strands and tying the pompom to the first string on the left hand side. This should stay in place easily.

211.jpg?sw=680&q=85
Step-2
Using 40 cm of White Natural Wool Roving », weave two rows, from left to right.
22.jpg?sw=680&q=85
Step Nine - Weaving with Multiple Strands Step-1

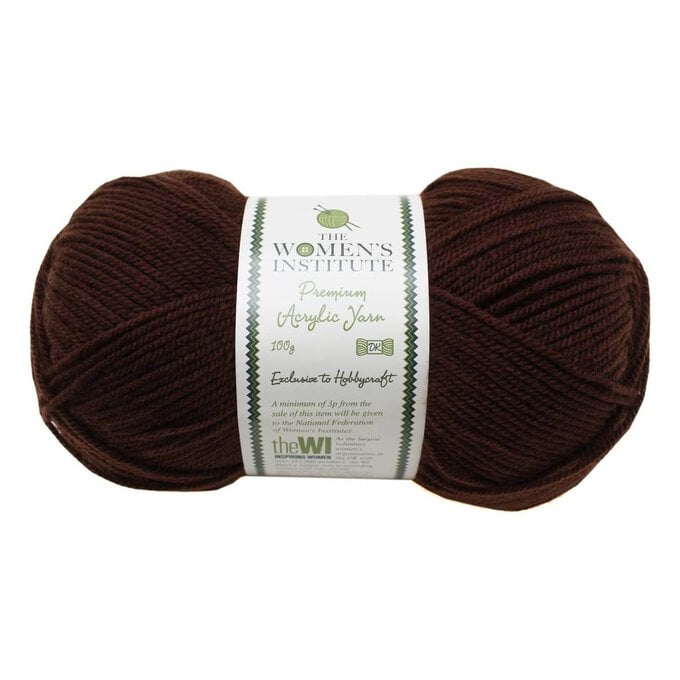
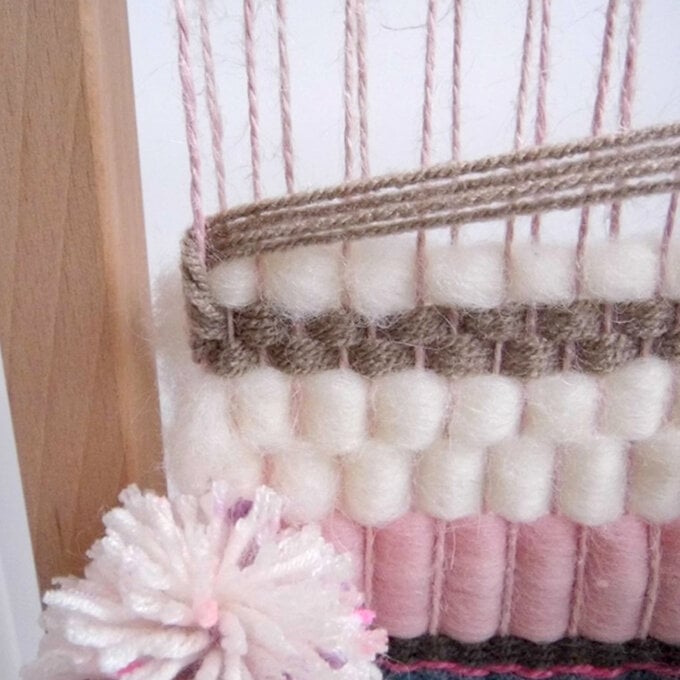
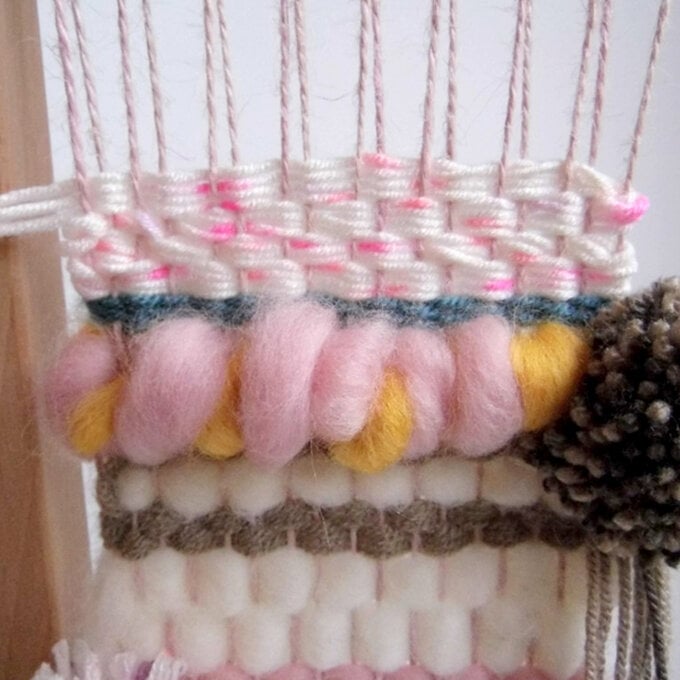
Using four strands (WI Premium Acrylic Yarn Biscuit ») measuring approx 1 m, weave in unison two full rows, from left to right. You can leave the excess yarns hanging at the end as we're going to use these again in a minute.

22.jpg?sw=680&q=85
Step Ten - Building it Up: Step-1

Weave another full row of white roving, tucking in the ends to the back of the weaving. Then pick up the left over yarns (WI Premium Acrylic Yarn Biscuit ») and weave another full row with them.

24.jpg?sw=680&q=85
Step-2
Add another pompom. This time I have used a fifty-fifty mix of the WI Premium Acrylic Yarn Choc » and WI Premium Acrylic Yarn Biscuit » and made the pom pom approx 5 cm in diameter. Attach the pompom to the last string on the right hand side of the weaving, by tying it on.
25.jpg?sw=680&q=85
Step-3
Using approx 1.5 cm thick and 35 cm length of Yellow » and Powder Pink Roving Wool », weave the two pieces together through the strings, from the left side to the right across the row. The roving wool will twist as it is thick, allow this to happen to achieve a bulky, bulbous effect.
Step-4
Turn the loom round to tuck in the ends at the back, as you have done from previous instructions.
Step-5
Using approx 1 m of the WI Teal Soft and Chunky Yarn », tie a knot to the first string on the left.
Step-6
Weave four full rows. Tuck in the ends.
28.jpg?sw=680&q=85
Step Eleven - Final Weaving Section: Step-1

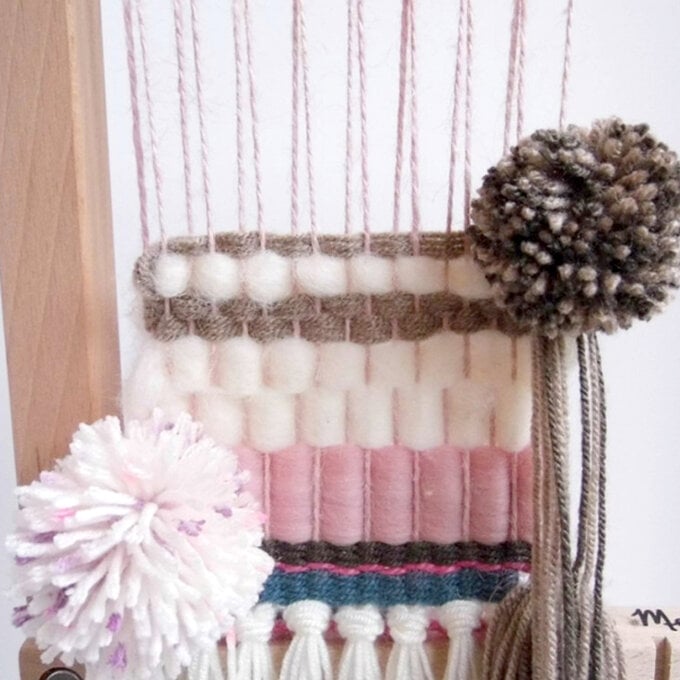
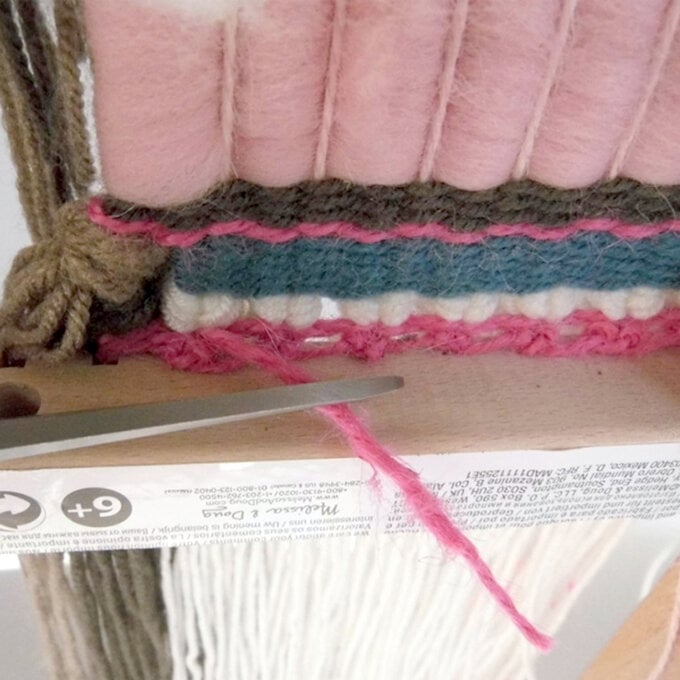
Using four yarns together (WI Pink Flecks Soft and Cuddly Yarn ») measuring approx 1 m each, weave four rows. At the end, tie the yarn and tuck in the ends to finish off.

29.jpg?sw=680&q=85
Step-2
Turn your loom round so that the back is facing you. All your ends should have been tucked in as you went along, but the back of your weaving could be looking messy. Remember no one will see this, but it just needs to be secure and tidied up a bit. Tie any stray strands that are close together, firmly but not so tightly that it changes the tension. Then using scissors cut back these ends to about 0.5 cm and any another other stray strands. Tuck in to the strings, any that are needed.
30.jpg?sw=680&q=85
Step Twelve - Adding your Hanging Rod: Step-1

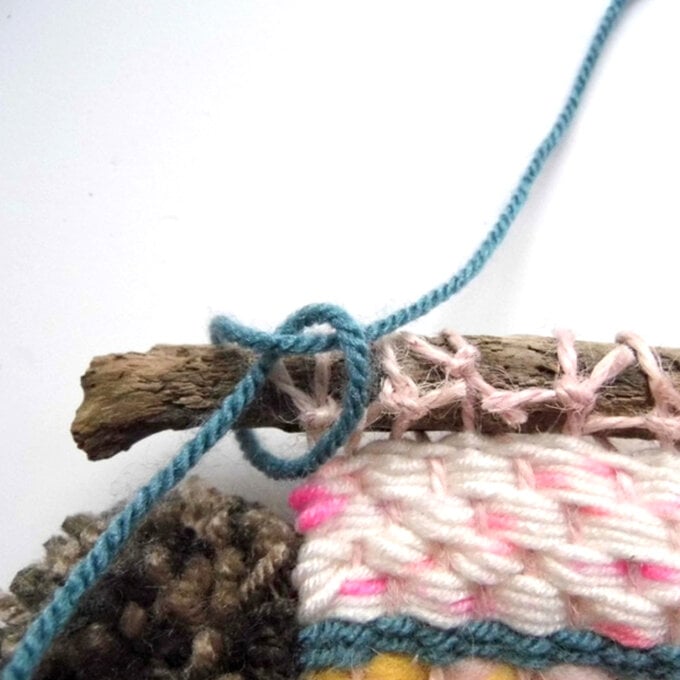
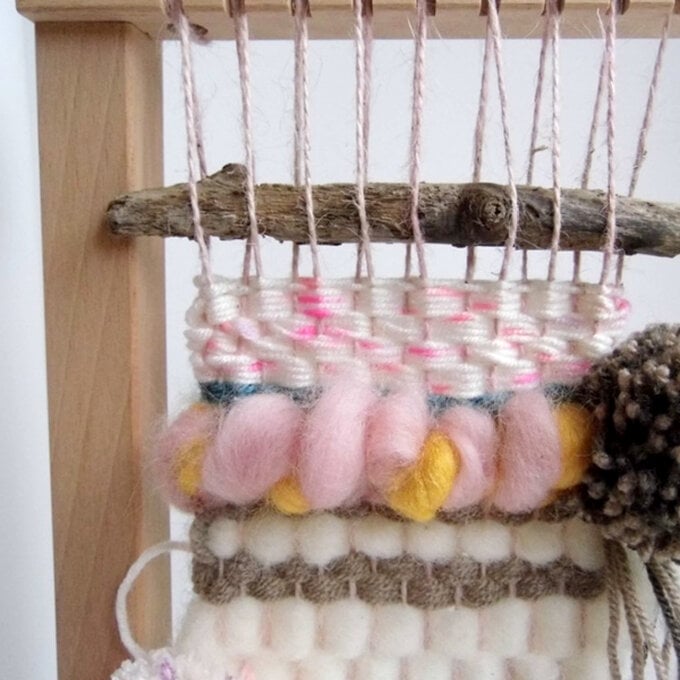
With the loom facing you again, you need to add your hanging rod. You need to have approx 10 cm gap left between the top of your finished weaving and the frame, so that you can easily tie off your weaving onto your stick. Weave your stick the whole way across your strings.

311.jpg?sw=680&q=85
Step-2
You will need to make sure you can easily access the front and back of the weaving for this bit. We need to cut the strings and tie them together over the stick / dowel rod. You will notice that a natural shift that has developed between the threads, so you should have a back row and a front row. Starting from the right hand side, cut the last and second to last strings from the top of the frame- (they should look like a front and back pair). Tie these together with a double knot around the Stick /Dowel Rod, so that the knot is at the back of the weaving.
32.jpg?sw=680&q=85
Step-3
Repeat this all the way along the row until the end, checking that it remains straight and the tension is the same the whole way across. Your weaving should be holding together fine, but if not try and hold it with your hand.
33.jpg?sw=680&q=85
Step-4
When you reach the end you will need to tie three strings together, so cut off the last string from the top of the frame and tie them all together- knotting them at the back of the weaving alongside the other knots. Cut back any excess string across the back of the row so that they are all looking as neat as they can.
34.jpg?sw=680&q=85
Step Thirteen - Tying off the Bottom: Step-1

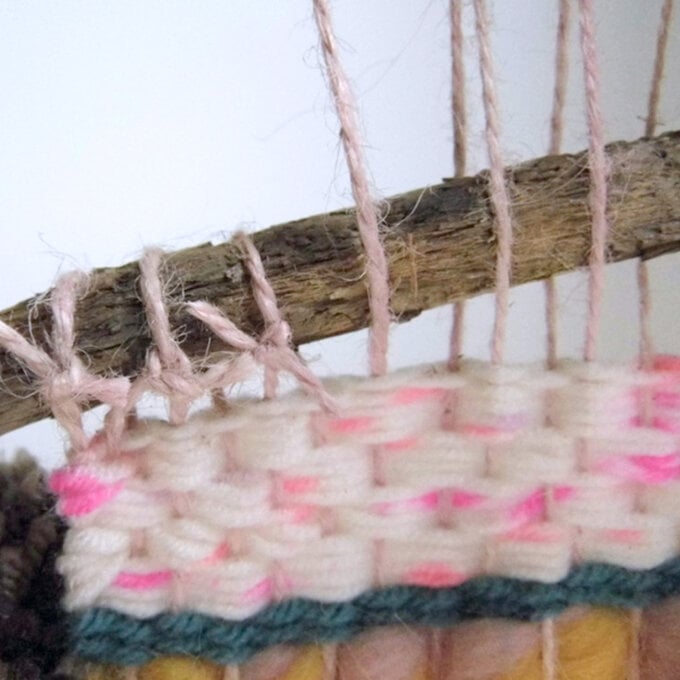
Peel your weaving off of the bottom knotches, if it hasnt come off already. This should be fairly sturdy. You should have eight 'U' shapes from the notches. Each 'U' shape needs to be cut and tied together.

35.jpg?sw=680&q=85
Step Fourteen - Hanging your Weaving: Step-1

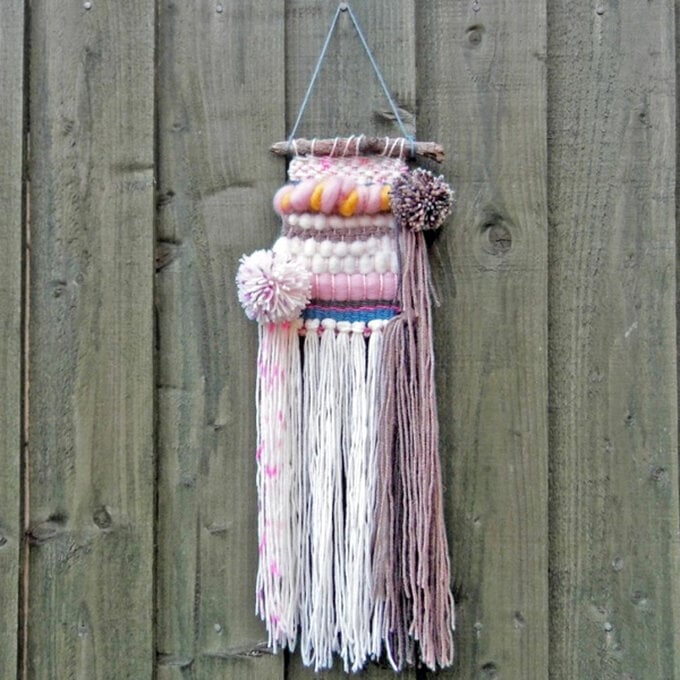
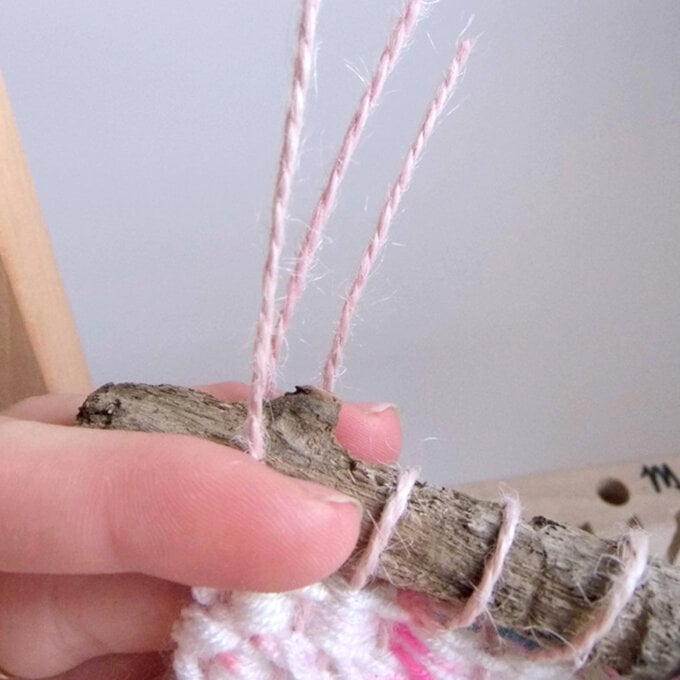
Measure out a length of yarn or twine, according to the height you want your weaving to hang from. Tie the yarn around the Stick / Dowel Rod and do a knot. Now you can hang your hand-woven wall hanging for everyone to admire!

Rated 5 out of 5 by from Very helpful Incredibly helpful, instructions and photos were really clear
Date published: 2023-11-19
Rated 5 out of 5 by from how to weave a frame it is given me the cofidence to try this out , cant wait
Date published: 2023-06-27
  • y_2024, m_4, d_23, h_5
  • bvseo_bulk, prod_bvrr, vn_bulk_3.0.41
  • cp_1, bvpage1
  • co_hasreviews, tv_0, tr_2
  • loc_en_GB, sid_how-to-weave-with-a-frame-loom, prod, sort_[SortEntry(order=RELEVANCE, direction=DESCENDING)]
  • clientName_hobbycraft
  • bvseo_sdk, dw_cartridge, 18.2.0, p_sdk_3.2.0
  • CLOUD, getReviews, 18ms
  • reviews, product
Top