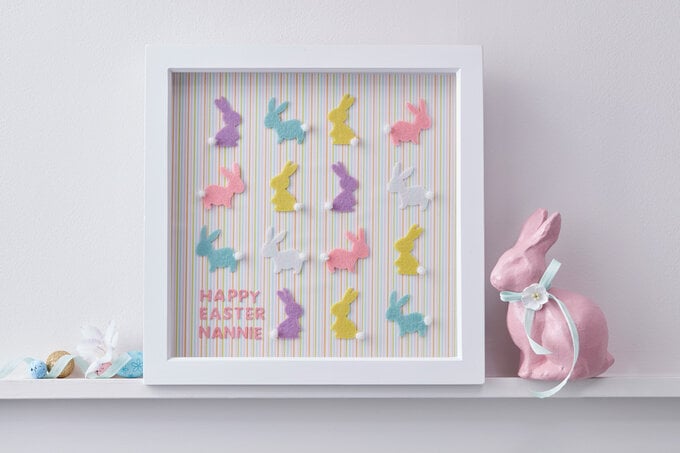
How to Make a Bunny Box Frame
Level
Beginner
Time
1 hour
Budget
<10
This bunny box frame is enough to make anyone hoppy I mean, happy. It's enough to make anyone happy this Easter. It's the perfect way to create a charming, spring-inspired gift for a loved one, or simply add a seasonal touch to your home decor. You can customise the colours, change up the featured animal or add your own message to make this extra personal. Tutorial by Krissi McGilton.
You will need
Quantity:
1
Subtotal
Is $ 4.49
Quantity:
1
Subtotal
Is $ 6.49 , was $ 13.00

Quantity:
1
Subtotal
Is $ 8.49
Total:
£0.00
How to make
Step-1
Step-2
Step-3
Step-4
Step-5
Step-6
Related Products
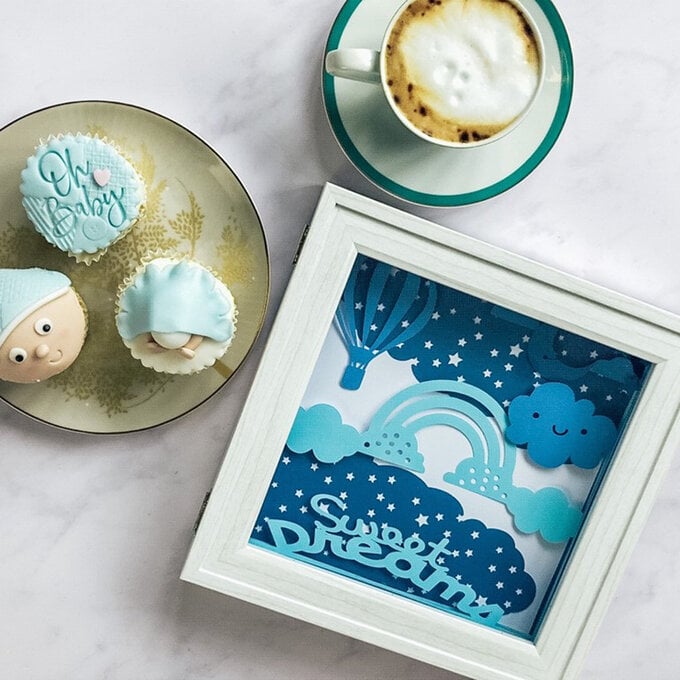
Cricut: How to Make a Sweet Dreams Box Frame
Take care of all your treasured memories with this Black Shadow Box Frame. This frame will deep set your photos and memorabilia, giving a stunning and unique look for personalised gifts and home decorations. From name displays and travel memories to ...
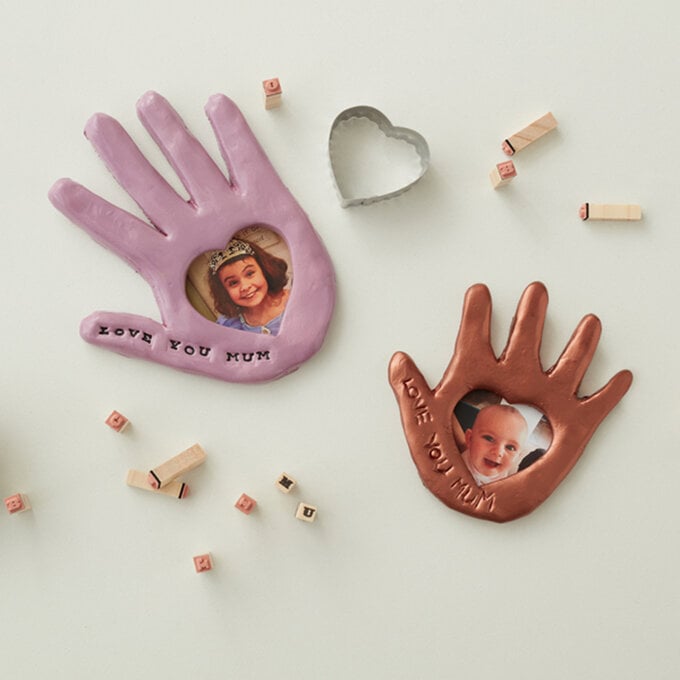
How to Make a Clay Handprint Frame
Project by Hobbycraft Artisan: Irene De Sá Find out more. Have a drawer full of Cricut vinyl scraps? Prepare to decorate your home for Pride Month with this bright, vinyl wall art. It couldn't be easier to follow our step-by-step ...
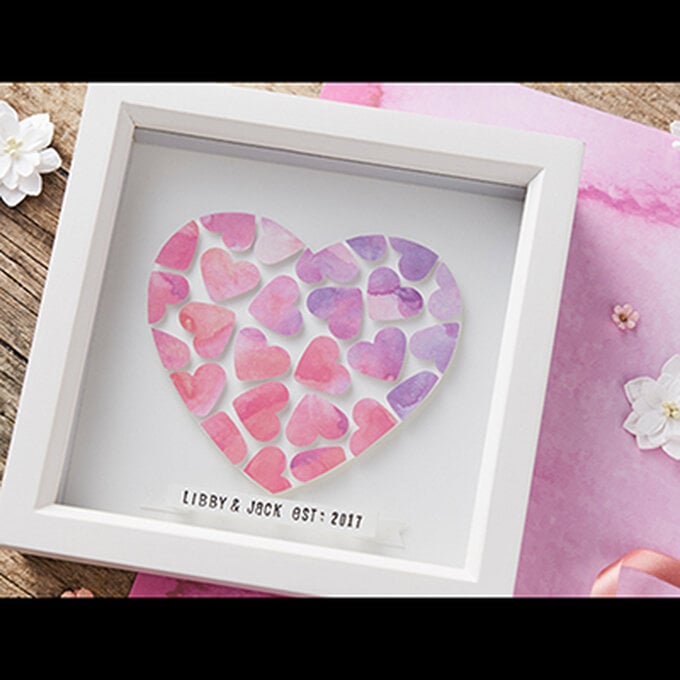
How to Make a Heart Confetti Box Frame
Brighten up your day with this Geometric Heart Plastic Suncatcher!The suncatcher is divided into sections, which means you can get creative and personalise your design with an assortment of paints. You may decide to go bright or choose a more ...
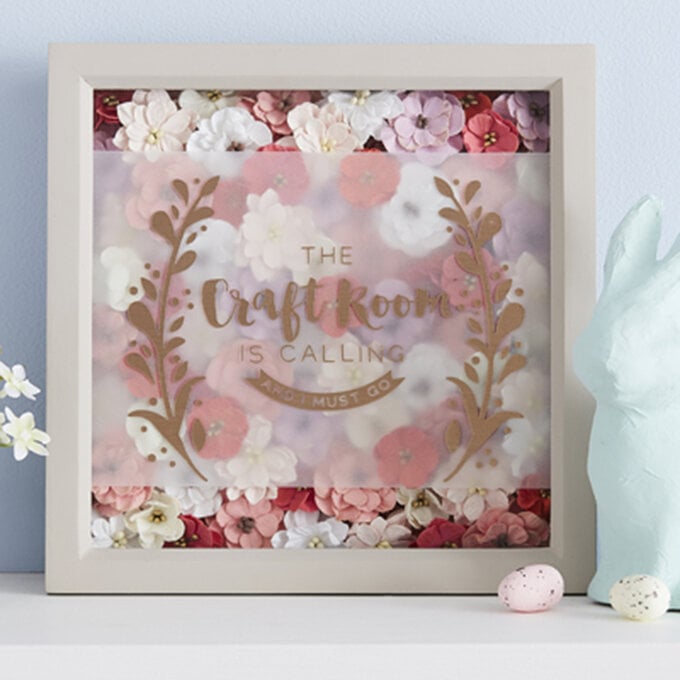
How to Make a Paper Flower Box Frame
Project and instructions by Hobbycraft Artisan: Becky Wallace from Rock Paper Vinyl Find out more. Make a simple and elegant memory box for your bridesmaids! Fill it with personalised goodies and treats to help them plan for your big day. ...
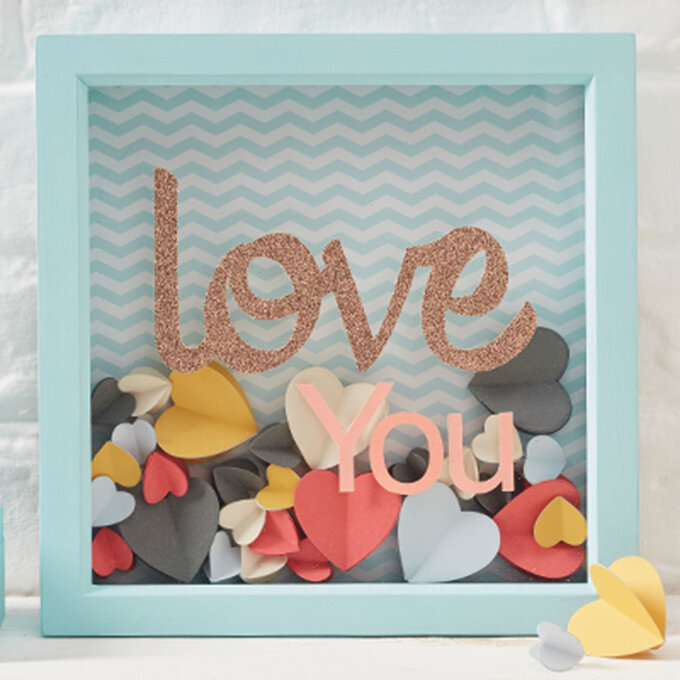
How to Make a Paper Heart Box Frame
Put a treasured photo or print on display in this Grey Photo Frame. Create beautiful wall art that will draw everyone’s focus and celebrate your favourite memories by putting them in a frame. This frame is excellent quality and comes with ...
.JPG?sw=680&q=85)
How to Make a Mum You Rock Box Frame
Project by Hobbycraft Artisan: Irene De Sá Find out more. Have a drawer full of Cricut vinyl scraps? Prepare to decorate your home for Pride Month with this bright, vinyl wall art. It couldn't be easier to follow our step-by-step ...

