How to Make a Fairy Garden
This paper plate fairy garden is loads of fun to make and a lot easier than it might look! With the help of this beginner-friendly step-by-step guide, your little ones will love creating this little scene and playing with it once it's finished.
You will need
Subtotal
Is $ 4.49

Subtotal
Is $ 9.49

Subtotal
Is $ 5.49

Subtotal
Is $ 5.49
You Will Need
* Paper Plates
* Acrylic Paint
* White Air Drying Clay
* Decopatch Medium
* Wooden Craft Sticks
* Green Reindeer Moss
* Various Paper and/or Artificial Flowers
* Washi Tape
* Artificial Flower Stamens
* Wooden Skewer
* Glue
* Paintbrushes
* Scissors
* Pencil
* Varnish
* Any Other Small Decorations You'd Like to Include
Note: The flowers originally used for this project have now been discontinued, however they can easily be substitiuted with any small artificial flowers.
How to Make
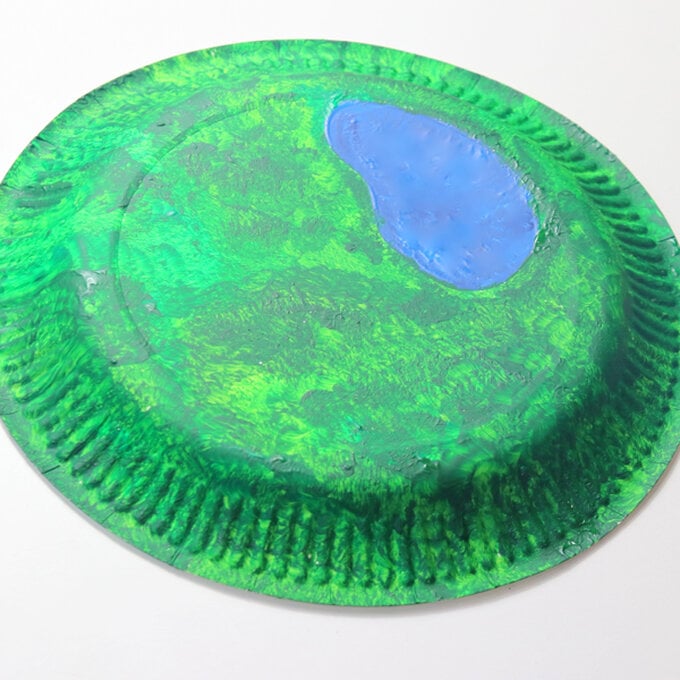
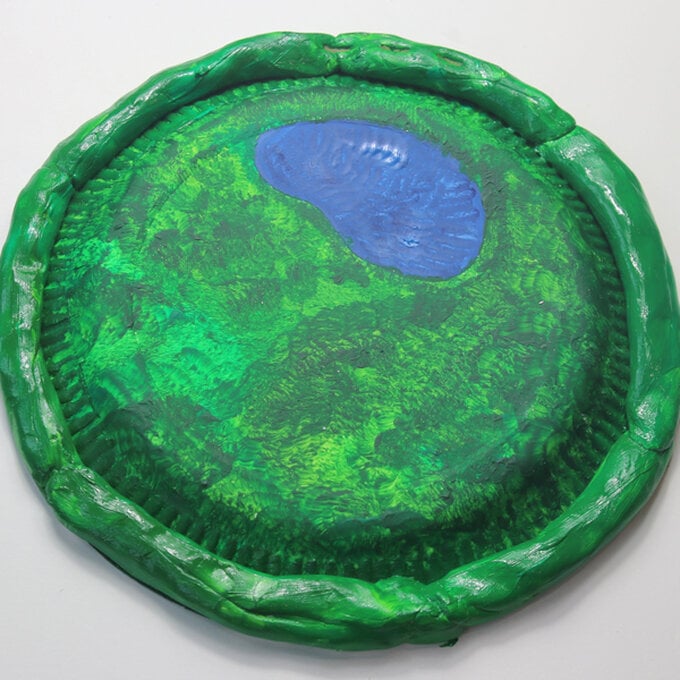
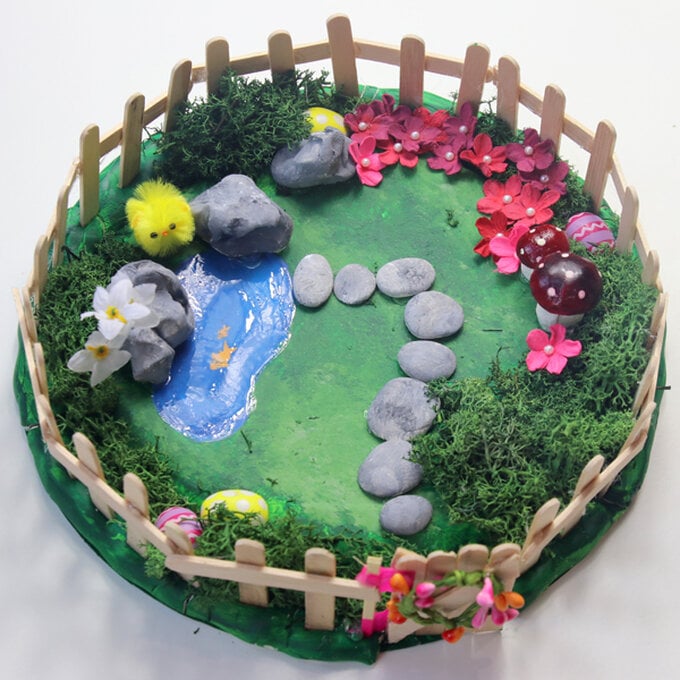
Draw a small pond shape onto the back of a paper plate and then paint it blue. Paint the rest of the plate green using a bristle effect (jab a dry paintbrush on to the paint, and then onto the plate) to make it look like grass. Mix a little grey into the green to give different shades. Leave to dry.
Take small lumps of clay, roll them up and squash to make stepping stones. Turn larger pieces into rocks by squashing and pinching the clay. Set aside to dry in a warm place.

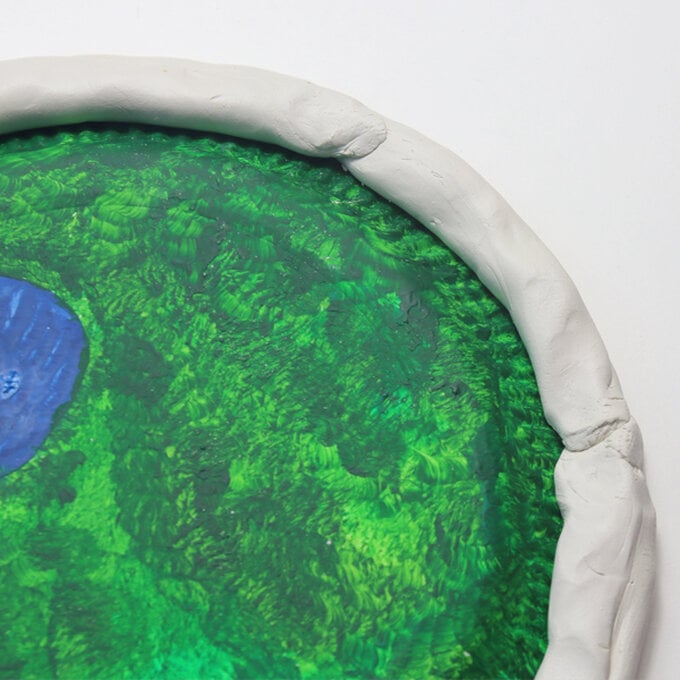
Roll lumps of clay into 2cm thick sausages and press around the rim of the plate. Paint the wet clay green.
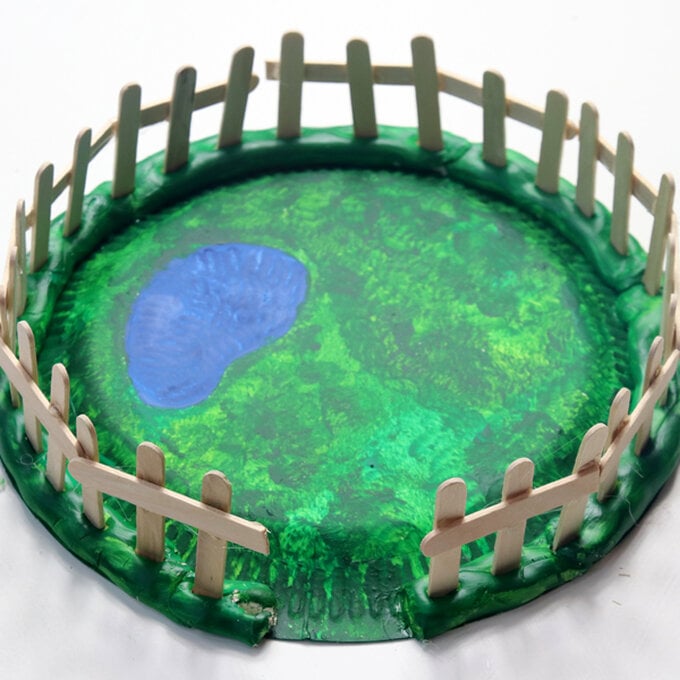
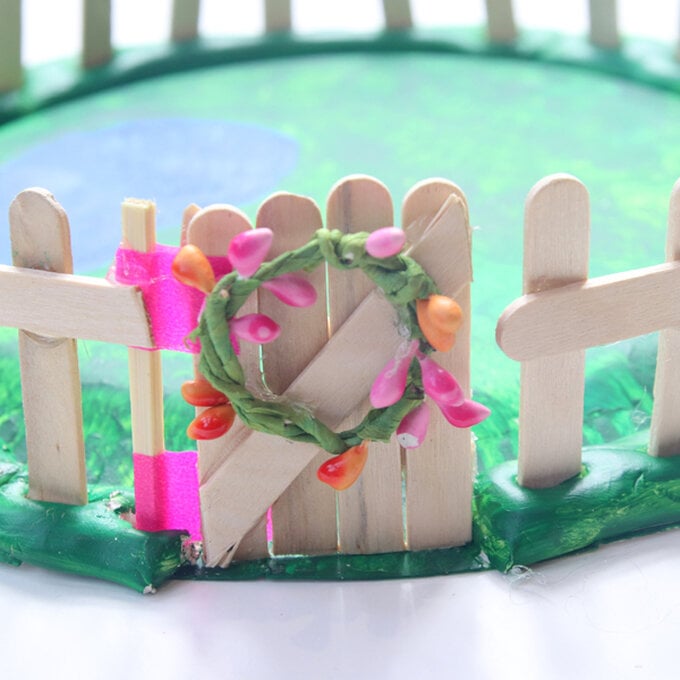
Cut away 5cm from one side of the clay around the rim, to make a doorway. Cut lollipop sticks in half and push them into the clay all the way around to make a fence. Glue more half-lollipop sticks across the ones in the clay to make it look more like a fence.
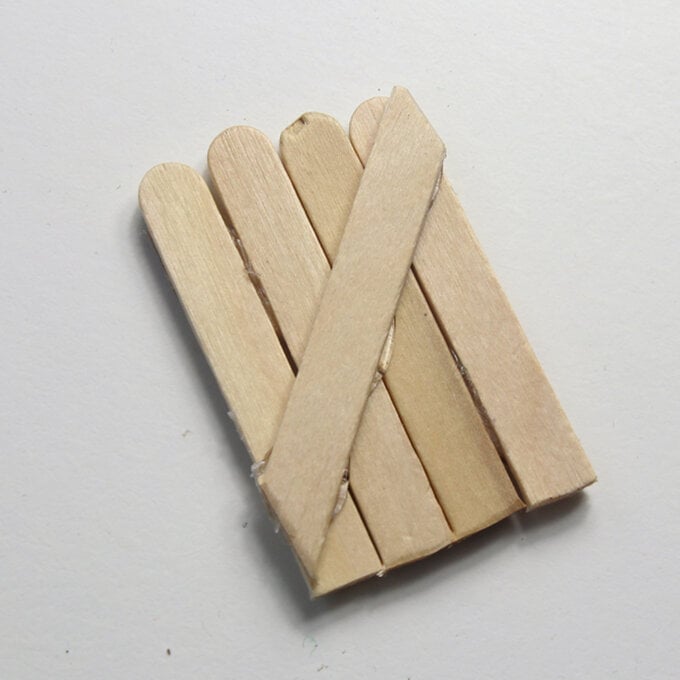
To make a gate, cut two lollipop sticks in half to create 4 pieces. Line them up together and glue a lollipop stick on top diagonally. Trim the ends of the diagonal stick and repeat for the other side.
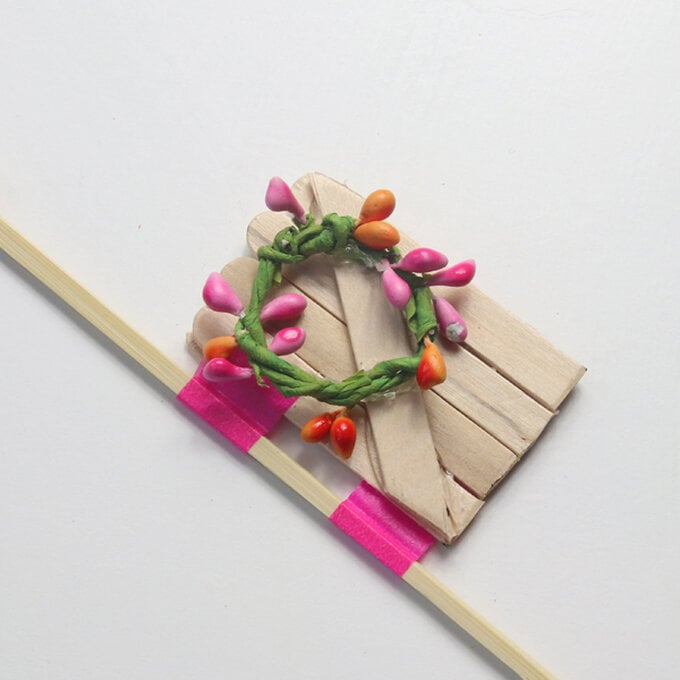
Decorate the gate with some flowers. You can make a wreath with some small buds and stems twisted together, or just stick on some loose flowers.

To make a hinge, use washi tape to stick the top and bottom of one side of the gate onto a wooden skewer.
Trim the skewer to size and push into the clay next to the opening on the plate. Glue the skewer to the fence for extra strength. Leave the plate overnight to allow the clay to dry.
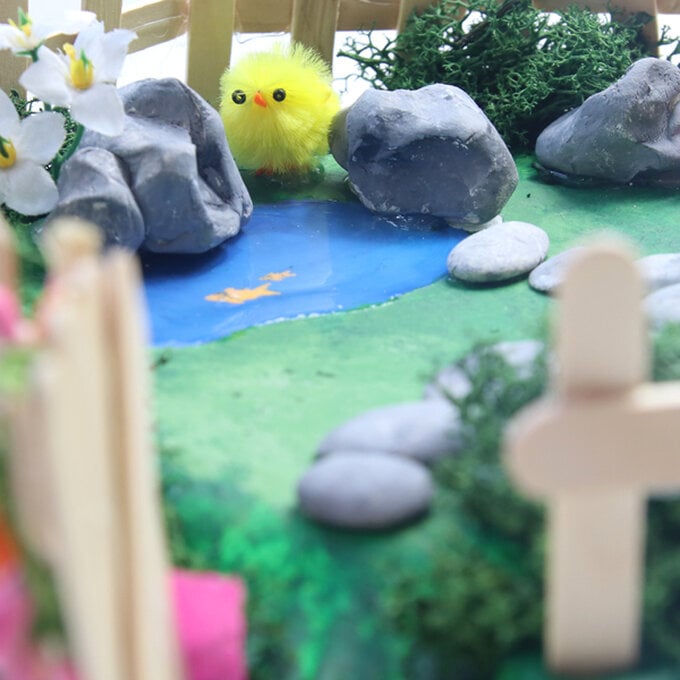
Paint the rocks and stepping stones grey, using the bristle effect as with the grass. Glue onto the plate to create a pathway with rocks around the pond. Glue some moss around the rocks.
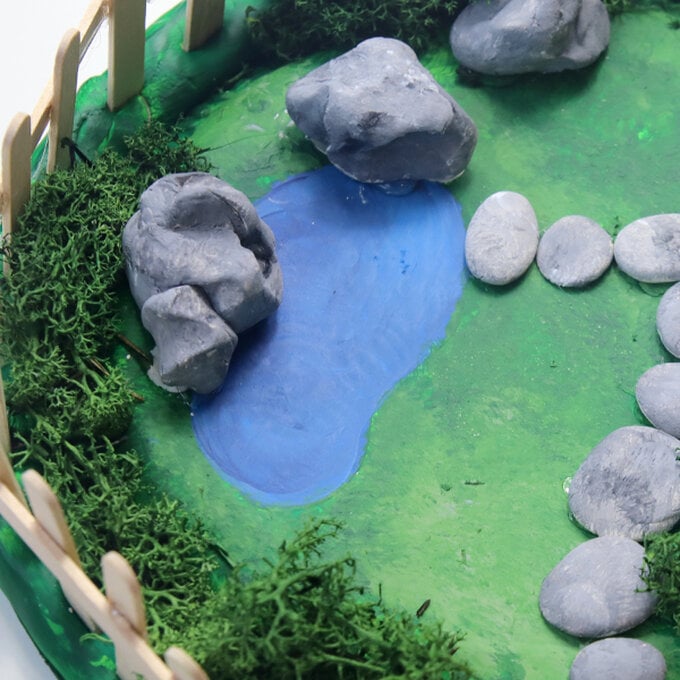
Paint some tiny goldfish in the pond. Leave to dry, then add a coat of varnish to the pond to make it look wet!

Add any extra decorations you would like and then your fairy garden is complete!
Related Products

Is $ 19.00