Skip to Content (Press Enter) Skip to Footer (Press Enter)

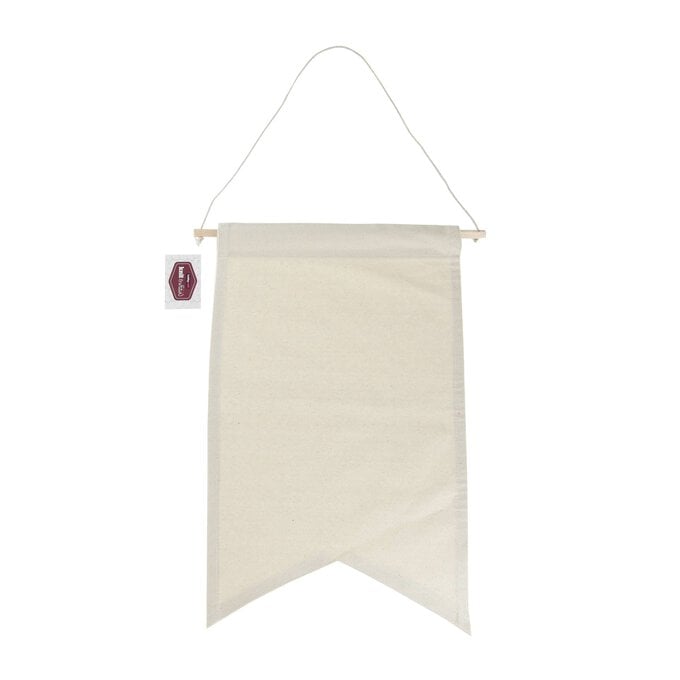
How to Make an Embroidered Banner

Level
Beginner
Time
1+ days
Budget
10 - 30

Add a delicate finishing touch to your festive décor with this embroidered banner project guide. This lovely design features a variety of dried flowers which are ideal for adding a natural, bohemian touch to your Christmas table arrangement.

Using our free downloadable template, you’ll be able to show off your embroidery skills – but also discover new techniques!

Project and instructions by Katherine Lucy Creates

Discover more embroidery projects here >

You will need

Is $ 7.49

Quantity: 1

Subtotal

Is $ 7.49

Is $ 2.49

Quantity: 1

Subtotal

Is $ 2.49

Is $ 2.49

Quantity: 1

Subtotal

Is $ 2.49

Is $ 2.49

Quantity: 1

Subtotal

Is $ 2.49

Is $ 2.49

Quantity: 1

Subtotal

Is $ 2.49

Is $ 2.49

Quantity: 1

Subtotal

Is $ 2.49

Is $ 2.49

Quantity: 1

Subtotal

Is $ 2.49

Is $ 2.49

Quantity: 1

Subtotal

Is $ 2.49

Is $ 2.49

Quantity: 1

Subtotal

Is $ 2.49

Is $ 2.49

Quantity: 1

Subtotal

Is $ 2.49

Is $ 2.49

Quantity: 1

Subtotal

Is $ 2.49

Is $ 2.49

Quantity: 1

Subtotal

Is $ 2.49

Is $ 6.49

Quantity: 1

Subtotal

Is $ 6.49

Is $ 4.49

Quantity: 1

Subtotal

Is $ 4.49

Is $ 1.49

Quantity: 1

Subtotal

Is $ 1.49

You’ve viewed 2 of 15 products

You’ve viewed 4 of 15 products

Total:

You will also need:

* Embroidery Scissors

* A lightbox or light source

Step 1

Download and print our FREE dried flower embroidery design sheet below. Type in your chosen font the names for the chair backs and print.


Template Download.pdf

Step 2
Using a lightbox or good light source, trace the names and flower designs onto the flag - using a heat erasable fabric pen. Mix and match the flower designs and place around the name sporadically.
Step 3
Start the embroidery with the name, place the embroidery hoop around one section of the name. Use two strands of your chosen colour and satin stitch to fill the text.
Idea_how-to-make-an-embroidered-banner_step3.jpg?sw=680&q=85
Step 4
Once the text is fully stitched, move onto the flowers. Starting with thread colour DMC 950 - split so that you have three strands. Back stitch the main stem of the dried foliage and then Fern stitch the top part, following the design lines.
Step 5
Moving on to the small flower, use all six strands of DMC 3866 to fill in the shape using short and long stitches.
Step 6
The next dried flower uses two colours, for the stem, use three strands of DMC 3052 and stem stitch. For the top, use three strands of DMC 3828 and french knot to fill the shape.
Step 7
Next, use three strands of DMC 3866 and split stitch the dried foliage design.
Step 8
Use three strands of DMC 3013 and stem stitch the stem of the pampas grass. For the top, use three strands of DMC Ecru and DMC 739. Fish bone stitch, alternating the colours by leaving varied gaps in between the stitches. This creates a stunning effect for the pampas.
Step 9
Use 4 strands of DMC 3364 for the next design, back stitch the stem and then add a Lazy Daisy (or single chain stitch) for each leaf.
Step 10
For the next dried flower, use three strands of DMC 3053 for the stem - stem stitch and satin stitch the leaf. For the flower head, use six strands of DMC 976, short and long stitch to fill the shape.
Step 11
For the last dried foliage, use three strands of DMC 3012. Back stitch the stem and satin stitch the leaves.
Step 12
Once the stitching is complete, press well with a hot iron to remove the pen marks and creases from the hoop.
Idea_how-to-make-an-embroidered-banner_step12.jpg?sw=680&q=85

Related Products

Related Categories

  • bvseo_sdk, dw_cartridge, 18.2.0, p_sdk_3.2.0
  • CLOUD, getReviews, 4ms
  • reviews, product
  • bvseo-msg: Unsuccessful GET. status = 'ERROR', msg = 'Not Found.'; Unsuccessful GET. status = 'ERROR', msg = 'Not Found.';
Top