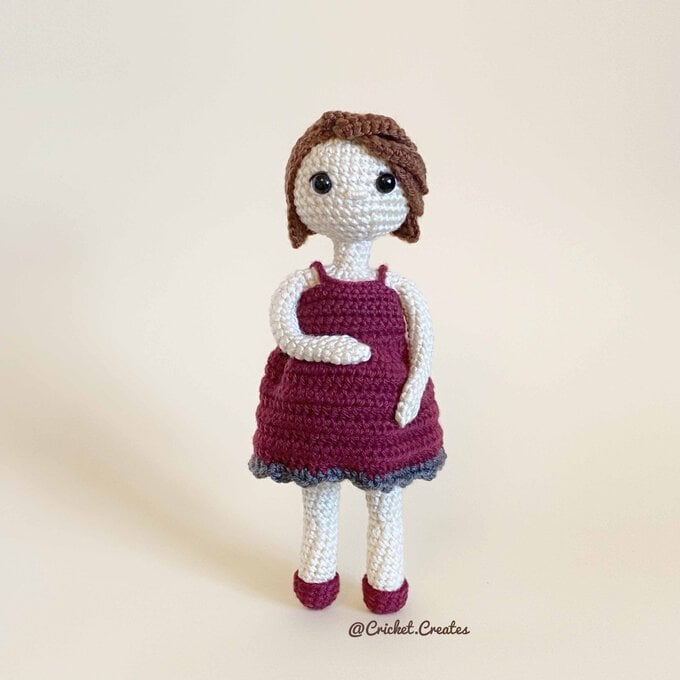
How to Make Amigurumi Dolls
We’re proud to celebrate International Women’s Day at Hobbycraft. And what better way to celebrate the incredible social, cultural, and political achievements of all types of women than through crochet?! Perfect for intermediate crocheters, this step-by-step guide will show you how to make amigurumi dolls using some of our favourite yarns.
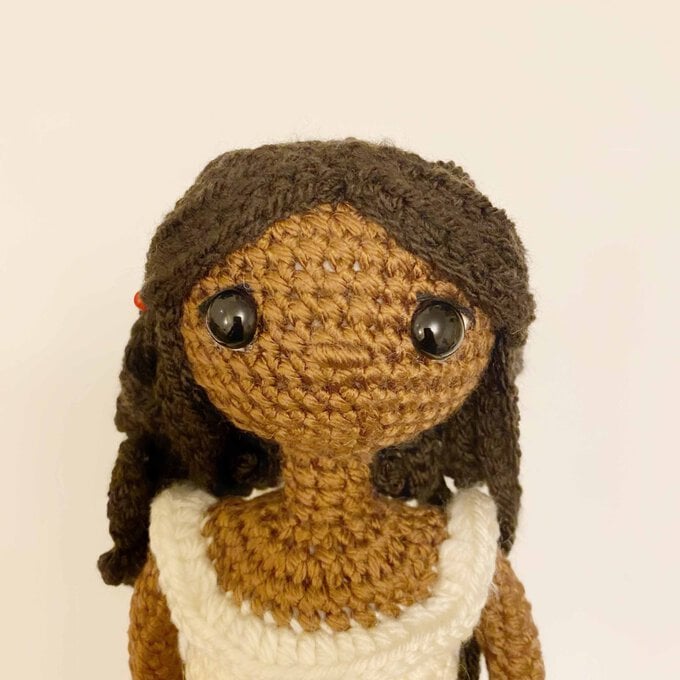
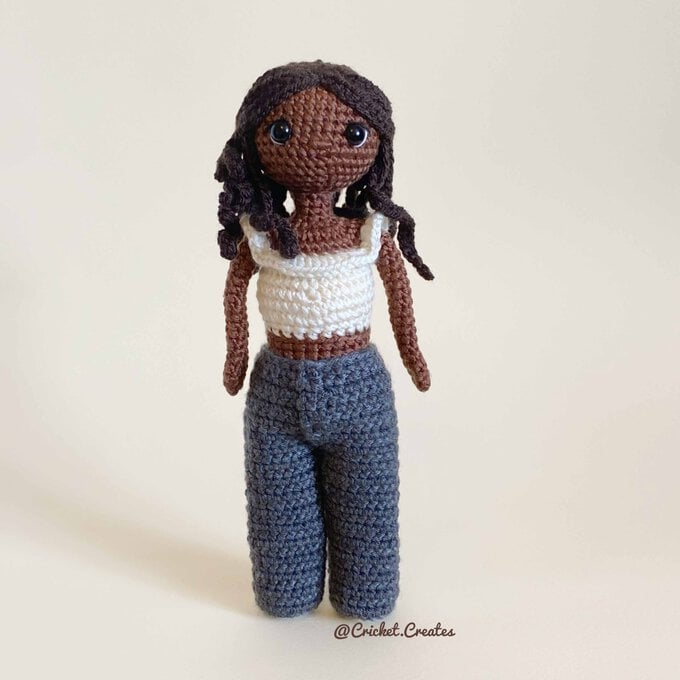
Meet Maddison, Yemi, and Laila. Although they come from different backgrounds, they’ve been best friends since university and believe that the strength of their friendship lies in their diversity as they believe in honouring and celebrating their differences.
The pattern for all three dolls uses a similar base pattern with additions and colour changes to give each doll her unique features and wardrobe. For ease of crocheting, each pattern is written separately.
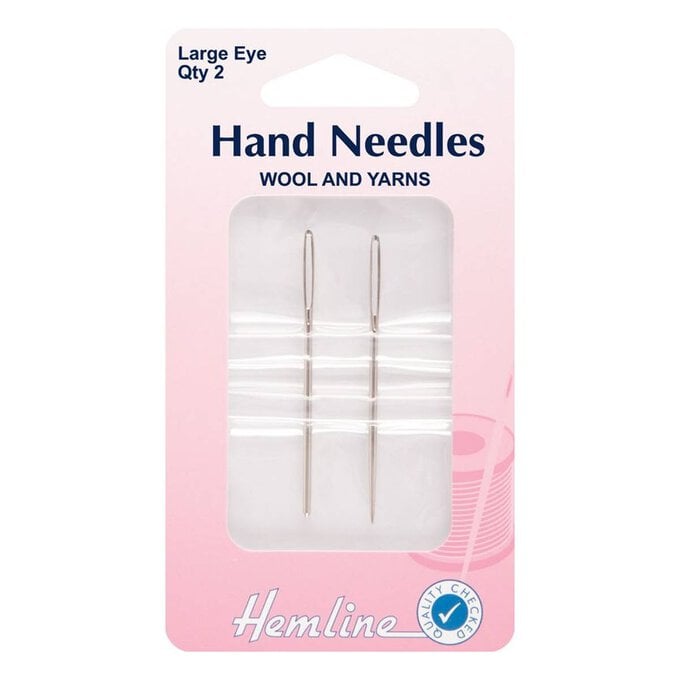
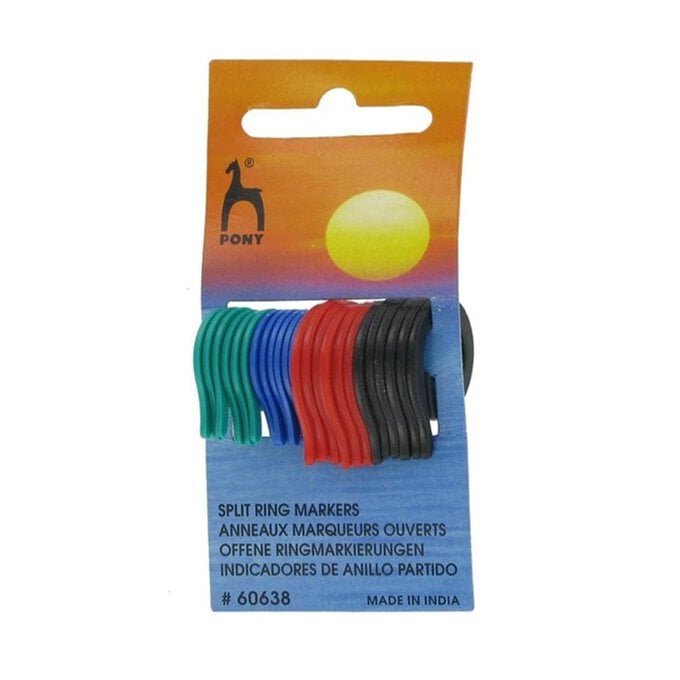
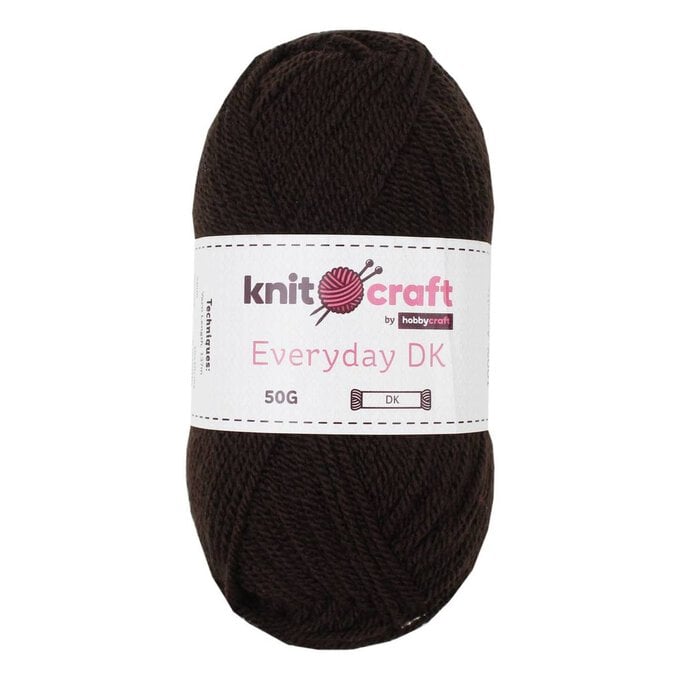
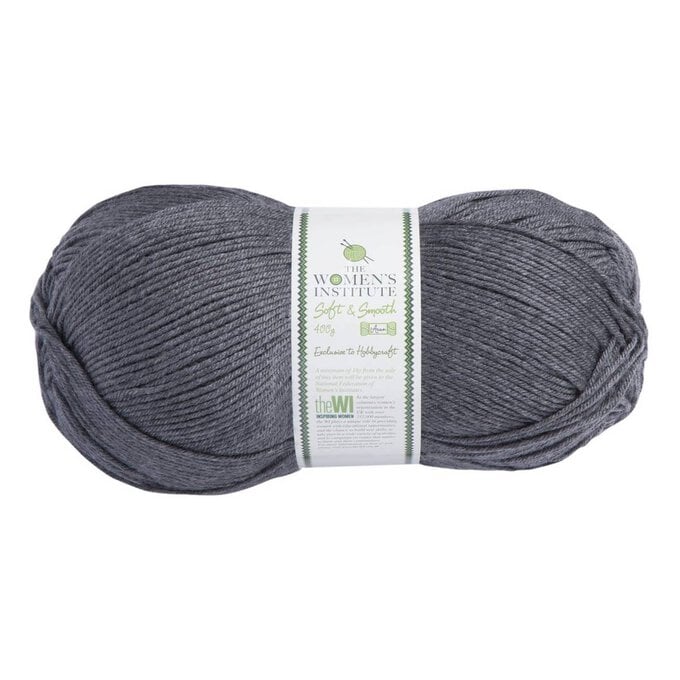
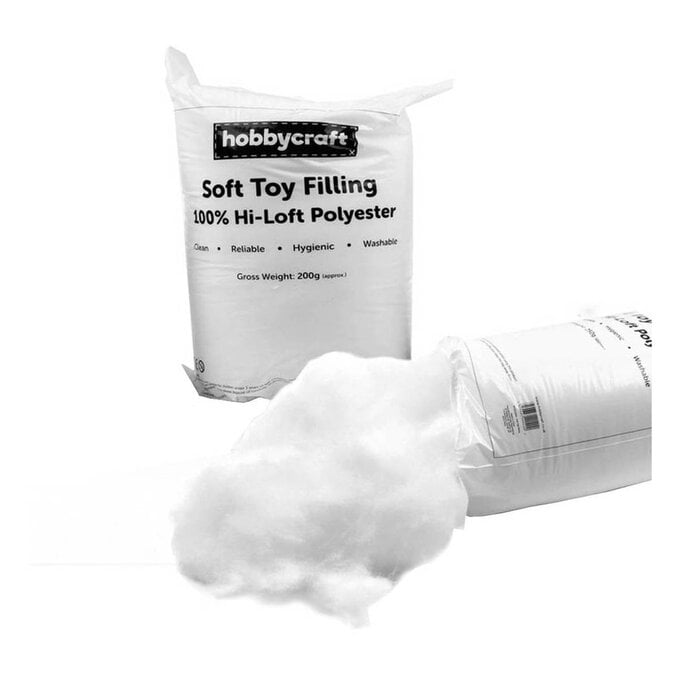
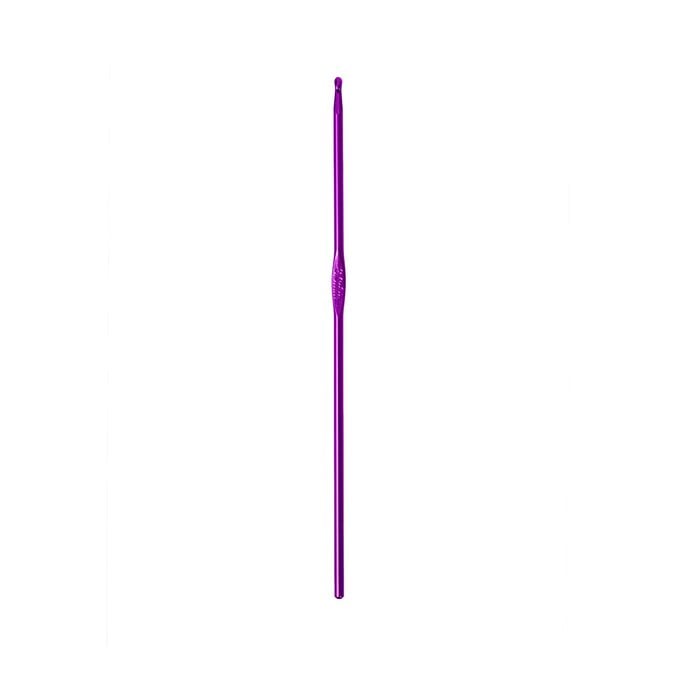
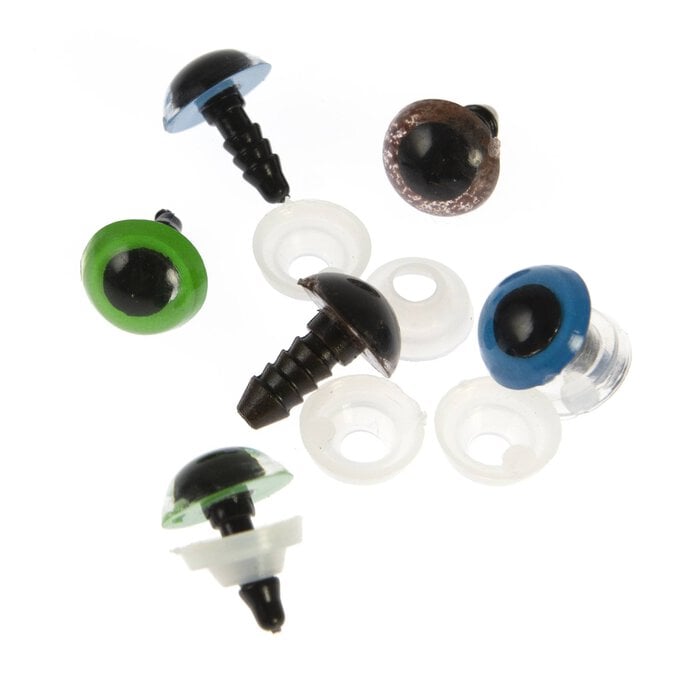
You will need
Subtotal
Is $ 4.49
Subtotal
Is $ 6.49
Subtotal
Is $ 2.49
Subtotal
Is $ 19.00
Subtotal
Is $ 19.00
Subtotal
Is $ 2.49
Subtotal
Is $ 2.49
Subtotal
Is $ 3.49
Subtotal
Is $ 6.49
Subtotal
Is $ 4.49
Out of stock

Subtotal
Is $ 4.49
Subtotal
Is $ 5.49
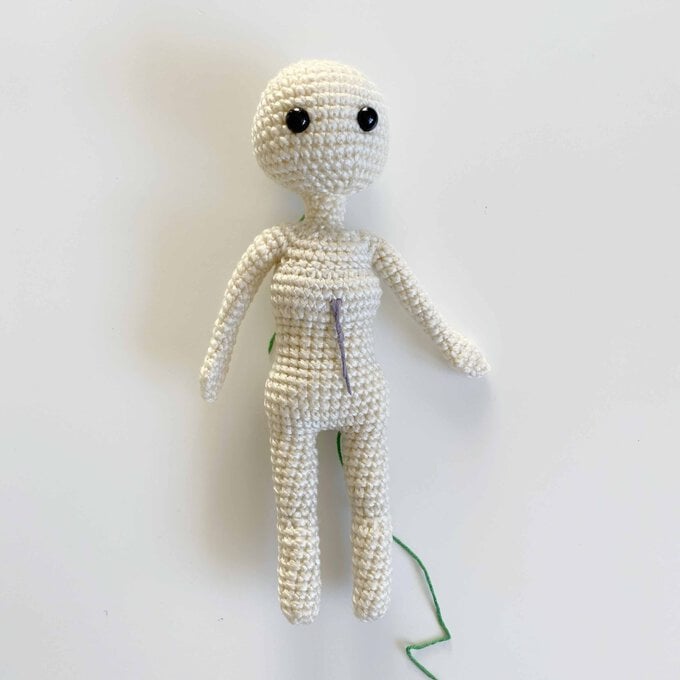
This Pattern is written in US crochet terms. Please stuff firmly as you go along.
You should be comfortable with colour changes. The legs, body and arms are crocheted together, whereas the head is crocheted separately.
Abbreviations (US):
MR = Magic Ring
SC = Single Crochet
Inc = Increase (two SC in the same loop)
IncHdc = two Hdc in the same loop
IncDc = two Dc in the same loop
Dec = invisible Decrease
BLO = Back loop only
FLO = Front loop only
Hdc = Half double crochet
Dc = Double crochet
Slst = slip stitch
f/o = fasten off
Ch = chain
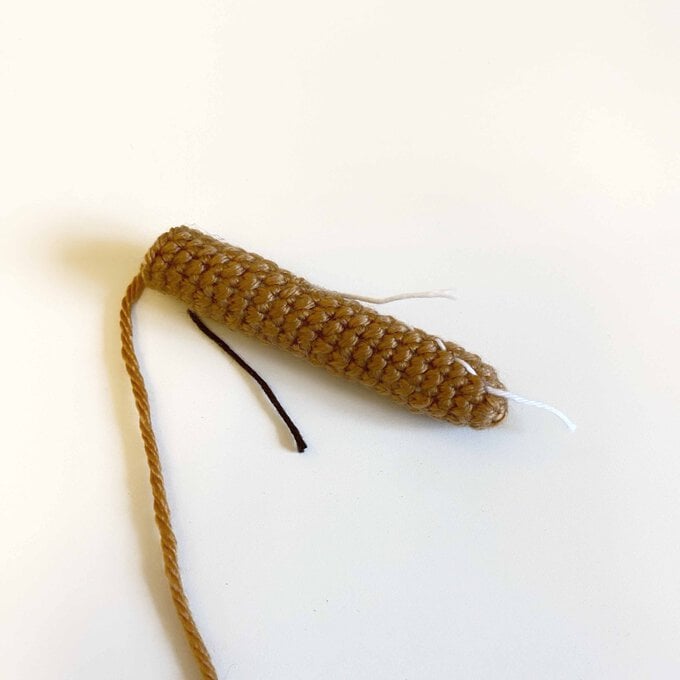
Colour A: Mahogany
Crocheted in a continuous round
Round 1: MR 3 SC. [3]
Round 2: Inc x 3. [6]
Round 3: (Inc, SC) x 3. [9]
Round 4: 9 Sc around. [9]
Round 5: (Dec, SC) x 3. [6]
Round 6-10: 6 SC around (5 rounds). [6]
Round 11: Inc 5 SC. [7]
Round 12 – 18: 7 SC around (7 rounds). [7]
Stuff lightly, f/o leaving a long tail.
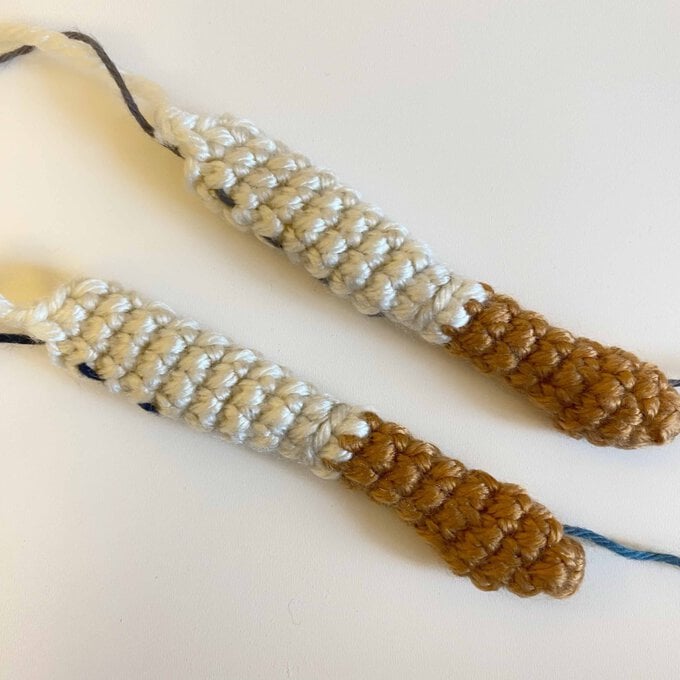
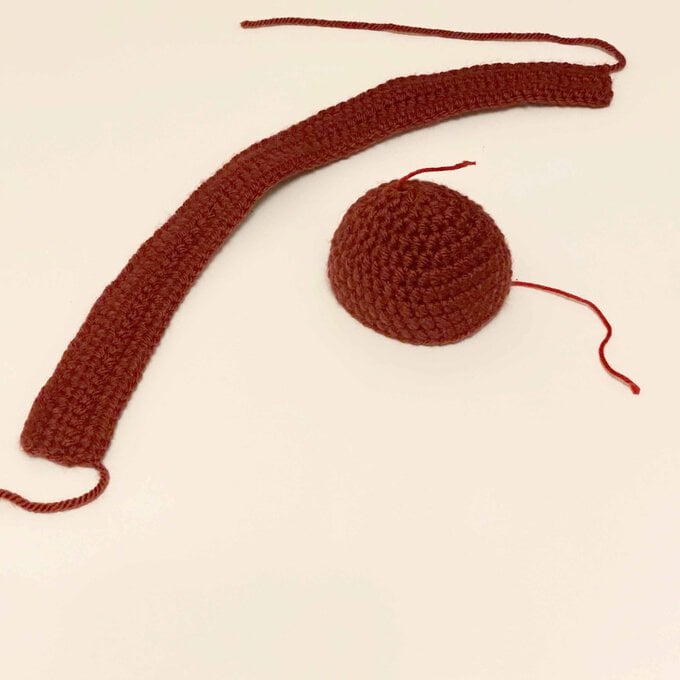
Colour A: Mahogany
Crocheted in a continuous round
Round 1: MR 6 SC. [6]
Round 2: (Inc, SC) x 3. [9]
Round 3-11: 9 Sc around. [9]
Round 12: Dec, 7 SC. [8]
Round 13: (Inc, 3 SC) x 2. [10]
Rounds 14-20: 10 SC around (7 rounds). [10]
f/o leaving a long tail.
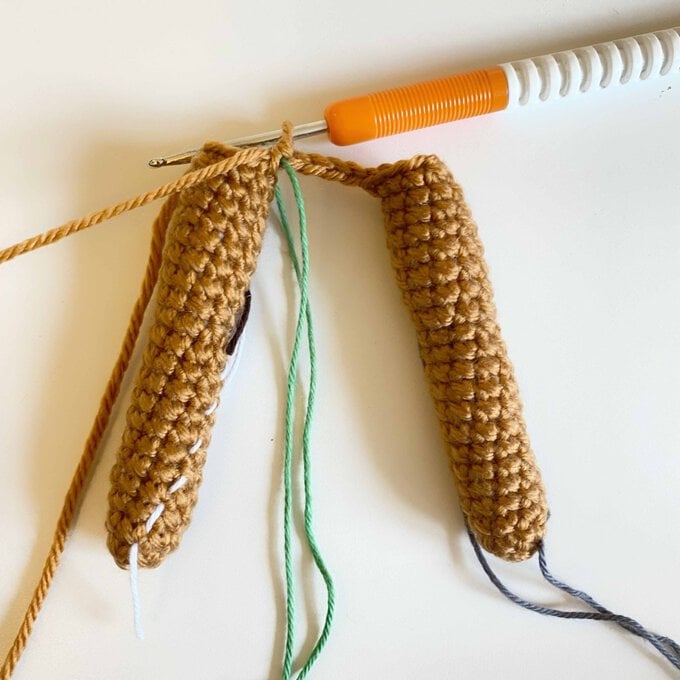
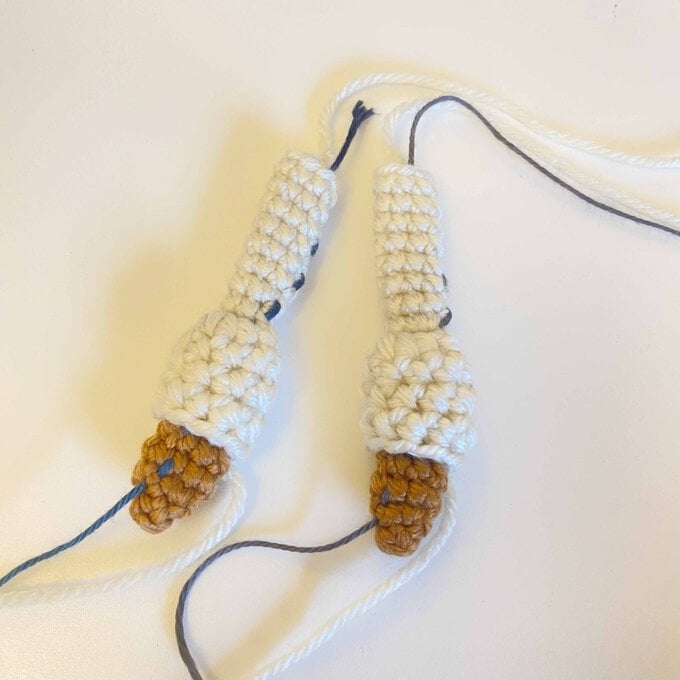
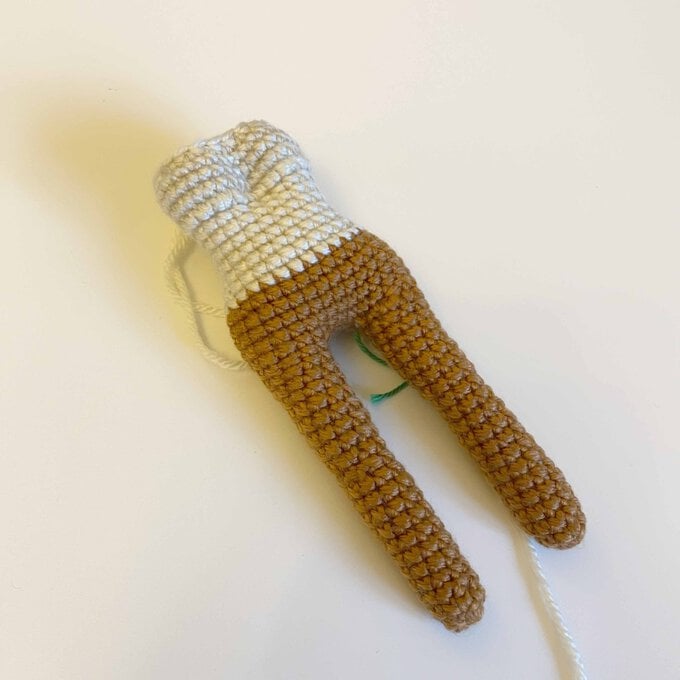
Repeat Round 1- 20 for the 2nd Leg, do not fasten off. With the 2nd leg still attached to the hook, Ch 4 then join leg 2 to leg 1 with a SC. Mark this as the start of the next round.

Crocheted in a continuous round
Round 21: 9 SC around leg 1, 4 SC on one side of the chain, 10 SC around leg 2 and 4 SC on the other side of the chain. [28]
Round 22: 5 SC, Inc, 13 SC, Inc, 8 SC. [30]
Round 23-26: 30 SC around (4 rounds). [30]
Round 27: 5 SC, Dec, 13 SC, Dec, 8 SC. [28]
Round 28: 4 SC, Dec, 12 SC, Dec, 8 SC. [26]
Round 29: 4 SC, Dec, 11 SC, Dec, 7 SC. [24]
Round 30-31: 24 SC around (2 rounds). [24]
Change to colour B: Ivory
Round 32: BLO 24 SC. [24]
Round 33: 24 SC. [24]
Round 34: 5 SC, Inc x 12, 7 SC. [36]
Round 35: 16 SC, Dec x 2, 16 SC. [34]
Round 36: 14 SC, Dec x 2, 16 SC. [32]
Round 37: 32 SC around. [32]
Round 38: 7 SC, Dec x 8, 9 SC. [24]
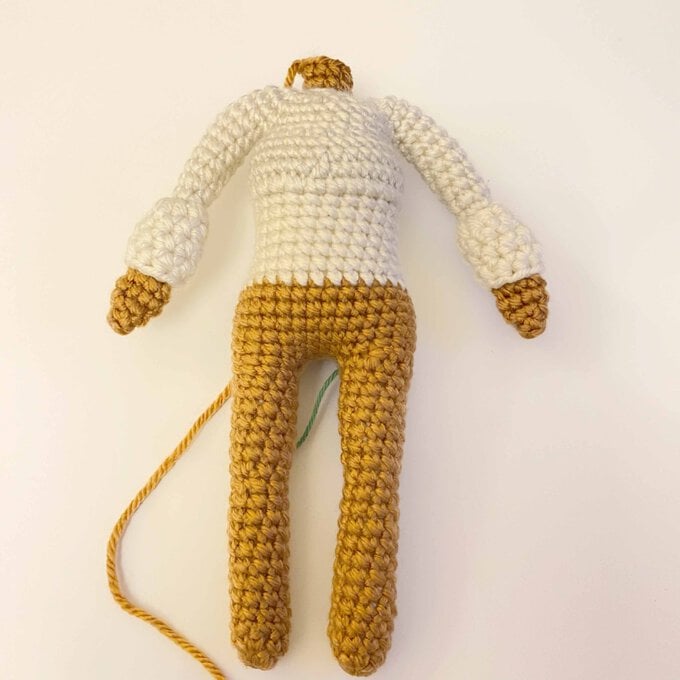
Now we join the arms to the body
Round 39: 6 SC, 7 SC around 1st arm, 10 SC around front of the body, 7 SC around 2nd arm and 8 SC on the back of the body. [38]
Change to colour A: Mahogany
Round 40: BLO 38 SC around. [38]
Round 41: Dec, 34 SC, Dec. [36]
Stuff firmly as you go along.
Ensure the tops of the arm, shoulder region and neck are stuffed firmly.
Round 42: Dec x 18. [18]
Round 43: Dec x 9. [9]
Round 44-46: 9 SC around. [9]
Stuff firmly, f/o leaving a long tail.
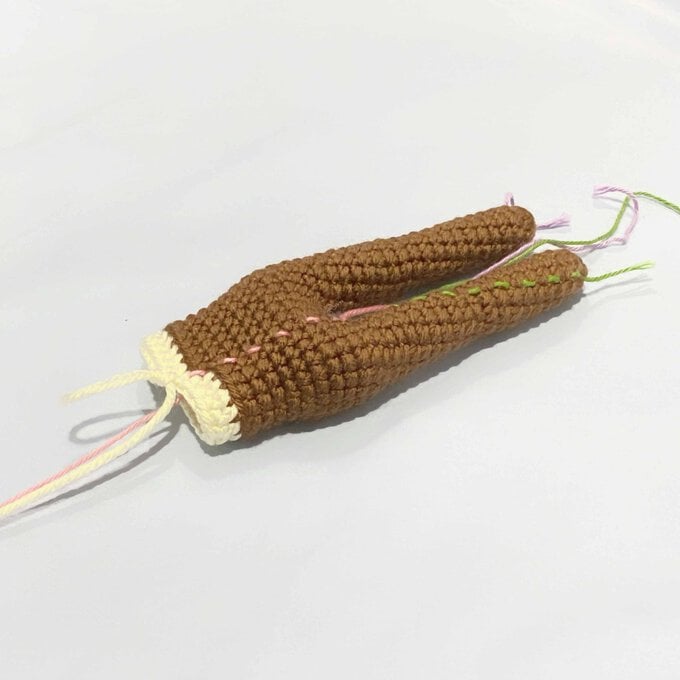
Adding the frill to the top - in colour B: Ivory
Using the remain front loops of Round 40,
Round 1: (Inchdc x 38) [76]

Colour A: Mahogany
Crocheted in a continuous round
Round 1: MR 6 SC. [6]
Round 2: Inc x 6. [12]
Round 3: (Inc, SC) x 6. [18]
Round 4: (Inc, 2 SC) x 6. [24]
Round 5: (Inc, 3 SC) x 6. [30]
Round 6: (Inc, 4 SC) x 6. [36]
Rounds 7-12: 36 SC around (6 rounds). [36]
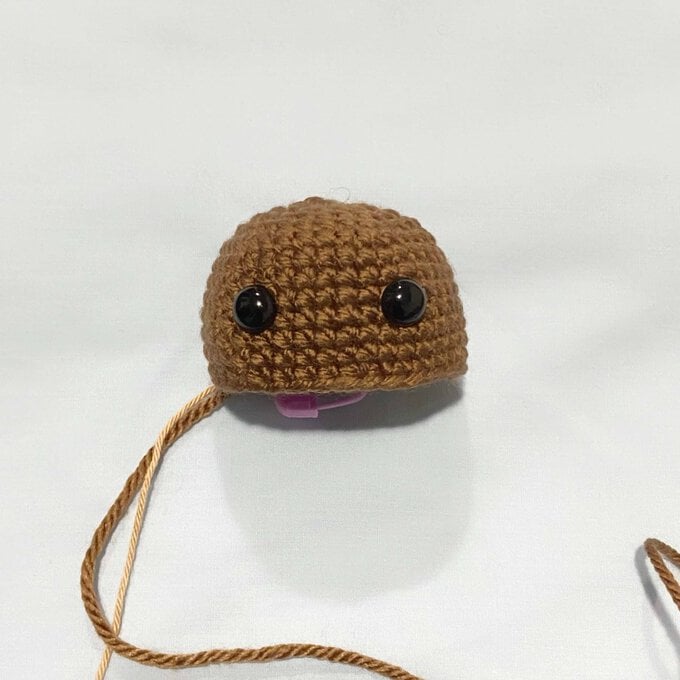
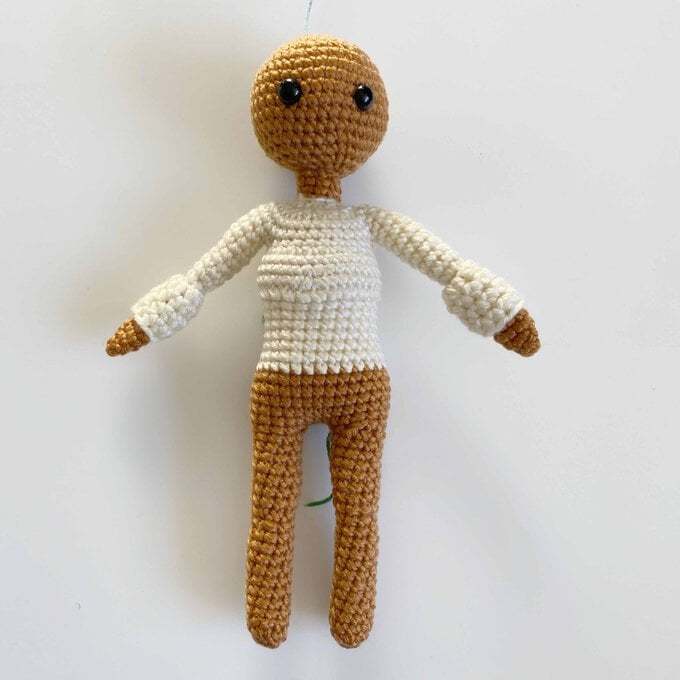
Position eyes between Round 9 and 10. (7 stitches apart).
Round 13: (Dec, 4 SC) x 6. [30]
Round 14: (Dec, 3 SC) x 6. [24]
Round 15: (Dec, 2 SC) x 6. [18]
Round 16: Dec x 9. [9]
Head should be fully stuffed at this point
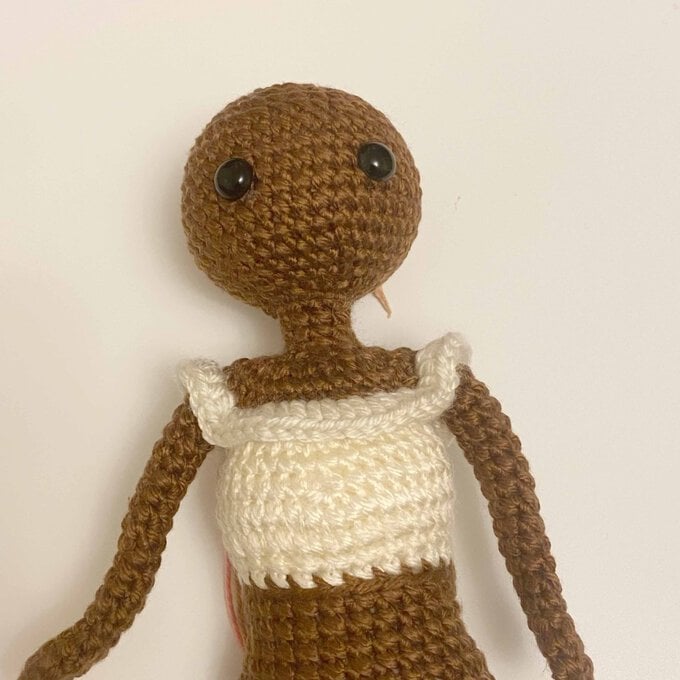
Attach head to body ensuring eyes and facing forward.
Colour B: Ivory
Crocheted in continuous rounds
Round 1: MR 6 SC. [6]
Round 2: Inc x 6. [12]
Round 3-5: 12 SC around (3 rows). [12]
f/o and weave in ends.
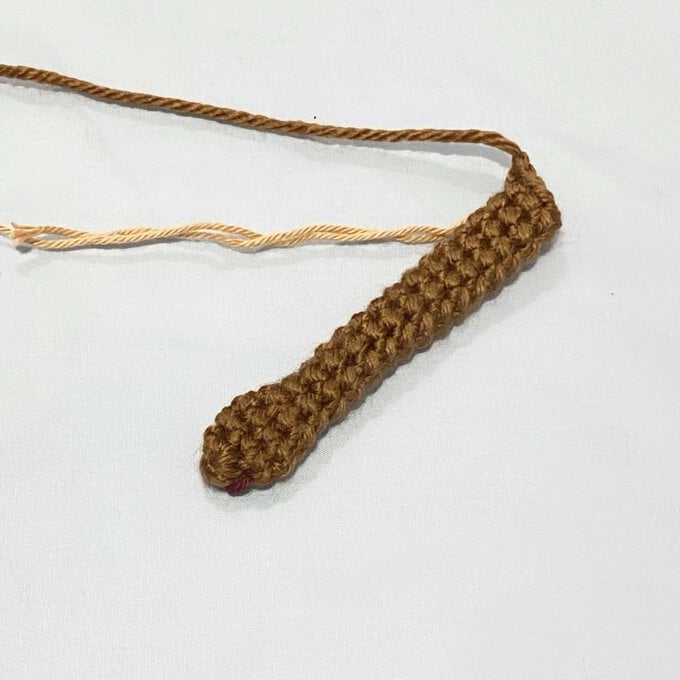
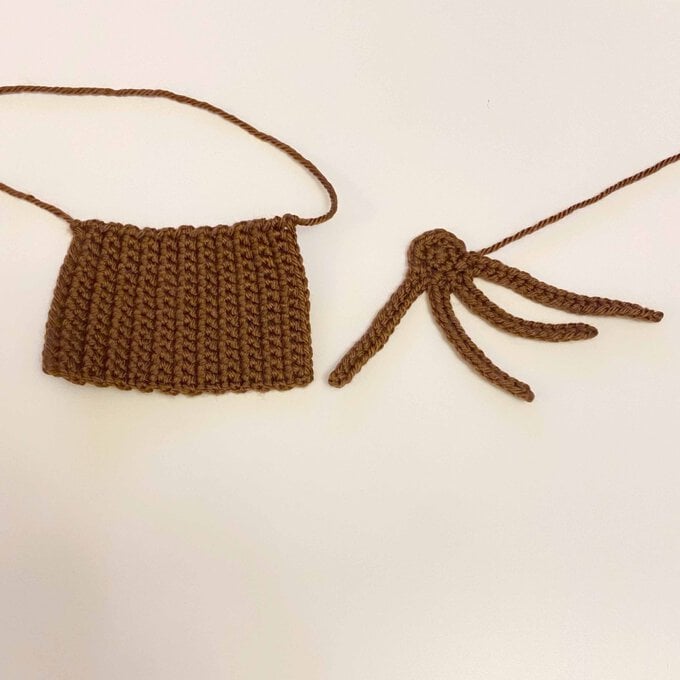
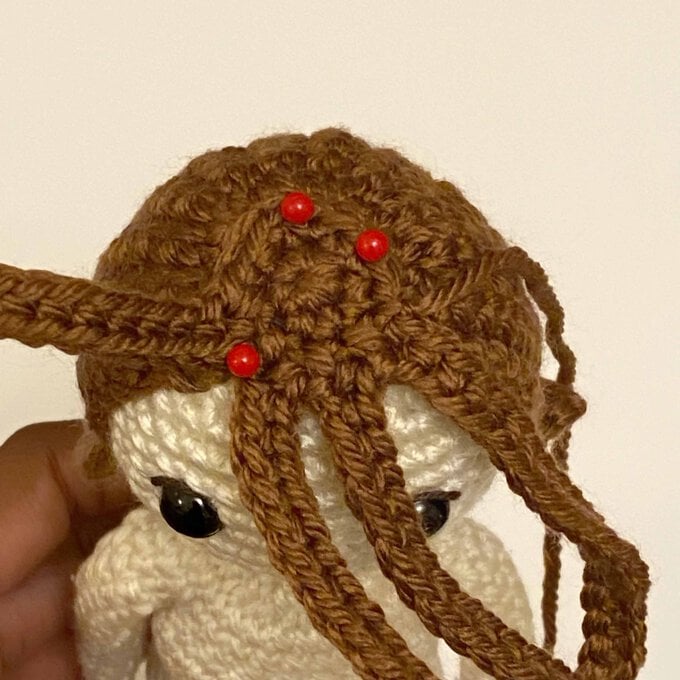
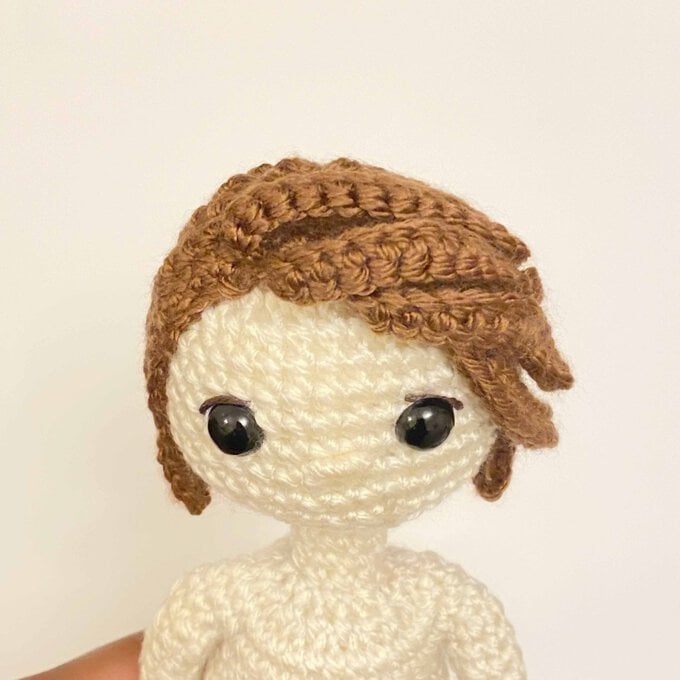
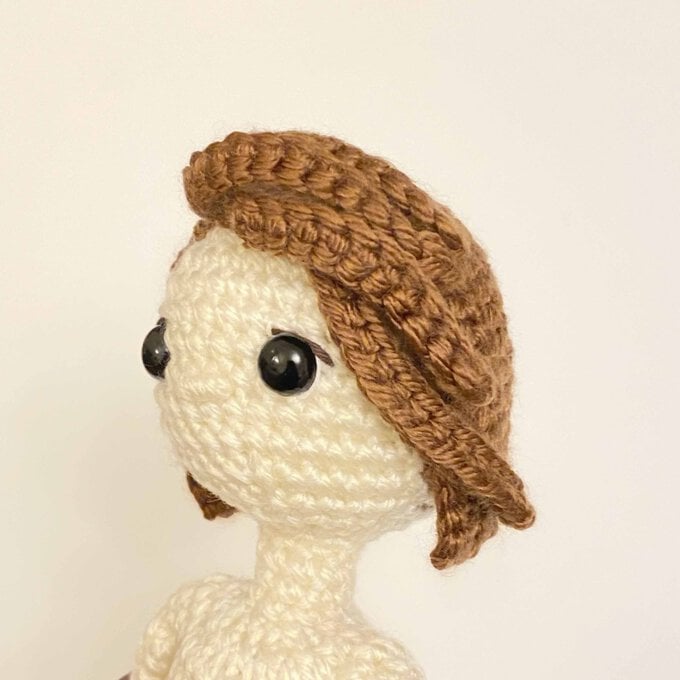
Yemi’s hair is made up of two pieces, a base piece, and a Top section
Base piece
Colour D: Brown
Crocheted in rows
Ch 1 at the end of each row of SC, these are turning chains and not counted in the total number of stitches
Row 1: CH 31. [31]
Row 2: from the second chain from the hook, 30 SC. [30]
Row 3: 10 SC, CH 21 [31]
Row 4: from the second chain from the hook, 30 SC. [30]
Repeat rows 3-4 12 more times.
You should now have a rectangular hair piece with 13 braids extending from it.
Hair: top section
Colour D: Brown
Crocheted in continuous rounds
Round 1: MR 6 SC. [6]
Round 2: Inc x 6. [12]
Round 3: Ch 20, on the back of the chain from the second chain from the hook, 19 SC, SC to connect the chain stiches to round 2. Repeat 3 times.
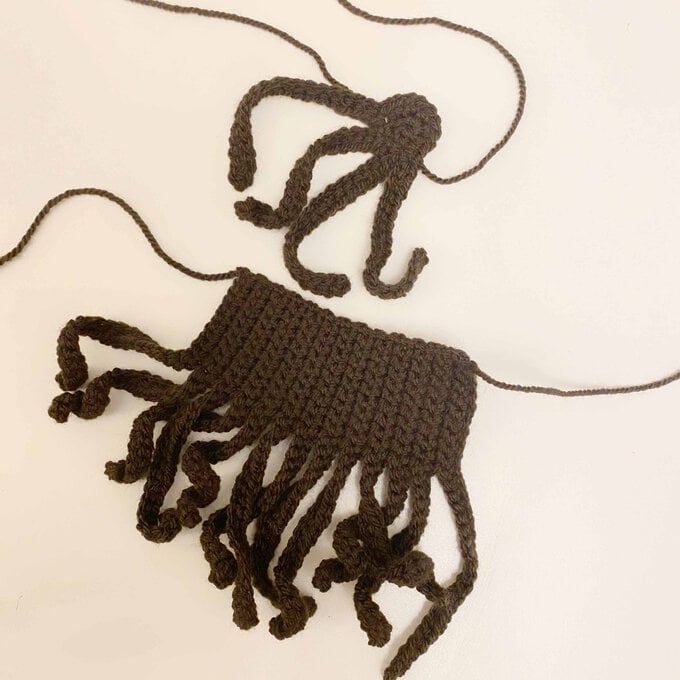
You should now have 4 long braids extending from a circle forming the top piece
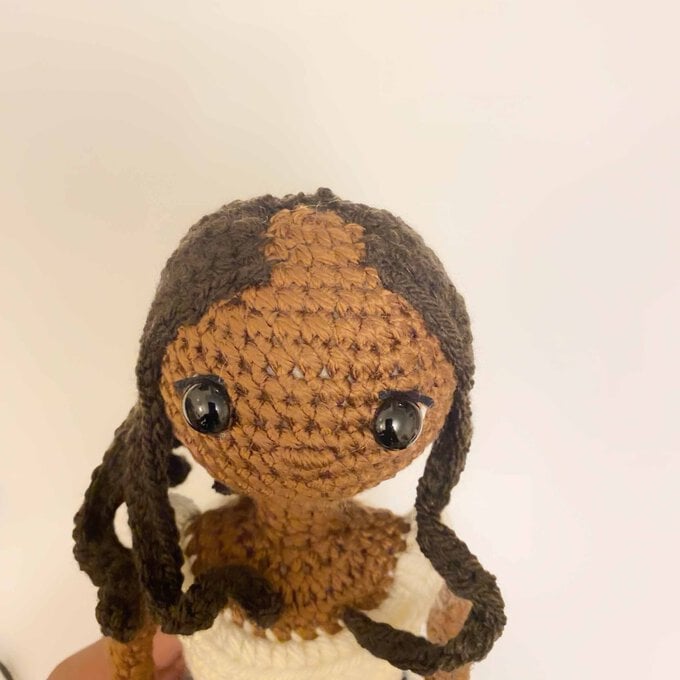
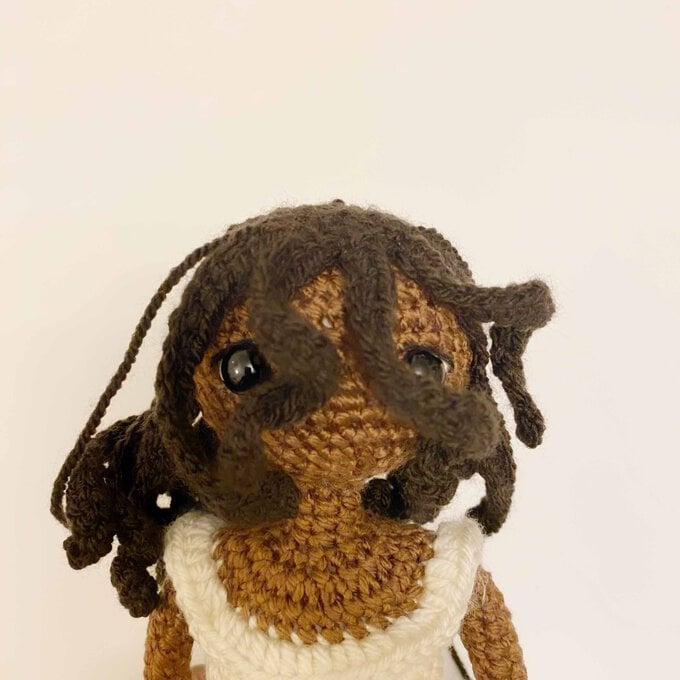
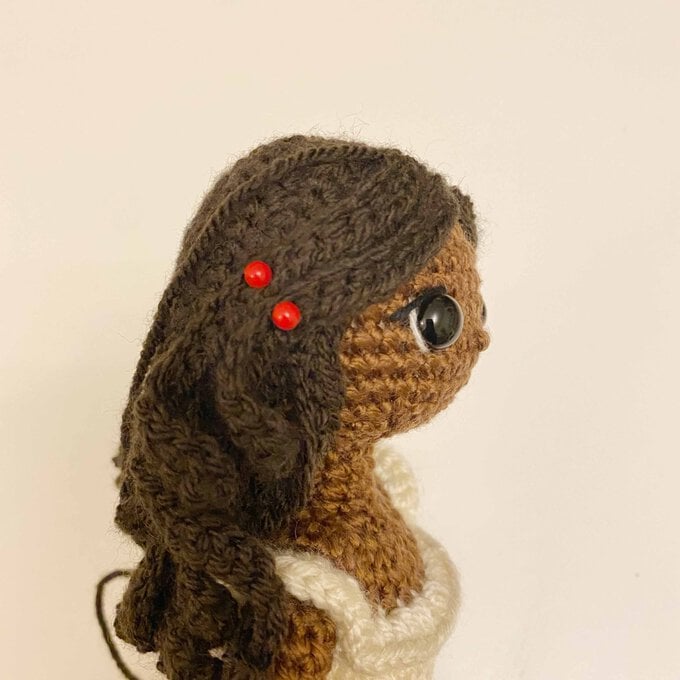
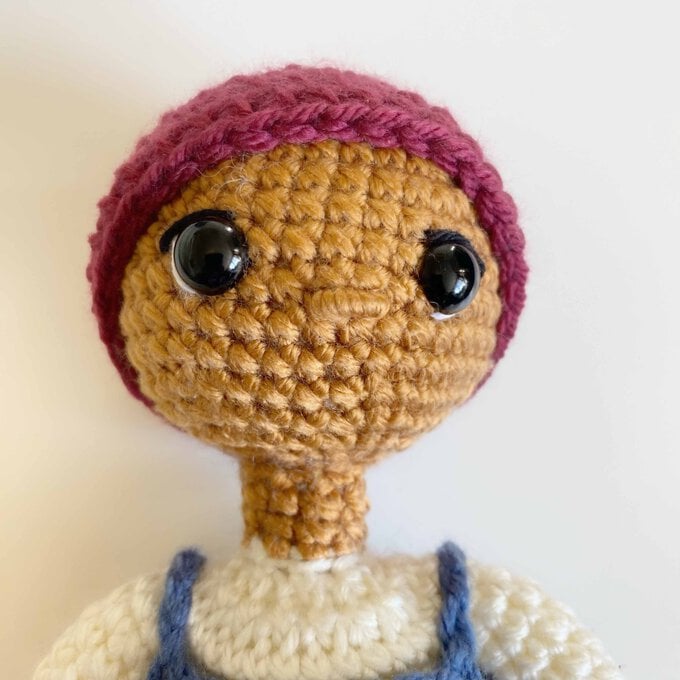
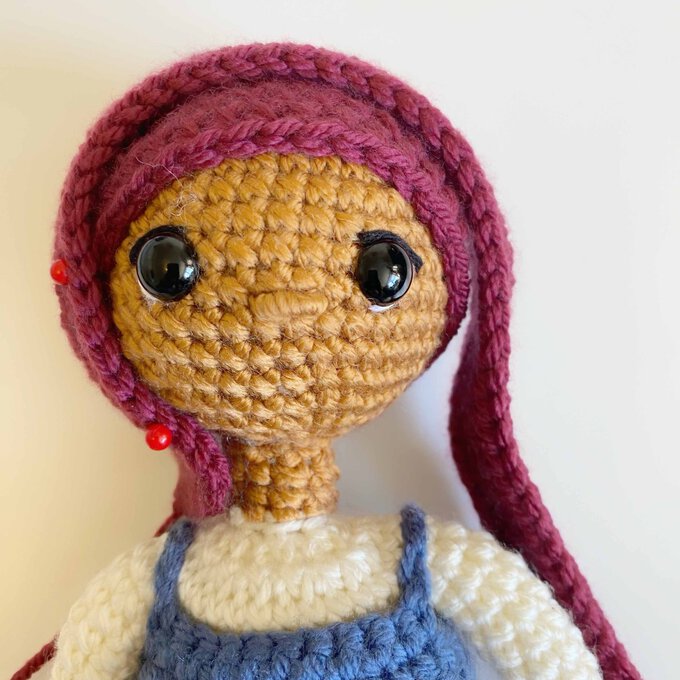
Attaching hair to head:
Place the base piece in an upside-down U-shape with the top between rounds 1-2 of the head and the bottom on round 4. Stitch the hair unto the head using same colour yarn as the hair.
Attaching the top piece:
For the top piece, pin in place as shown in the picture with two braids on either side of the head and stitch top piece unto the base piece.
Using small stitches secure the style in place.
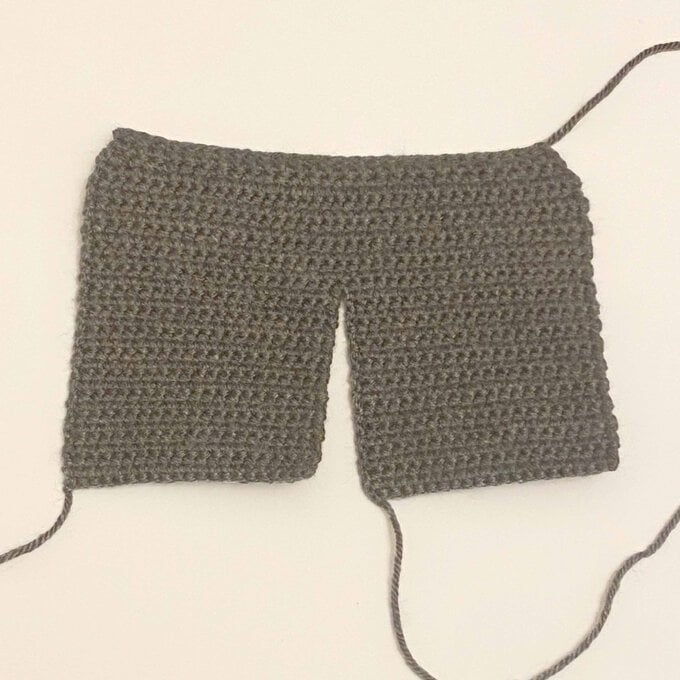
Colour E: Grey
Crocheted in rows
From Rows 2-33, Ch 1 at the end of each row, these are turning chains and not counted in the total number of stitches
Row 1: Ch 30. [30]
Row 2: from the second chain from the hook, 29 SC. [29]
Row 3: 29 SC. [29]
Row 4: (Inc, 2 SC) x 4
(Inc, SC) x 2,
Inc,
(2 SC, Inc) x 4 [40]
Row 5-13: 40 SC (9 rows). [40]
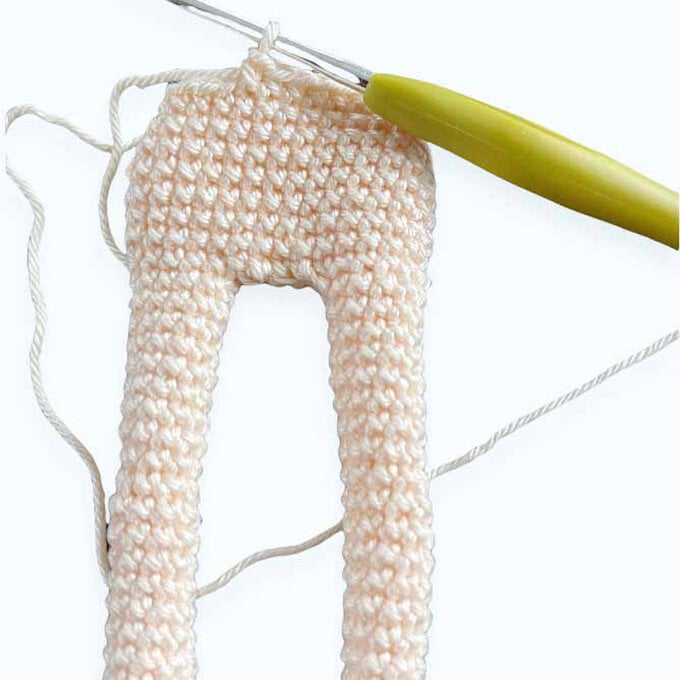
Now we crochet the legs of the trousers
Row 14: 20 SC, mark stitch 21 [20]
Row 15-33: 20 SC. [20]
f/o leaving a long tail.
From the stitch marked on row 14,
Repeat row 15-33 to make the second leg of the trousers.
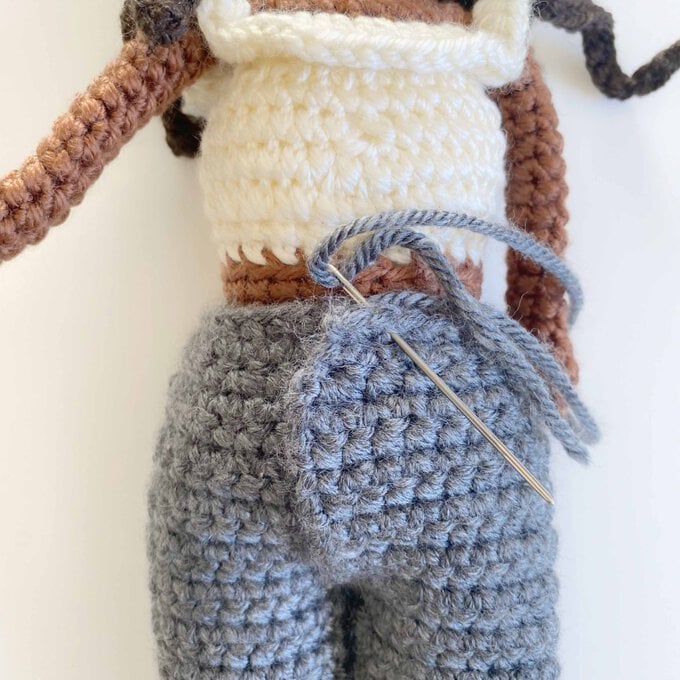
Fold the trousers as shown in the picture lengthwise.
Using the long tails from row 33 sew along the inseams to form the legs of the trousers.
Wear the trousers with the seam in front, overlap edges and sew closed.
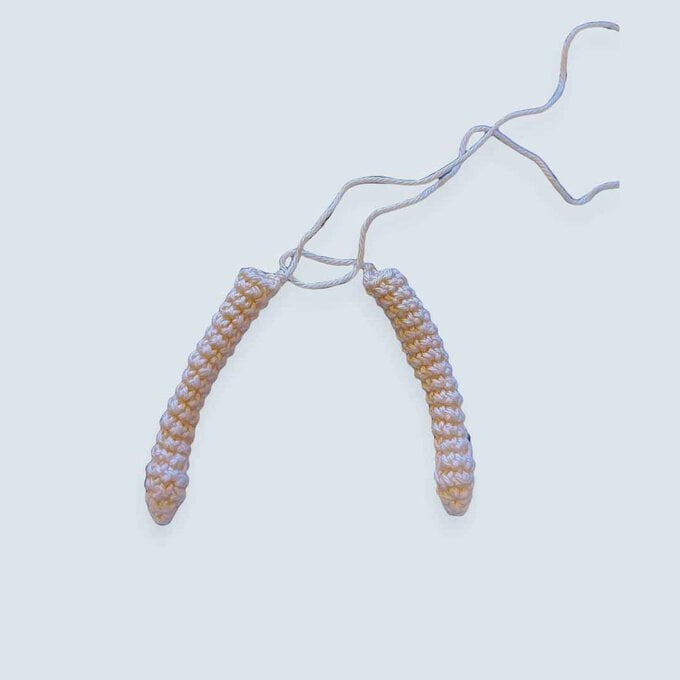
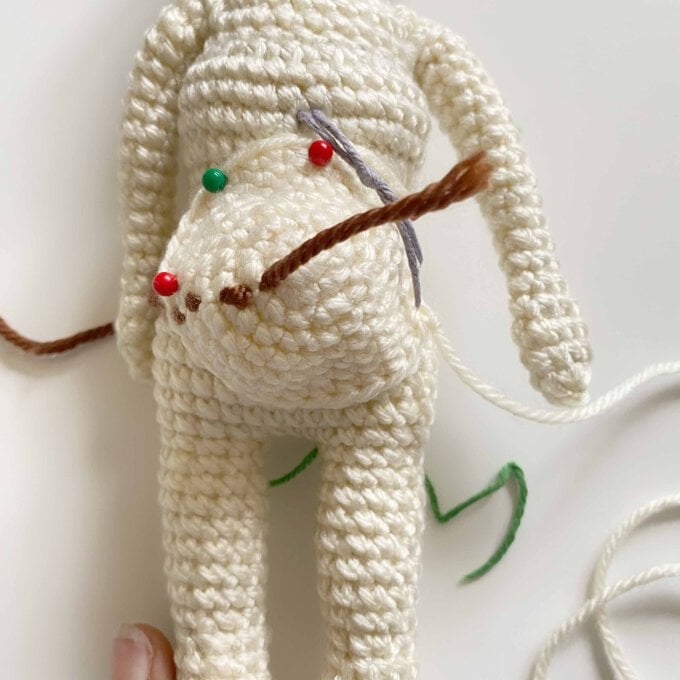
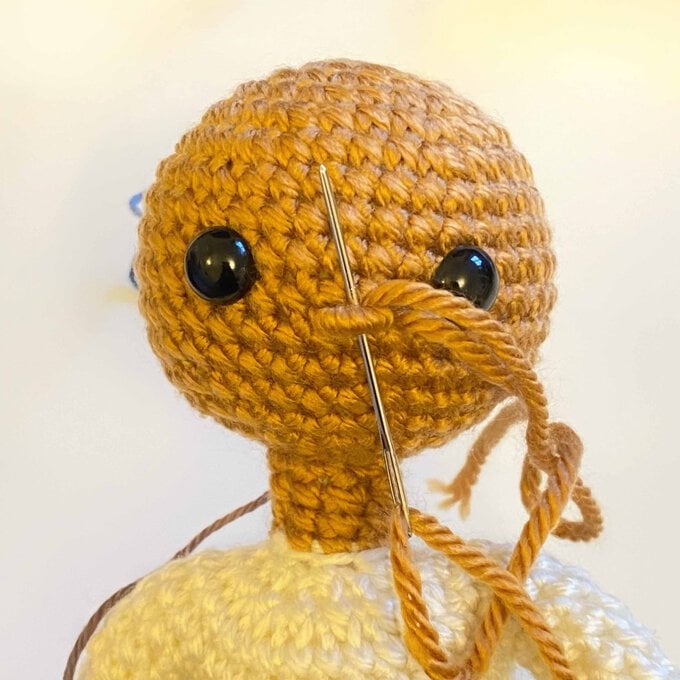
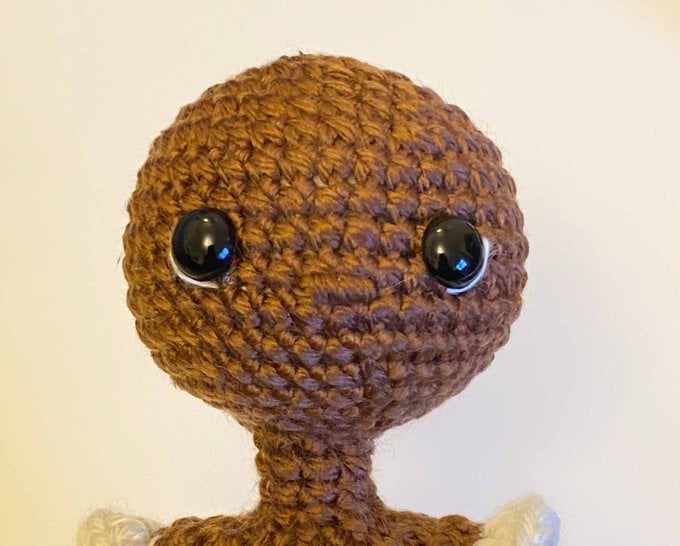
Nose – Colour A: Mahogany
Between round 10-11 of the head, make a couple of horizontal stitches 2 stitches wide.
Now on those stitches wrap the yarn around until all the stitches are covered.
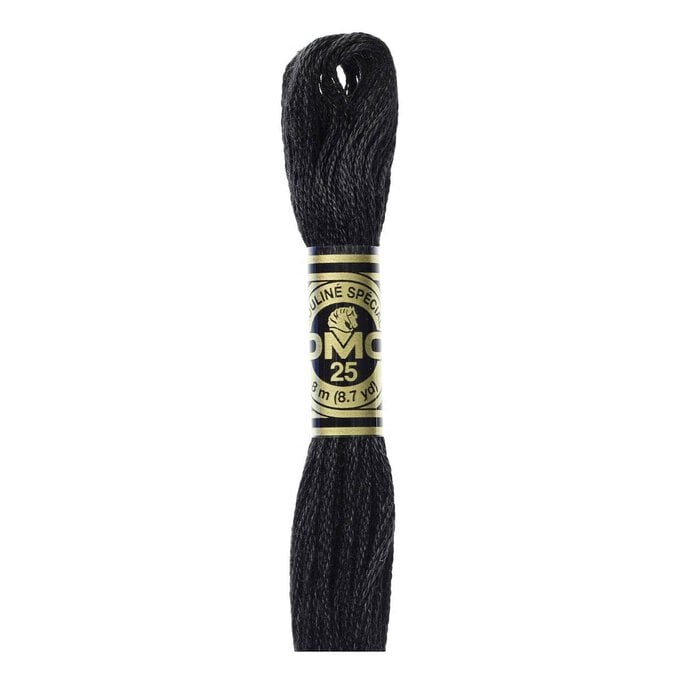
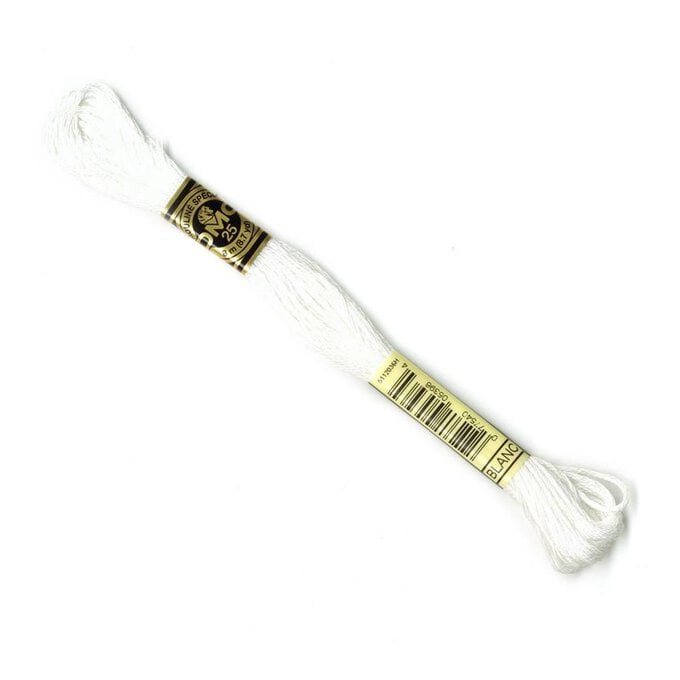
Eyes – Black and white embroidery floss (optional)
Using the pictures a guide, use the white embroidery thread to make the whites of the eyes. With the black embroidery thread sew a line across the top of the eye.


Colour B: Ivory
Crocheted in a continuous round
Round 1: MR 3 SC. [3]
Round 2: Inc x 3. [6]
Round 3: (Inc, SC) x 3. [9]
Round 4: 9 Sc around. [9]
Round 5: (Dec, SC) x 3. [6]
Round 6-10: 6 SC around (5 rounds). [6]
Round 11: Inc 5 SC. [7]
Round 12 – 18: 7 SC around (7 rounds). [7]
Stuff lightly, f/o leaving a long tail.
Colour B: Ivory
Crocheted in a continuous round
Round 1: MR 6 SC. [6]
Round 2: (Inc, SC) x 3. [9]
Round 3-11: 9 Sc around. [9]
Round 12: Dec, 7 SC. [8]
Round 13: (Inc, 3 SC) x 2. [10]
Rounds 14-20: 10 SC around (7 rounds). [10]
f/o leaving a long tail.
Repeat Round 1- 20 for the 2nd Leg, do not fasten off. With the 2nd leg still attached to the hook, Ch 4 then join leg 2 to leg 1 with a SC. Mark this as the start of the next round.
Colour B: Ivory
Crocheted in a continuous round
Round 21: 9 SC around leg 1, 4 SC on one side of the chain, 10 SC around leg 2 and 4 SC on the other side of the chain. [28]
Round 22: 5 SC, Inc, 13 SC, Inc, 8 SC. [30]
Round 23-26: 30 SC around (4 rounds). [30]
Round 27: 5 SC, Dec, 13 SC, Dec, 8 SC. [28]
Round 28: 4 SC, Dec, 12 SC, Dec, 8 SC. [26]
Round 29: 4 SC, Dec, 11 SC, Dec, 7 SC. [24]
Round 30-33: 24 SC around (4 rounds). [24]
Round 34: 5 SC, Inc x 12, 7 SC. [36]
Round 35: 16 SC, Dec x 2, 16 SC. [34]
Round 36: 14 SC, Dec x 2, 16 SC. [32]
Round 37: 32 SC around. [32]
Round 38: 7 SC, Dec x 8, 9 SC. [24]
Now we join the arms to the body
Round 39: 6 SC, 7 SC around 1st arm, 10 SC around front of the body, 7 SC around 2nd arm and 8 SC on the back of the body. [38]
Round 40: 38 SC around. [38]
Round 41: Dec, 34 SC, Dec. [36]
Stuff firmly as you go along, ensure the tops of the arm, shoulder region and neck are stuffed firmly.
Round 42: Dec x 18. [18]
Round 43: Dec x 9. [9]
Round 44-46: 9 SC around. [9]
Stuff firmly, f/o leaving a long tail.
Colour B: Ivory
Crocheted in a continuous round
Round 1: MR 6 SC. [6]
Round 2: Inc x 6. [12]
Round 3: (Inc, SC) x 6. [18]
Round 4: (Inc, 2 SC) x 6. [24]
Round 5: (Inc, 3 SC) x 6. [30]
Round 6: (Inc, 4 SC) x 6. [36]
Rounds 7-12: 36 SC around (6 rounds). [36]
Position eyes between Round 9 and 10. (7 stitches apart).
Round 13: (Dec, 4 SC) x 6. [30]
Round 14: (Dec, 3 SC) x 6. [24]
Round 15: (Dec, 2 SC) x 6. [18]
Round 16: Dec x 9. [9]
Head should be fully stuffed at this point
Attach head to body ensuring eyes and facing forward.
Crocheted in a continuous round
Round 1: MR 6 SC. [6]
Round 2: Inc x 6. [12]
Round 3: (Inc, SC) x 6. [18]
Round 4: (Inc, 2 SC) x 6. [24]
Round 5: (Inc, 3 SC) x 6. [30]
Round 6-7: 30 SC around (2 rounds). [30]
Round 8: 12 SC. when sewing on the belly these 12 sc will be the base of the belly. [30]
f/o leaving a long tail.
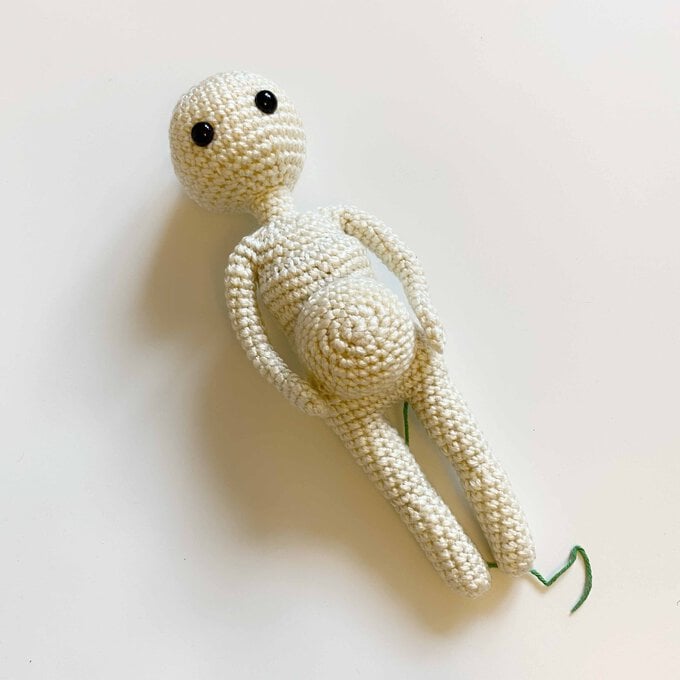
Attaching the Belly:
Sew the belly on to the body with top on Round 35-35 of the body and base on Round 23 of the body.
Crocheted in continuous rounds
Round 1: MR 6 SC. [6]
Round 2: Inc x 6. [12]
Round 3-5: 12 SC around (3 rows). [12]
f/o and weave in ends.
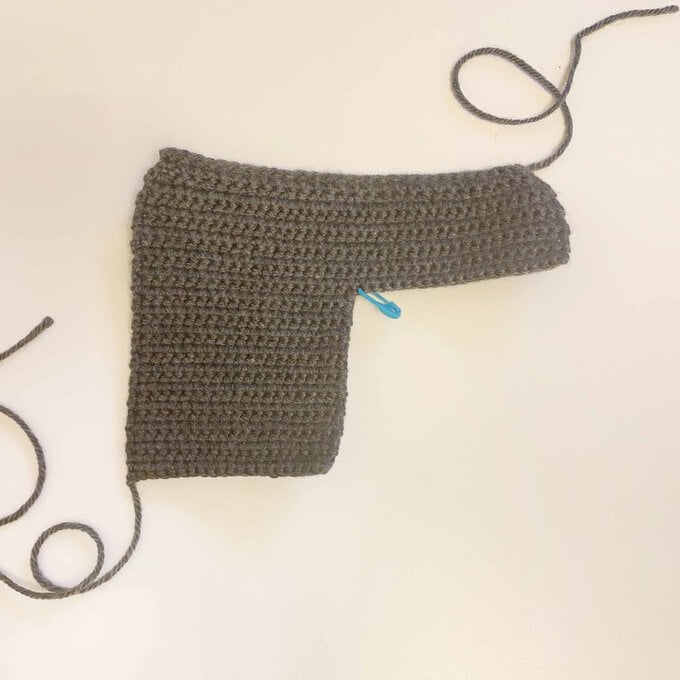
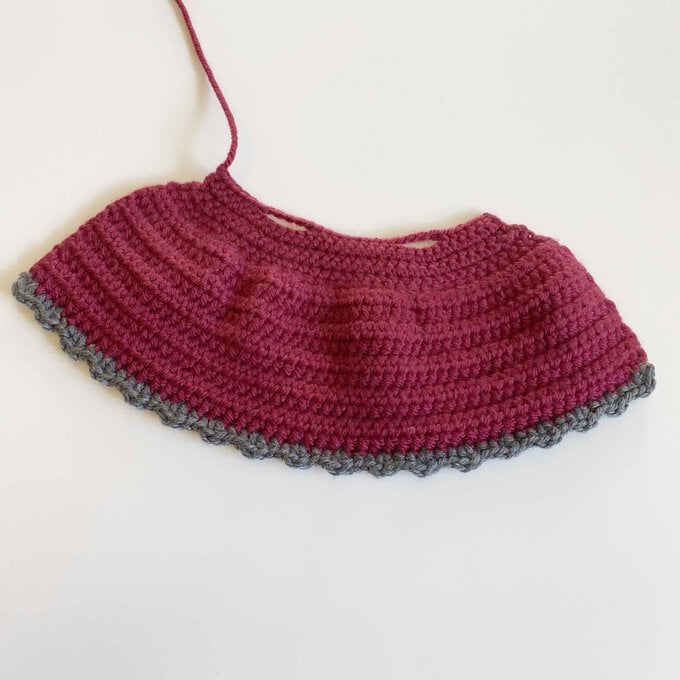
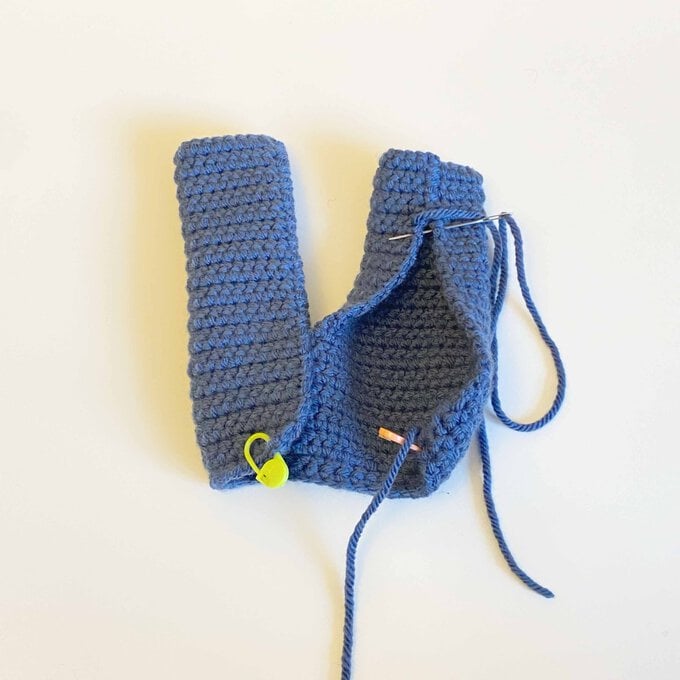
The dress is constructed in two halves, a top and bottom half.
Colour F: Plum
Crocheted in rows
From Rows 2-12, Ch 1 at the end of each row, these are turning chains and not counted in the total number of stitches
Row 1: Ch 37. [37]
Row 2: from the second chain from the hook, 36 SC. [36]
Row 3: (Hdc, Inchdc) x 18. [54]
Row 4-12: 54 Hdc (9 rows). [54]
Change to colour E: Grey
Row 13: SC, (IncDc, 2SC) x 17, IncDc, SC [72]
f/o and weave in ends.
Attach yarn to one end of the base chain of Row1 of the bottom half. Crochet along base chain to form the Top half of the dress

Colour F: Plum
Crocheted in rows
From Rows 1-5, Ch 1 at the end of each row, these are turning chains and not counted in the total number of stitches.
Row 1: 36 SC [36]
Row 2: Dec x 2, 28 SC, Dec x 2 [32]
Row 3-4: 32 SC (2 rows). [32]
Row 5: 6 SC, CH 5, skip 6 stitches, 8 SC, Ch 5, skip 6 stitches, 6 SC. [30]
You should now have 2 arm holes with 5 stitches on the top from the CH5 and 6 stitches on the bottom from the 6 skipped stitches.
f/o leaving a long tail.
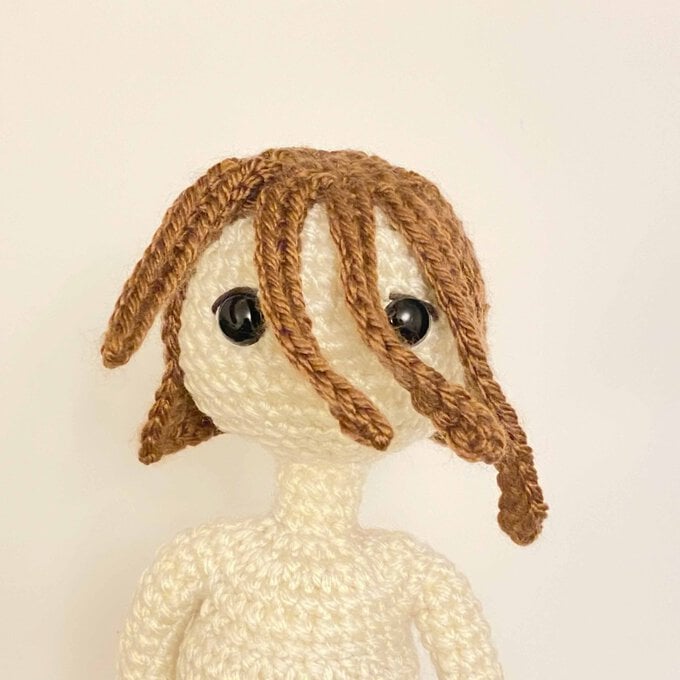
Maddison’s hair is made up of two pieces, a base piece, and a side fringe
Base piece
Colour A: Mahogany
Crocheted in rows
From Rows 2-24, Ch 1 at the end of each row, these are turning chains and not counted in the total number of stitches.
Row 1: CH 15. [15]
Row 2: from the second chain from the hook, 14 SC. [14]
Row 3-24: 14 SC. [14]
Hair: Side fringe
Colour A: Mahogany
Crocheted in continuous rounds
Round 1: MR 6 SC. [6]
Round 2: Inc x 6. [12]
Round 3: Ch 15, on the back of the chain from the second chain from the hook, 14 SC. SC to connect the chain stiches to round 2. Repeat 2 times.
Ch 18, on the back of the chain from the second chain from the hook, 17 SC. f/o leaving long tail
You should now have 4 pieces of hair extending from a circle forming the top piece
Place the base piece in an upside-down U-shape with the top between rounds 1-2 of the head and the bottom on round 4. Stitch the hair unto the head using same colour yarn as the hair.
Attaching the side fringe
For the fringe piece, pin in place as shown in the picture and stitch the side fringe unto the base piece.
Style the side fringe as illustrated and using small stiches secure the style in place.

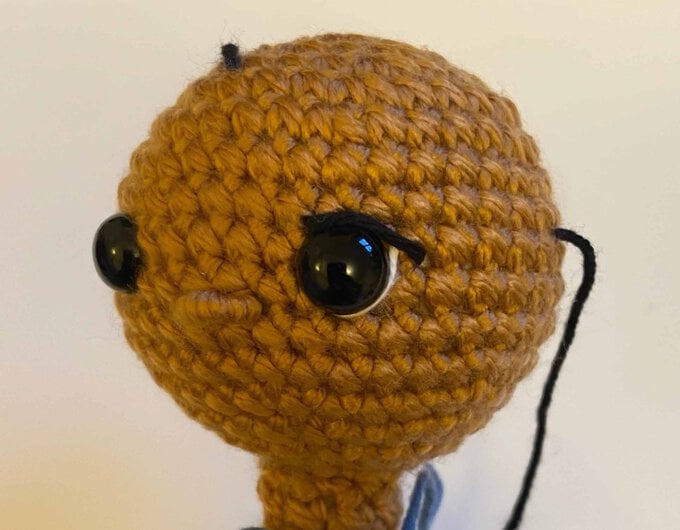
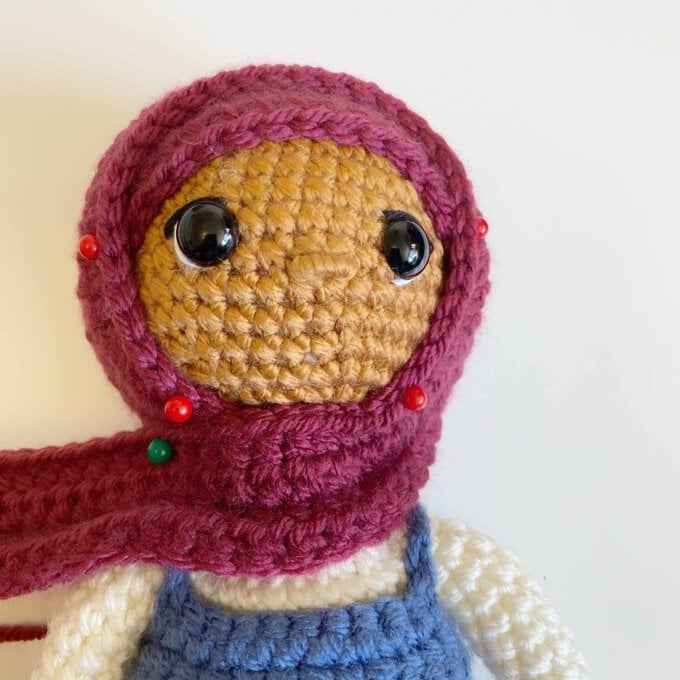
Nose – using - Colour B: Ivory
Between round 10-11 of the head, make a couple of horizontal stitches 2 stitches wide (Picture 1 and 2).
Now on those stitches wrap the yarn around until all the stitches are covered (picture 3).
Eyes – Black and white embroidery floss
Using picture 3and 4 as a guide use the white embroidery thread to make the whites of the eyes. With the black embroidery thread sew a line across the top of the eye.

Colour C: Hazelnut
Crocheted in a continuous round
Round 1: MR 3 SC. [3]
Round 2: Inc x 3. [6]
Round 3: (Inc, SC) x 3. [9]
Round 4: 9 Sc around. [9]
Round 5: (Dec, SC) x 3. [6]
Round 6-8: 6 SC around (3 rounds). [6]
Change to Colour B: Ivory
Round 9: 6 SC around [6]
Round 10: BLO 6 SC around [6]
Round 11: Inc, 5 SC. [7]
Round 12 – 18: 7 SC around (7 rounds). [7]
Stuff lightly, f/o leaving a long tail.
For the sleeve detail on the Arms (in colour B: Ivory)
From the front loops left on Round 10,
Round 1: (IncHdc, Hdc) x 3. [9]
Round 2-4: 9 Hdc around (3 rounds). [9]
f/o and weave in ends.
Colour C: Hazelnut
Crocheted in a continuous round
Round 1: MR 6 SC. [6]
Round 2: (Inc, SC) x 3. [9]
Round 3-11: 9 Sc around. [9]
Round 12: Dec, 7 SC.
Round 13: (Inc, 3 SC) x 2.
Rounds 14-20: 10 SC around (7 rounds).
f/o leaving a long tail.
Repeat Round 1- 20 for the 2nd Leg, do not fasten off. With the 2nd leg still attached to the hook, Ch 4 then join leg 2 to leg 1 with a SC. Mark this as the start of the next round.
Colour C: Hazelnut
Crocheted in a continuous round
Round 21: 9 SC around leg 1, 4 SC on one side of the chain, 10 SC around leg 2 and 4 SC on the other side of the chain. [28]
Round 22: 5 SC, Inc, 13 SC, Inc, 8 SC. [30]
Round 23-26: 30 SC around (4 rounds). [30]
Change to Colour B: Ivory
Round 27: 5 SC, Dec, 13 SC, Dec, 8 SC. [28]
Round 28: 4 SC, Dec, 12 SC, Dec, 8 SC. [26]
Round 29: 4 SC, Dec, 11 SC, Dec, 7 SC. [24]
Round 30-33: 24 SC around (4 rounds). [24]
Round 34: 5 SC, Inc x 12, 7 SC. [36]
Round 35: 16 SC, Dec x 2, 16 SC. [34]
Round 36: 14 SC, Dec x 2, 16 SC. [32]
Round 37: 32 SC around. [32]
Round 38: 7 SC, Dec x 8, 9 SC. [24]
Now we join the arms to the body
Round 39: 6 SC, 7 SC around 1st arm, 10 SC around front of the body, 7 SC around 2nd arm and 8 SC on the back of the body. [38]
Round 40: 38 SC around. [38]
Round 41: Dec, 34 SC, Dec. [36]
Stuff firmly as you go along, ensure the tops of the arm, shoulder region and neck are stuffed firmly.
Round 42: Dec x 18. [18]
Change to Colour C: Hazelnut
Round 43: Dec x 9. [9]
Round 44-46: 9 SC around. [9]
Stuff firmly, f/o leaving a long tail.

Colour C: Hazelnut
Crocheted in a continuous round
Round 1: MR 6 SC. [6]
Round 2: Inc x 6. [12]
Round 3: (Inc, SC) x 6. [18]
Round 4: (Inc, 2 SC) x 6. [24]
Round 5: (Inc, 3 SC) x 6. [30]
Round 6: (Inc, 4 SC) x 6. [36]
Rounds 7-12: 36 SC around (6 rounds). [36]
Position eyes between Round 9 and 10. (7 stitches apart).
Round 13: (Dec, 4 SC) x 6. [30]
Round 14: (Dec, 3 SC) x 6. [24]
Round 15: (Dec, 2 SC) x 6. [18]
Round 16: Dec x 9. [9]
Head should be fully stuffed at this point
Attach head to body ensuring eyes and facing forward.
Colour B: Ivory
Crocheted in continuous rounds
Round 1: MR 6 SC. [6]
Round 2: Inc x 6. [12]
Round 3-5: 12 SC around (3 rows). [12]
f/o and weave in ends.
The jumpsuit is constructed in two halves, a top and bottom section
Jumpsuit: Bottom section
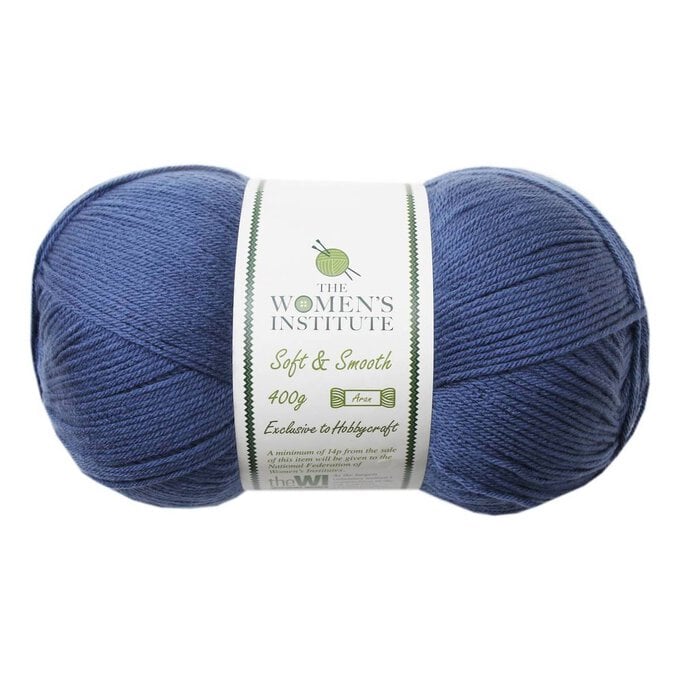
Colour G: Denim
Crocheted in rows
From Rows 2-33, Ch 1 at the end of each row, these are turning chains and not counted in the total number of stitches
Row 1: Ch 30. [30]
Row 2: from the second chain from the hook, 29 SC. [29]
Row 3: 29 SC. [29]
Row 4: (Inc, 2 SC) x 4
(Inc, SC) x 2,
Inc,
(2 SC, Inc) x 4 [40]
Row 5-13: 40 SC (9 rows). [40]
Now we crochet the legs of the jumpsuit
Row 14: 20 SC, mark stitch 21 [20]
Row 15-33: 20 SC. [20]
f/o leaving a long tail.
From the stitch marked on row 14,
Repeat row 15-33 to make the second leg of the trousers.
Attach yarn to one end of the base chain of Row1 of the bottom half. Crochet along base chain to form the Top section of the jumpsuit
Jumpsuit: Top section
Colour G: Denim
Crocheted in rows
From Rows 1-8, Ch 1 at the end of each row, these are turning chains and not counted in the total number of stitches
Row 1-7: 29 SC. [29]
Row 8: 4 SC, CH 6, skip 5 stitches, 11 SC, Ch 6, skip 5 stitches, 4 SC.
f/o leaving a long tail. [31]
You should now have 2 arm holes with 6 stitches on the top from the CH 6 and 5 stitches on the bottom from the 5 skipped stitches.

Fold the trousers as shown in the picture lengthwise.
Using the long tails from row 33 sew along the inseams to form the legs of the jumpsuit.
Wear Laila the jumpsuit with the open edges at the back. Sew closed the open edges


Nose – using colour C: Hazelnut
Between round 10-11 of the head, make a couple of horizontal stitches 2 stitches wide.
Now on those stitches wrap the yarn around until all the stitches are covered.
Eyes – Black and white embroidery floss
Using the pictures as a guide use the white embroidery thread to make the whites of the eyes. With the black embroidery thread sew a line across the top of the eye.


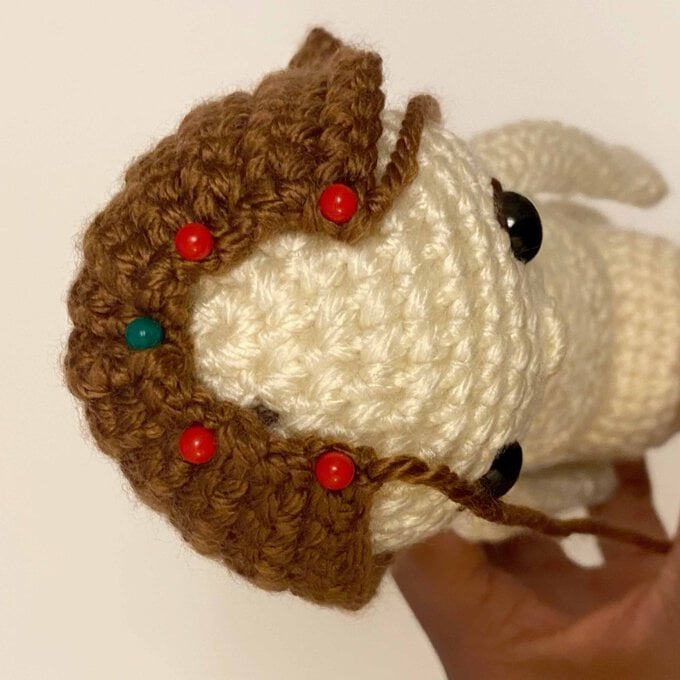
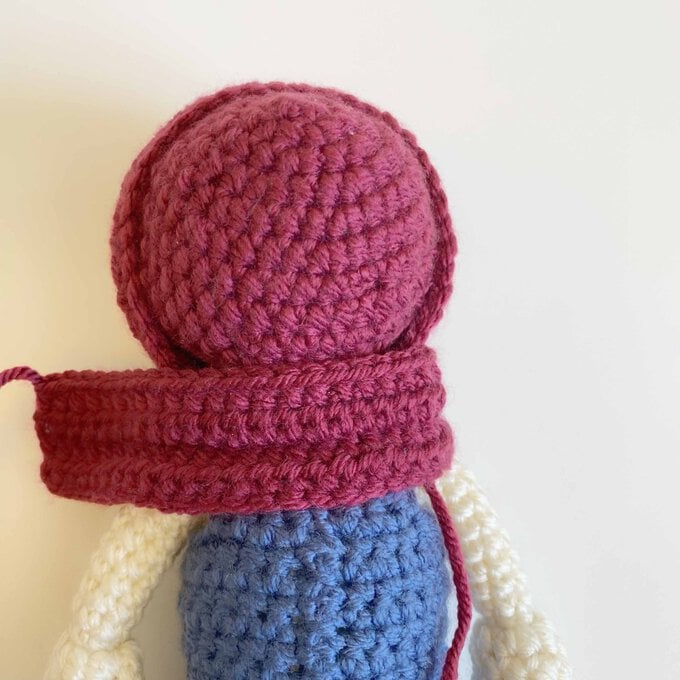
Laila’s hijab is made up of two pieces, a top section, and base piece
Hijab: Top section
Colour F: Plum
Crocheted in rows
From Rows 2-5, Ch 1 at the end of each row, these are turning chains and not counted in the total number of stitches
Row 1: CH 67. [67]
Row 2: from the second chain from the hook, 66 Hdc. [66]
Row 3-5: 66 Hdc. [66]
f/o leaving a long tail.
Hijab: Base Piece- Colour F: Plum
Crocheted in continuous rounds
Round 1: MR 6 Hdc. [6]
Round 2: IncHdc x 6. [12]
Round 3: (IncHdc, hdc) x 6. [18]
Round 4: (IncHdc, 2 hdc) x 6. [24]
Round 5: (IncHdc, 3 hdc) x 6. [30]
Round 6: (IncHdc, 4 hdc) x 6. [36]
Round 7-10: 36 Hdc around. f/o [36]
Place the base piece on the head like a hat and sew down to secure
Attaching the top section:
For the top piece, pin in place as shown in the picture, using a similar coloured yarn, sew in place.
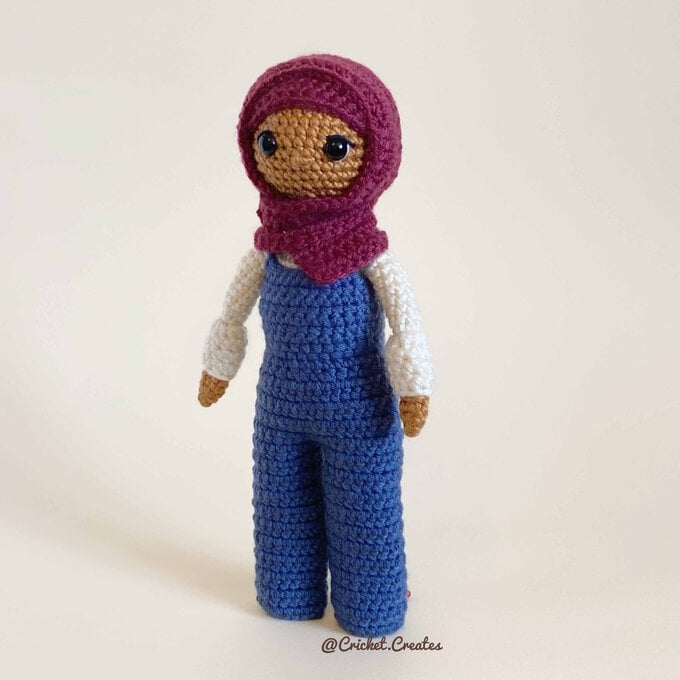
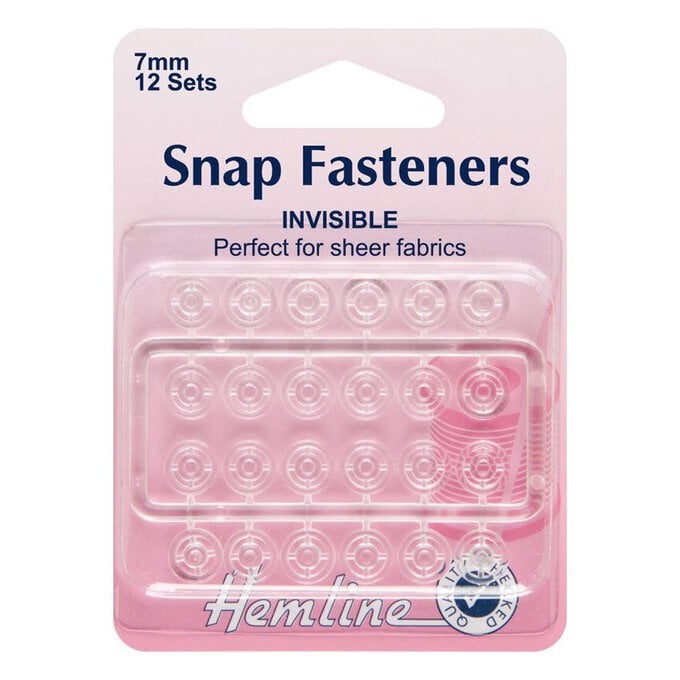
On each Doll, sew on a pair of hemline invisible fasteners to the arms.
Note: Ensure they are paired so one doll can clip into the hand of the other.
Related Products