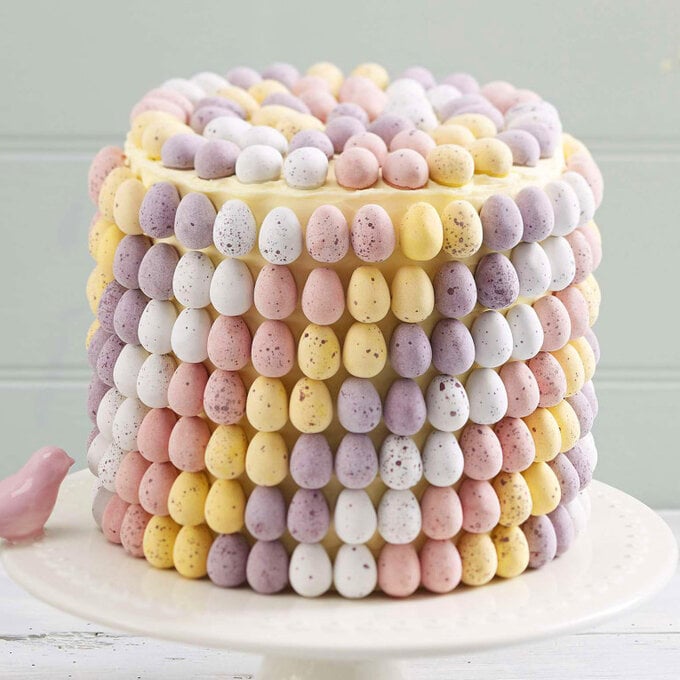
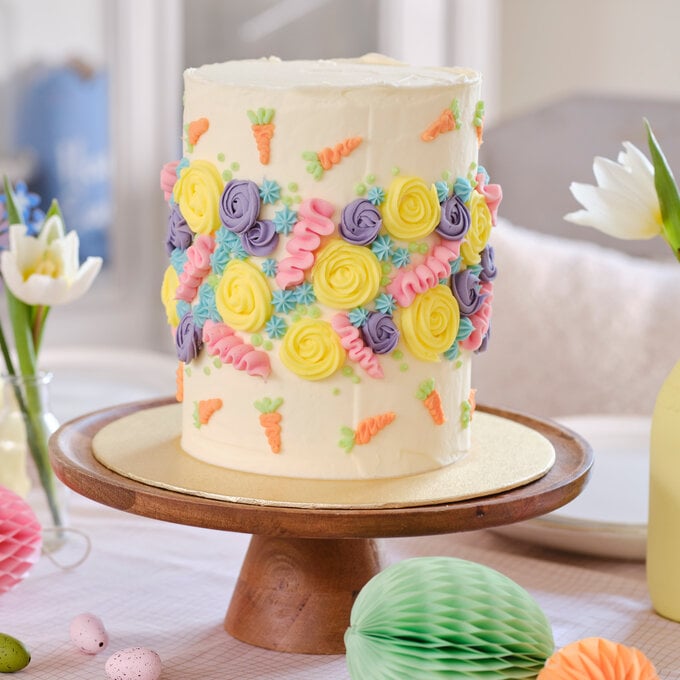
How to Make a Carrot Fault Line Cake
Fault line cakes are a huge trend in cake decorating, so why not try your hand! Create the perfect Easter showstopper with a fault line design. It may seem hard to achieve at first, but the process is super easy once you are in the know how!
To learn how to make a fault line cake, follow our step-by-step guide. The best thing about these cakes is that the base steps are always the same, so once you know the basics, your options for decoration are endless.
You will need
Subtotal
Is $38.00
Subtotal
Is $ 12.00
Subtotal
Is $ 4.49
Subtotal
Is $ 3.49
* Wooden Spoon 20cm 4 Pack
* PME Plain Edge Side Scraper
* PME Extra Tall Side Scraper
* Renshaw Ready to Roll Jet Black Icing 250g
* Renshaw Rose Pink Flower and Modelling Paste 250g
* Renshaw White Flower and Modelling Paste 250g
* Rainbow Dust Metallic Dark Gold Food Paint 25ml
* Silver 10 Inch Round Cake Drum
* Modelling Tools 8 Pack
* Squires Kitchen Edible Glue 25g
* Nielsen Massey Pure Orange Extract
* Wilton Straight Spatula 11 Inches
* Cake Star Curved Leaf Plunger Cutters 3 Pack
* Cocktail Sticks
Chocolate cake ingredients:
* 16oz caster sugar
* 160z margarine or soft butter
* 8 medium eggs
* 11oz self-raising flour
* 5oz cocoa
* 2 tsp baking powder
* Grated zest of 3 oranges – and juice of ½
* 8x chocolate cookies (Oreos)
Chocolate ganache ingredients:
* 600ml double cream
* 600g dark chocolate
* 1tsp orange extract if wished

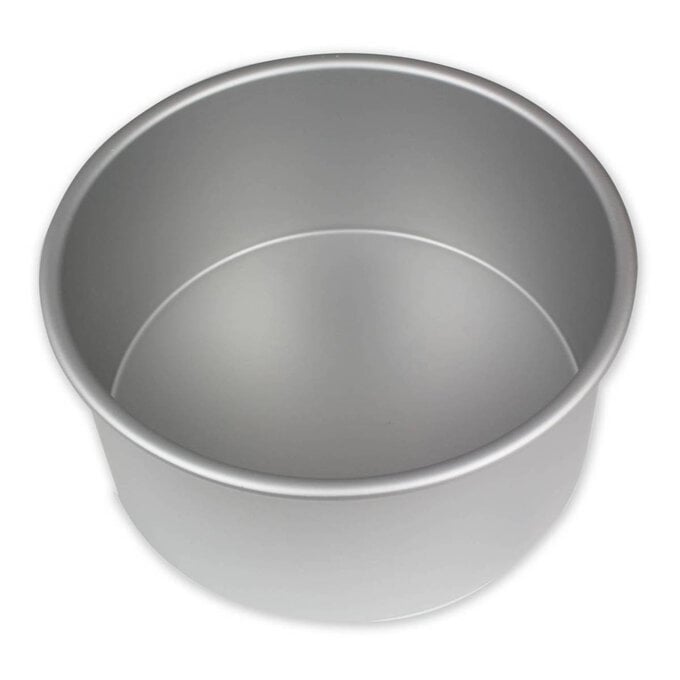
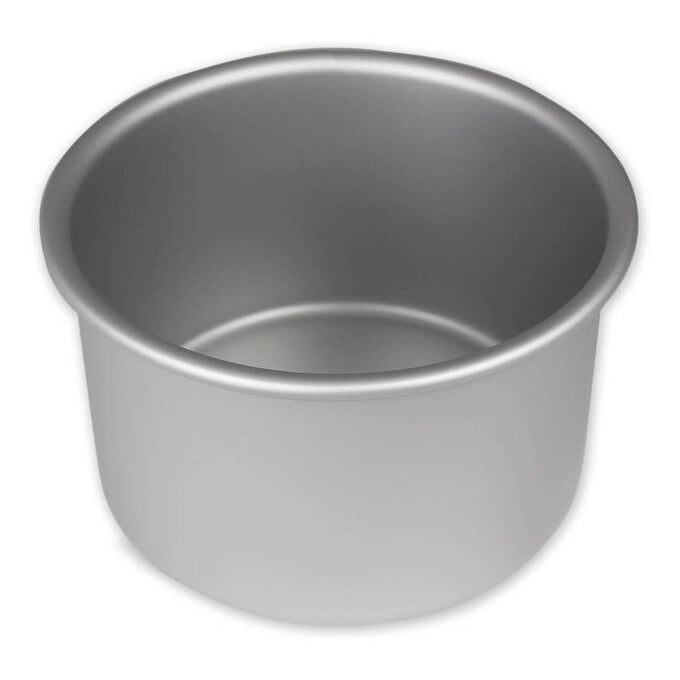
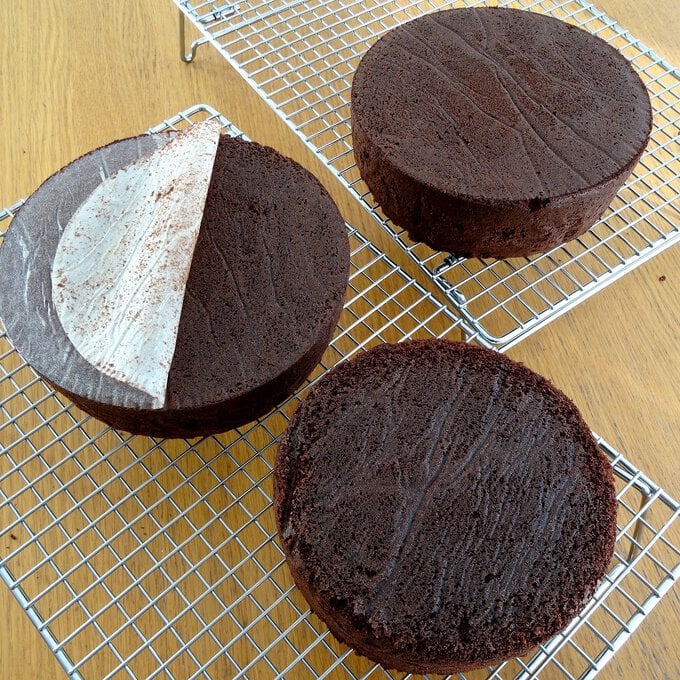
Preheat the oven to 170°C fan. You will need 2x 7” round cake tins and 1x 6” round cake tin. Line the base of the tins with circles of baking paper and line the sides with strips of baking paper.
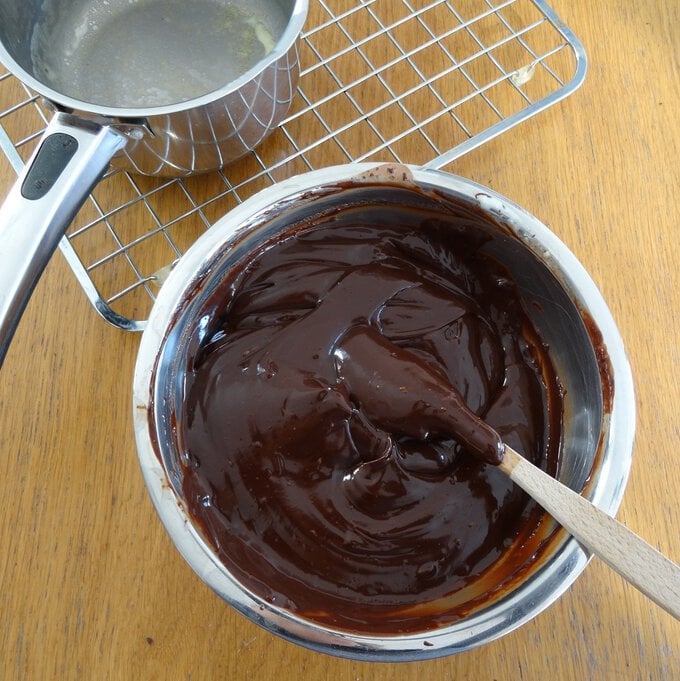
Break the chocolate up into a heatproof bowl. Heat the cream in a pan until it just starts to come up to the boil. Pour it over the chocolate and leave it to sit for a couple of minutes.

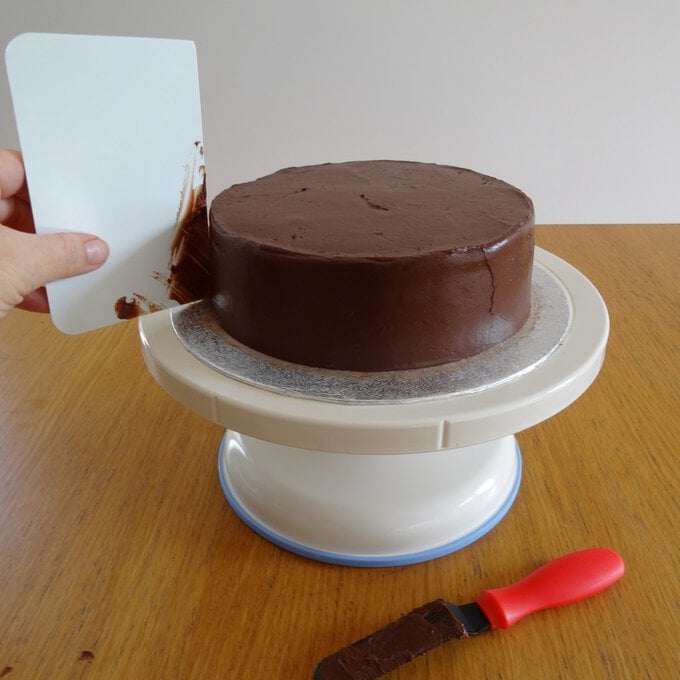
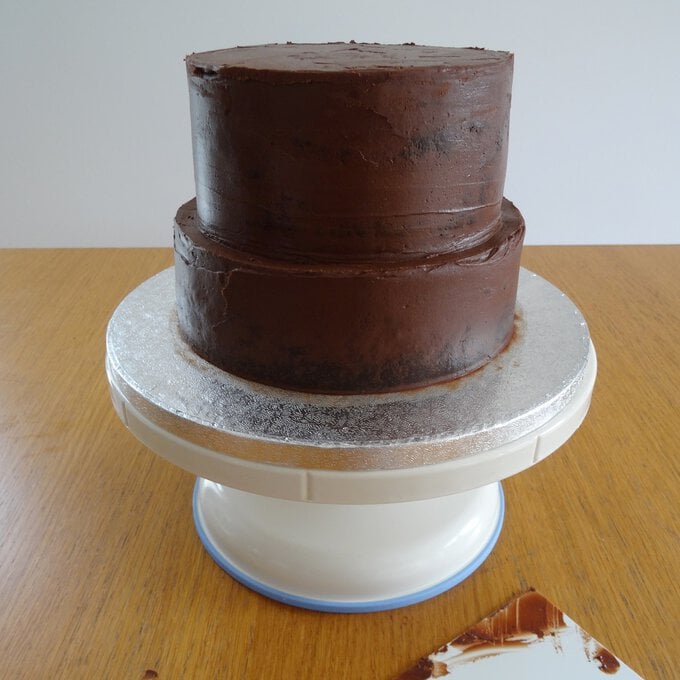
Level the 3 sponge cakes by cutting off any domed tops. Stick one of the 7” cakes to a 10” cake board with a blob of the ganache – this will be the base cake. Cover the sponge with ganache and smooth the top and sides with a scraper – use a cake turntable to help with this. Chill the cake in the fridge.

Put the other 7” and 6” cakes on boards, but don't stick them down as they will need to be removed from their boards. Cover them both with ganache and smooth in the same way.
Chill all the cakes in the fridge for 30-60 minutes until the ganache has hardened before moving onto the next step.
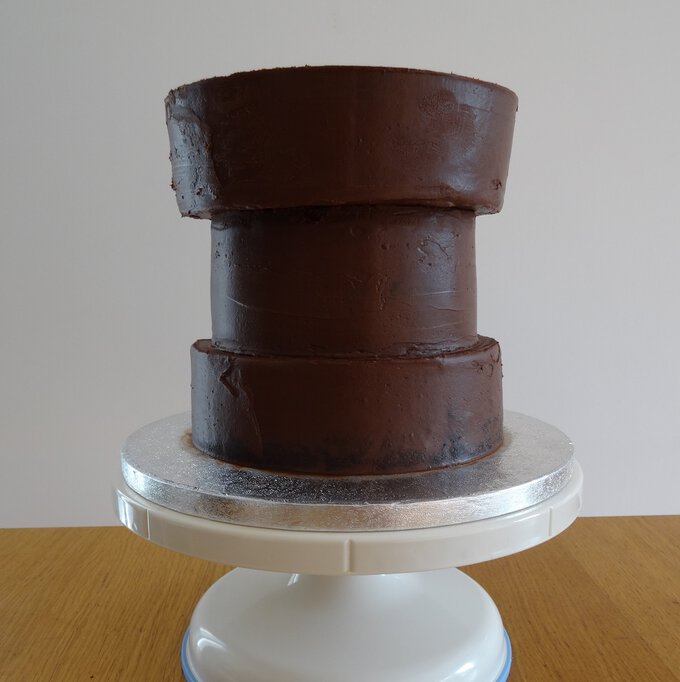
Put a thin layer of ganache on the top of the base cake and sit the 6” cake on top, making sure it is central. Put a thin layer of ganache on top of the 6” cake and invert the final 7” cake on top so that the base of the 7” cake is now on top. Cover the exposed cake top with ganache and smooth with the scraper. Put the assembled cake back into the fridge to set for another 30 minutes.
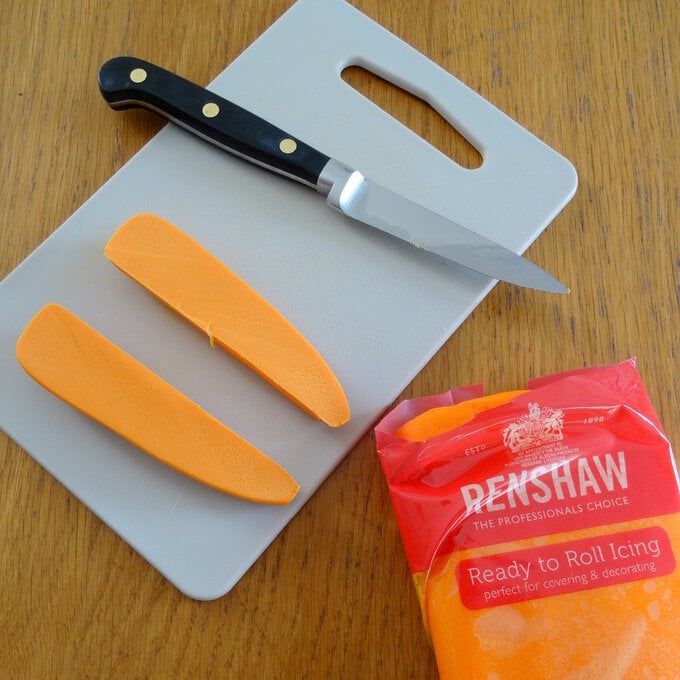
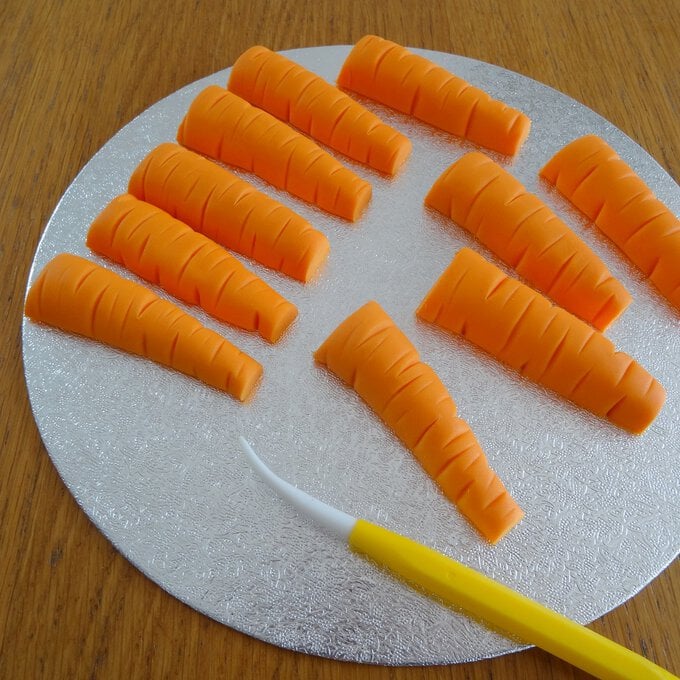
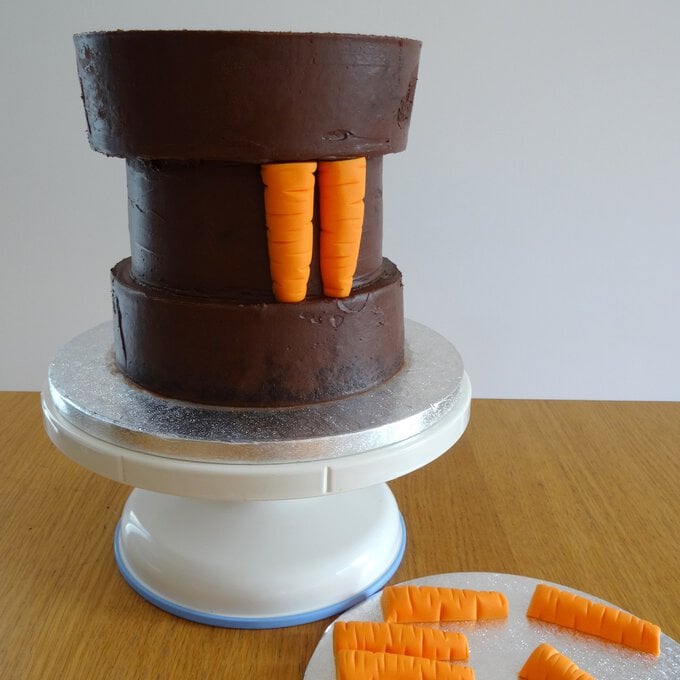
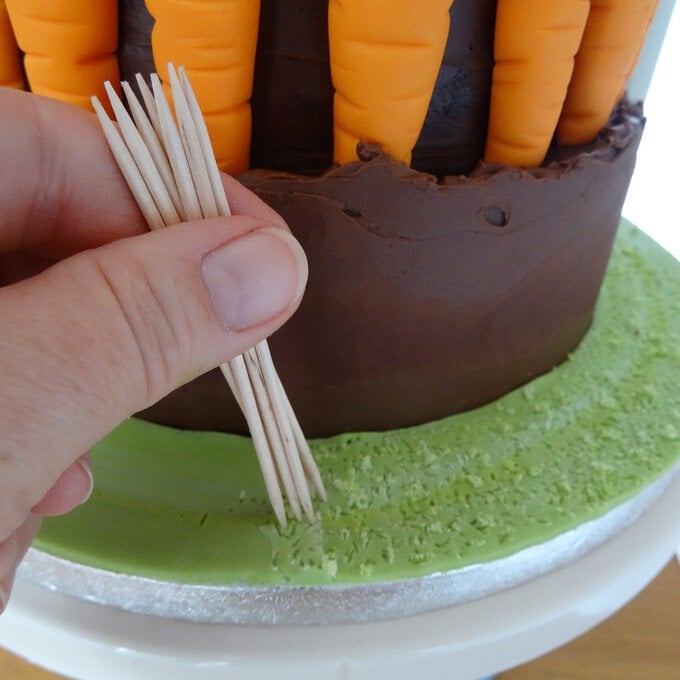
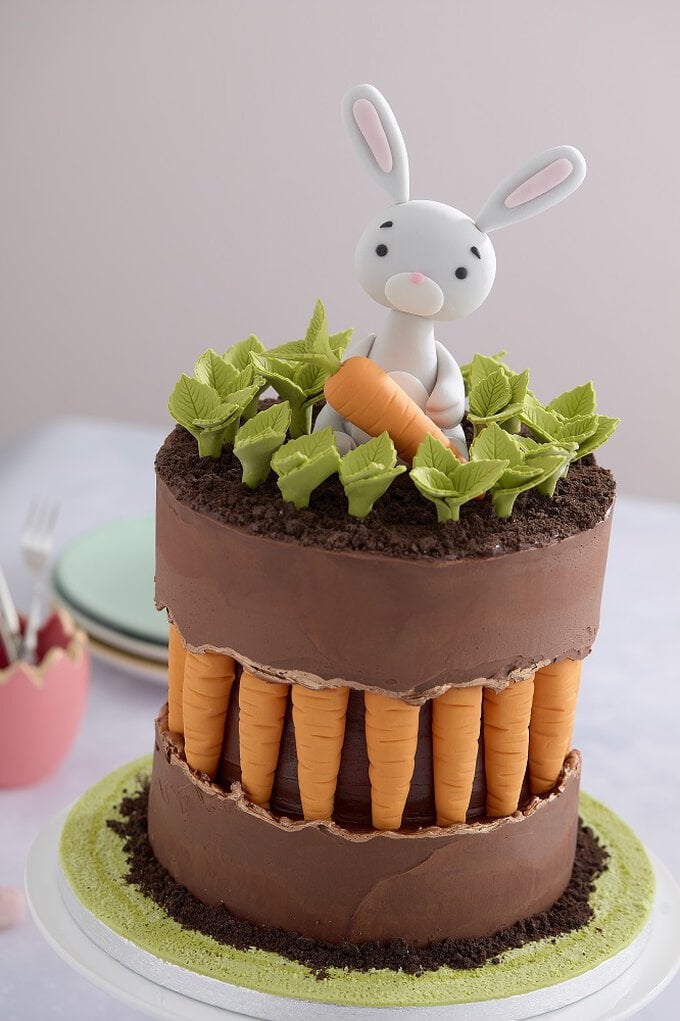
Use the orange icing to make some carrots – you will need approximately 12 – 16. Slice each carrot in half lengthways and trim them to fit into the fault line gap of your cake. Use the veiner tool to score ridges into the carrots to give them a realistic look.
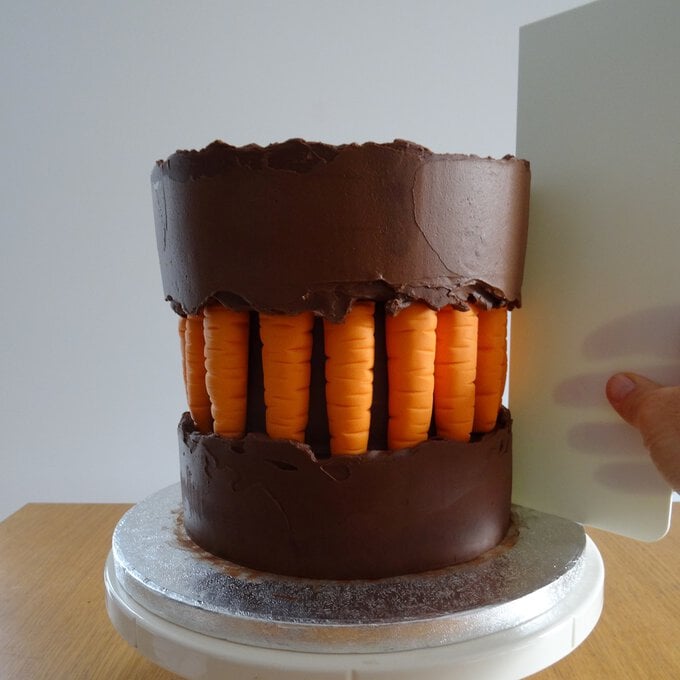
Stick the carrots in place around the middle of the cake – use a little ganache to stick if needed.
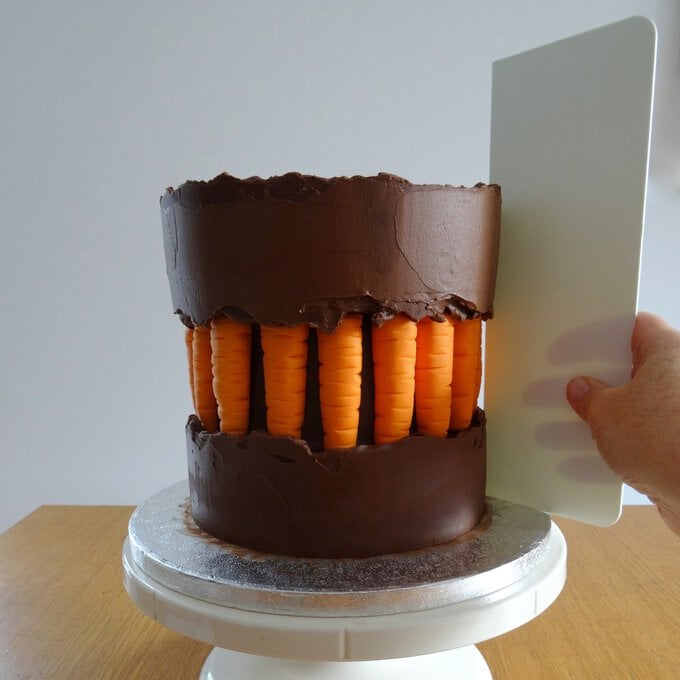
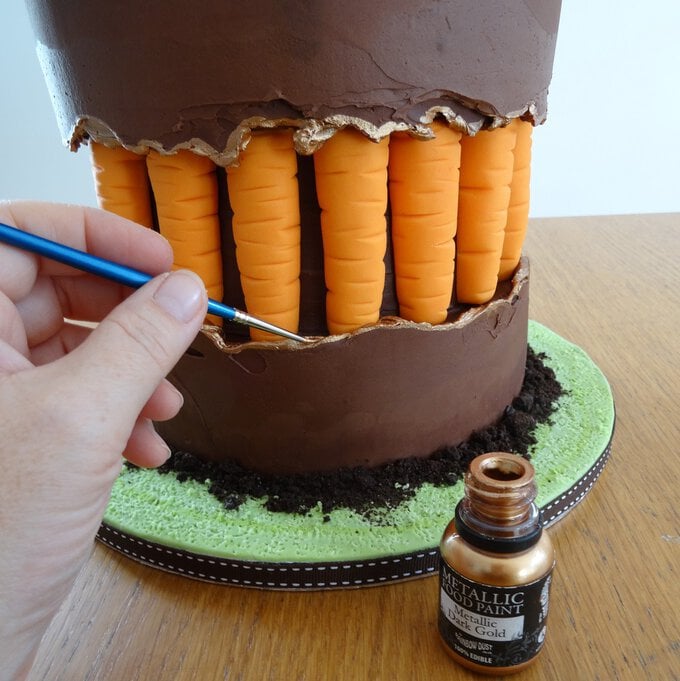
Put a thick layer of ganache on the top and bottom cakes, slightly overlapping the carrots. Make the edges of the fault line rough and uneven. Scrape the sides of the cake smooth with the tall scraper and chill once more.
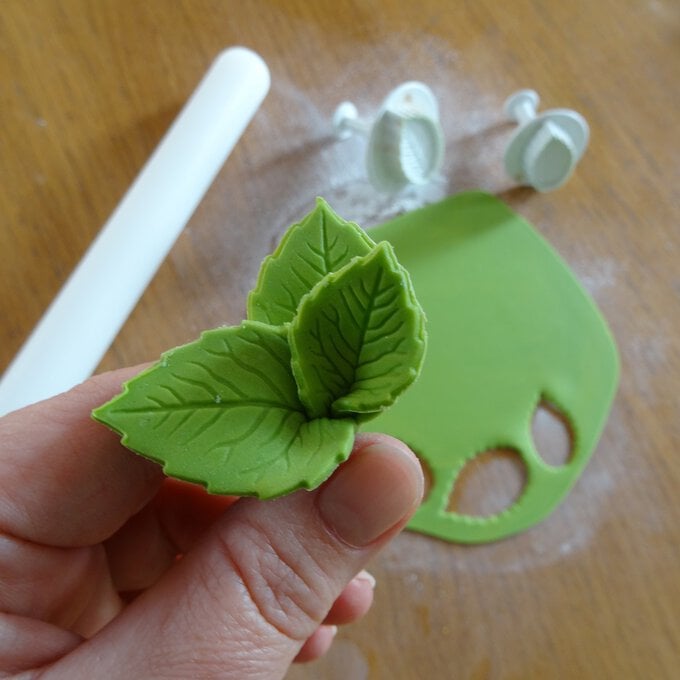
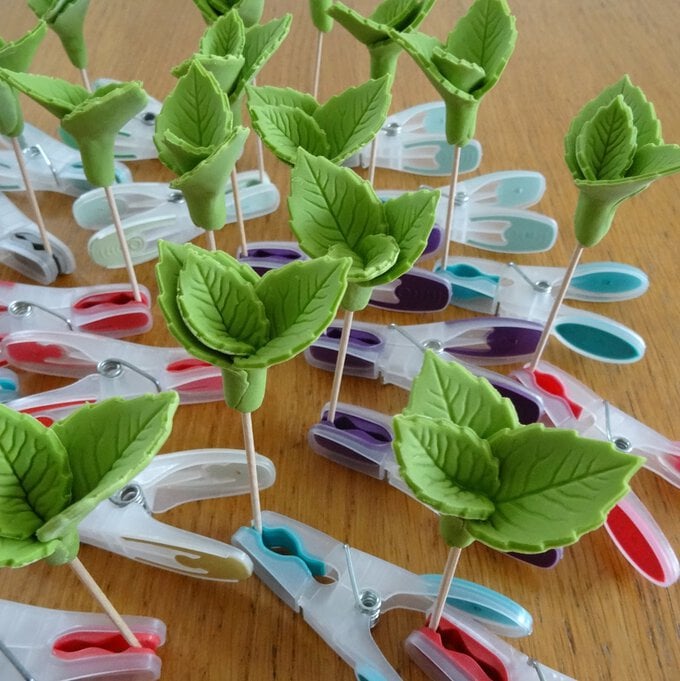
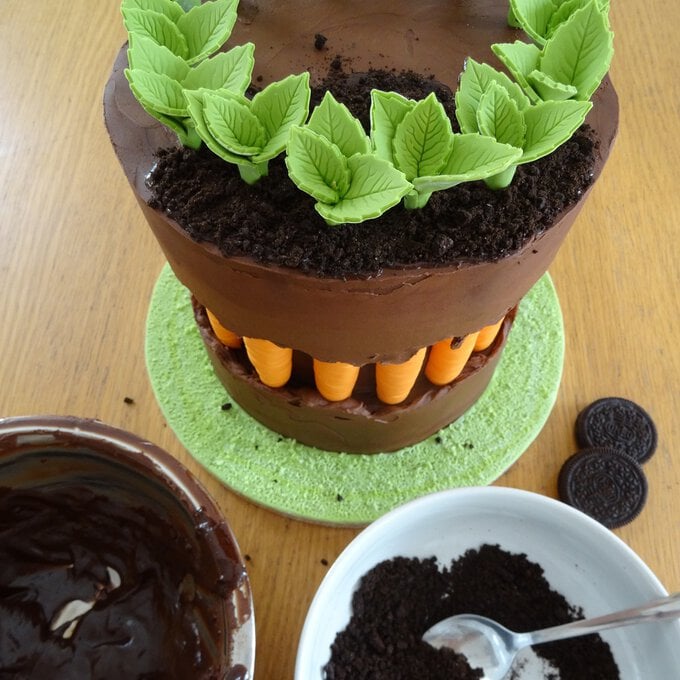
To make the carrot tops roll out green modelling paste 2mm thick. Use the leaf plunger cutters to cut out 1 small and 2 large leaves. Pinch the small leaf at the base to curl it inwards and wrap a large leaf around it, sticking it with a little water. Wrap the third leaf around in the same manner.
Insert the end of a wooden cocktail stick that has been dipped in edible glue into the base of the leaves. Repeat another 12 – 16 times. Dry the leaves upright – you can stand them up using pegs.
Roll out a strip of green icing that is long enough to wrap around the cake to cover the cake board. Secure it in place with water and trim the edges

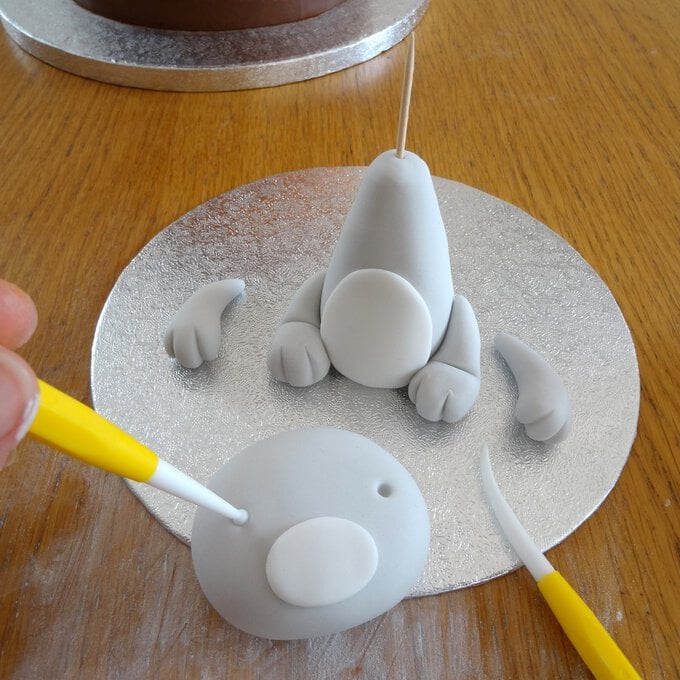
Make a cute bunny to sit atop your cake using pale grey modelling paste (I used white with a little black icing kneaded in). Start with a cone shape for the body and a large round head. Give your bunny a white tummy and snout. Roll 4 small cones for the arms and legs and use the veiner tool to add in fingers and toes.
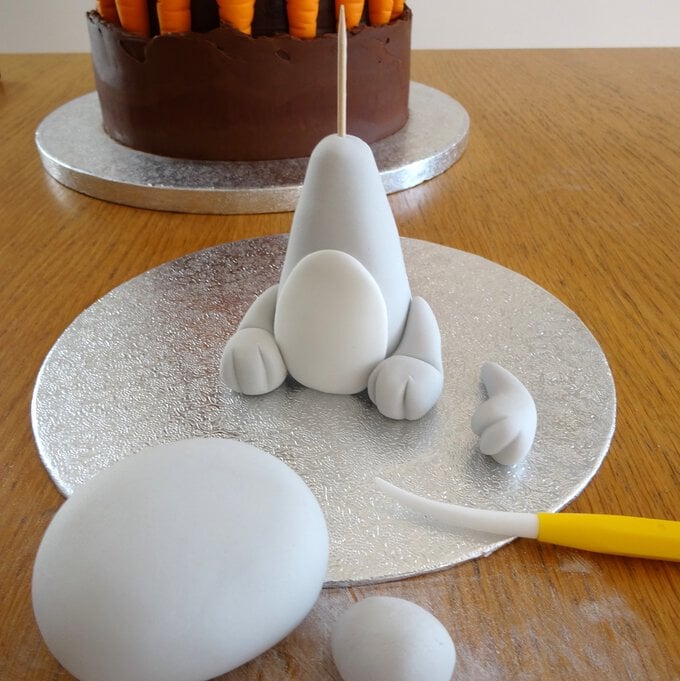
Use a tiny ball tool to add eye sockets and fill with tiny black balls of icing for the eyes. Add eyebrows and a pink nose. Attach the arms and legs with water or edible glue.
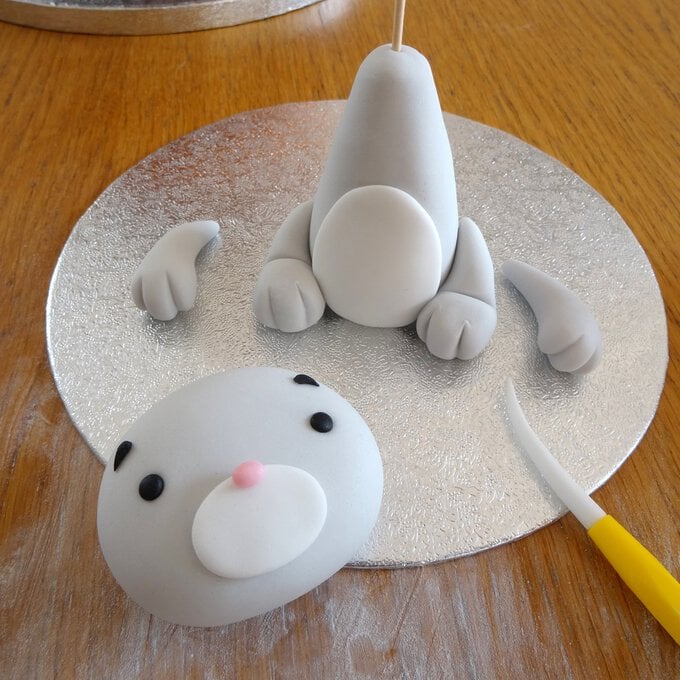
Insert a wooden cocktail stick covered with edible glue into the top of the body so that 1” protrudes from the top of the body. Stick the head onto the stick. Make 2 long ears and insert half a cocktail stick into the base of each ear. Insert these into the top of the head. Leave your bunny to dry and harden

To finish your cake, cover the top of the cake with a thin layer of melted ganache and crushed chocolate cookie crumbs and add more crumbs around the base of the cake. Insert the leaves (with the sticks) into the top of the cake in a ring around the edge and sit your bunny in the middle. Give your bunny a carrot to hold, complete with leafy top.
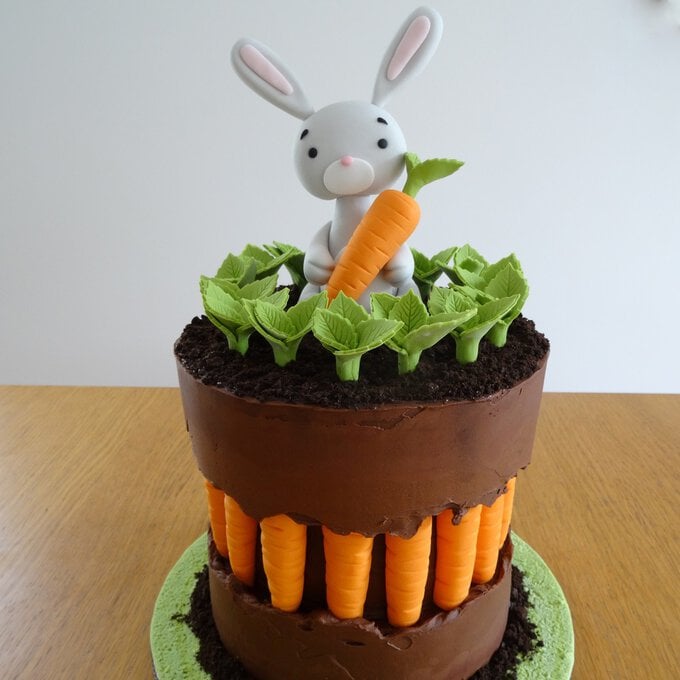
You can further enhance the fault line by painting the edges with gold edible paint.
Related Products