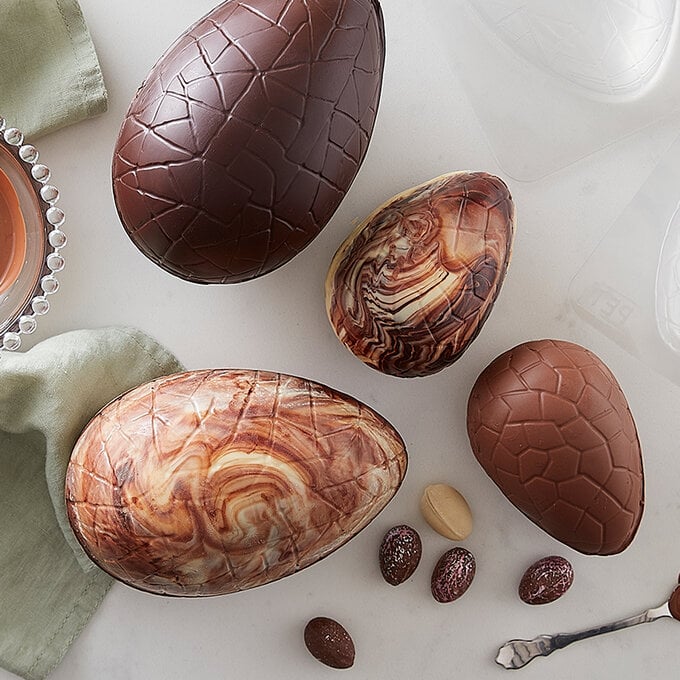
How to Make Marbled Chocolate Eggs
Create beautiful, marbled chocolate eggs this Easter with our step-by-step guide. These moreish sweet treats can be made with your favourite chocolate combinations for an indulgent treat that everyone will love.
This marbling technique works well for any size egg – big or small – and you only need a handful of ingredients to create these unique chocolate eggs.
Project and instructions by Rose Chocolates
You will need

Subtotal
Is $ 1.49
* Milk Chocolate
* White Chocolate
* Dark Chocolate
* Chocolate Egg Moulds (Small, Medium and Large)
* Heatproof Bowls x3
* Silicone Spoon
* A Teaspoon

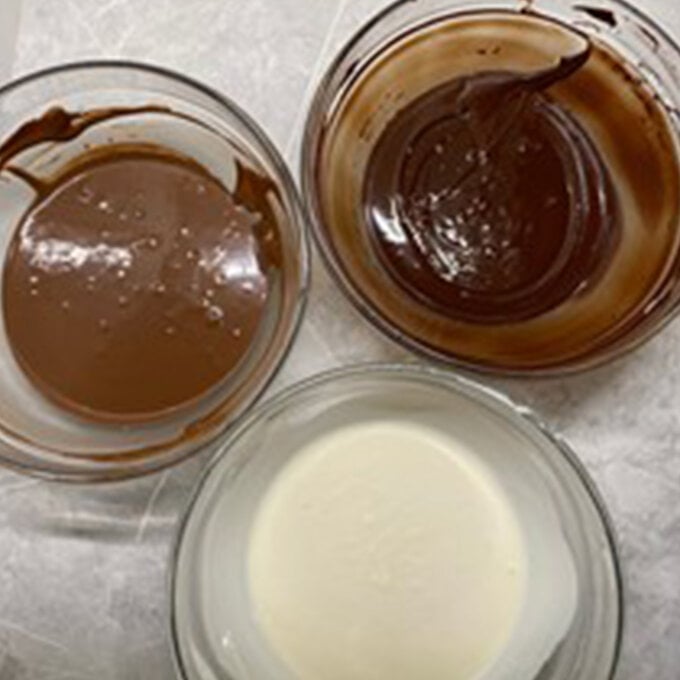
Divide 300g of milk, white and dark chocolate into three bowls. Melt each chocolate as per instructions on the packet.
Melt in the microwave using short 15 second intervals.
Stir after each interval and make sure it's glossy and completely melted.
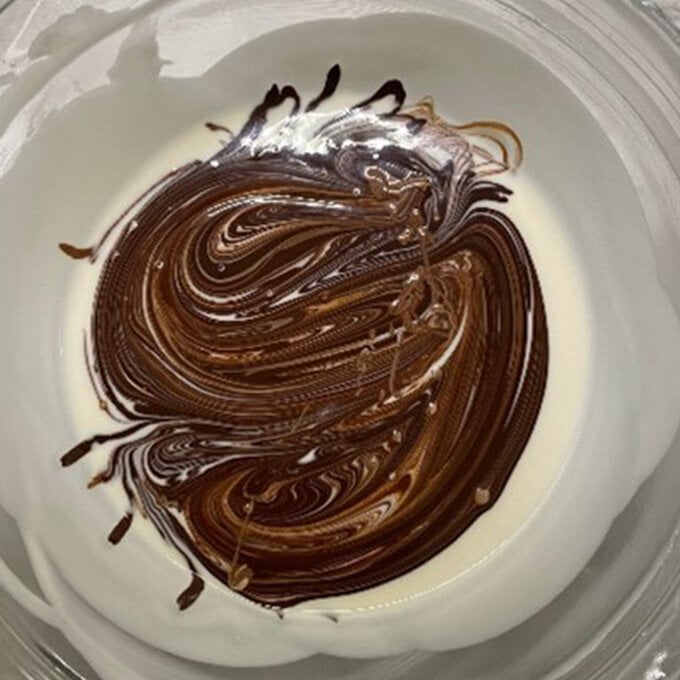
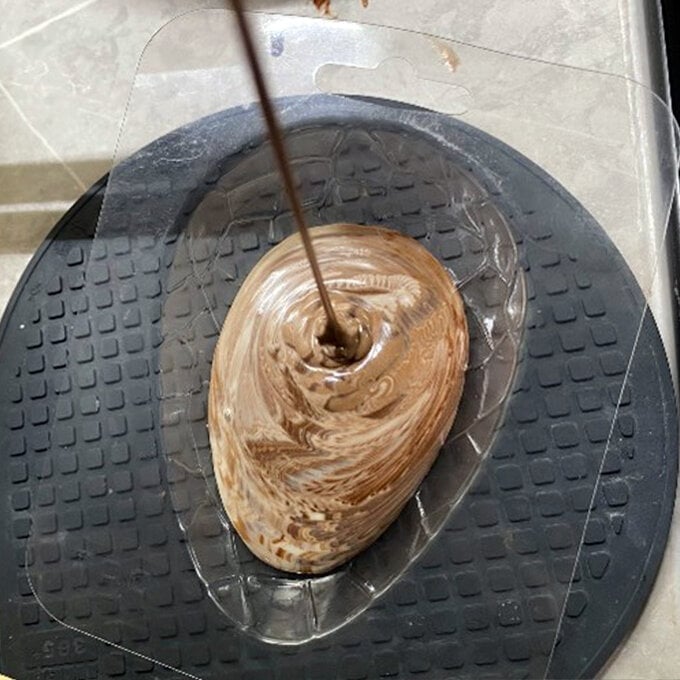
In the bowl of white chocolate use a large spoon or spatula to add two spoons worth of dark and milk chocolate.
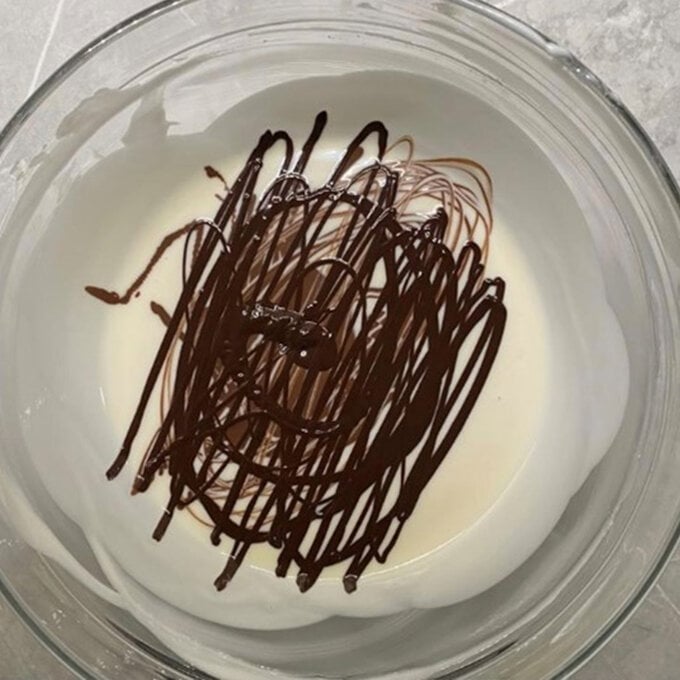
Use a thin utensil such as the end of a spoon to do a swirling motion in the bowl to create the marble effect.
Top Tip: Be careful not to overmix/combine the chocolate mixture as you will loosed the marble effect.
Pour half the chocolate into each mould half, filling them to the top, if you don't have enough mixture to fill the mould, pick up the mould and gently tip from side to side so that the chocolate reaches the edge of the mould.
Tip the mould upside down, and allow the excess chocolate to drip back into bowl to remove any excess chocolate. Repeat this with the other mould half.
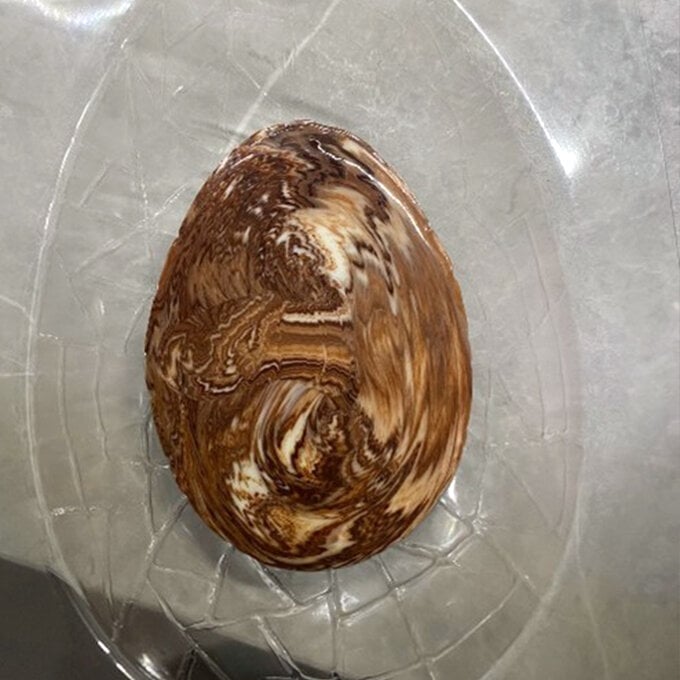
Place the moulds into the fridge to set.
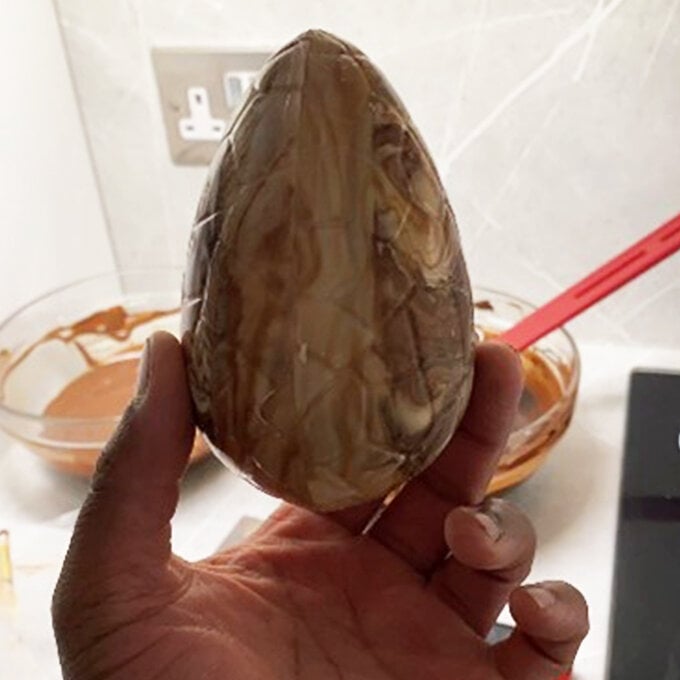
Once set, add another thick layer of chocolate with the milk or dark chocolate, either by pouring the chocolate into the mould once more, or using a food-safe brush.
Applying another layer of chocolate will help to ensure you get a nice thick shell.
Place both halves of the egg mould back into the fridge to set.
Once the egg shells have set, remove them from the firdge and carefully turn them out onto a clean, flat surface.
Heat an oven to it's lowest setting or 50℃. Place a clean baking tray into the oven for 3 - 5 minutes.
Remove the tray from the oven and place the flat edges of the egg halves onto the tray for a few seconds. Do this carefully and quickly to avoid too much of the egg shell melting.
Top Tip: Use a kitchen roll to handle the egg shells to avoid your fingers melting the chocolate.
Secure the two egg halves together matching up the edges as quickly as possible, before the chocolate sets.
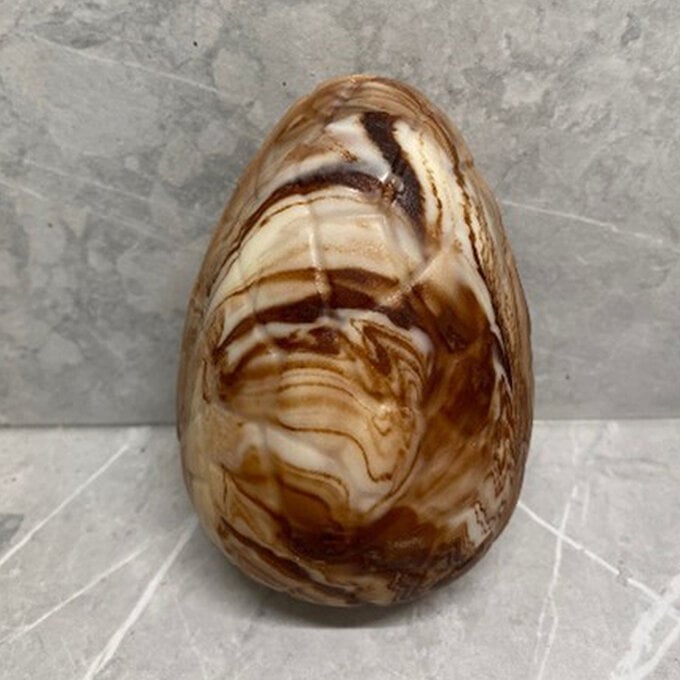
Your eggs are then ready to be wrapped up and gifted!