Cricut: How to Make Postcard Happy Mail
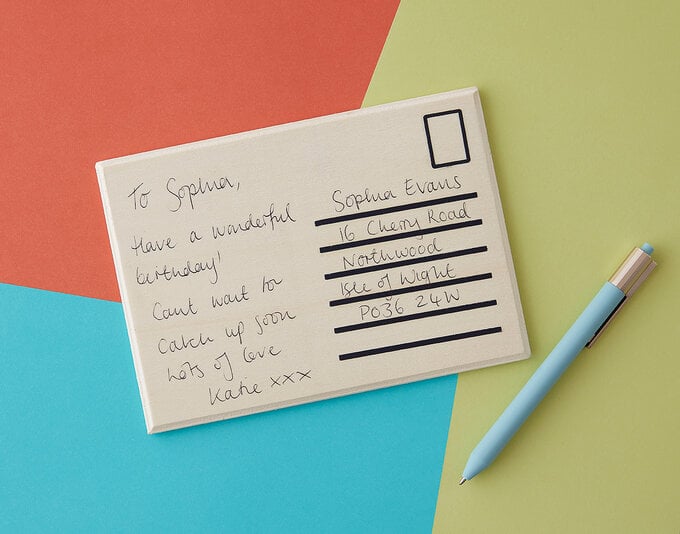
Make a friend or a loved one's day brighter by sending them some happy mail. Personalising wooden postcards is a wonderful way to put a pick-me-up in the post to your friends or family, bringing a welcome change to bills and junk mail.
Using your Cricut machine, add custom details to the wooden postcard with a colourful vinyl design!
Please note: This project contains paid-for content from Cricut's Design Space app. Screen reference images are taken from the desktop version of Design Space.
This project has been created using the Cricut Maker however, it can also be created on the Cricut Explore Air 2 and Joy.
Project and instructions by Hobbycraft Artisan Vicky Boyns
You will need
Subtotal
Is $ 13.00

Subtotal
Is $ 40.00

Subtotal
Is $ 52.00
Subtotal
Is $ 17.00
Subtotal
Is $ 4.49

Subtotal
Is $ 608.00
How to make
You will also need:
* Cricut Design Space app installed on a laptop, PC, Tablet or mobile device
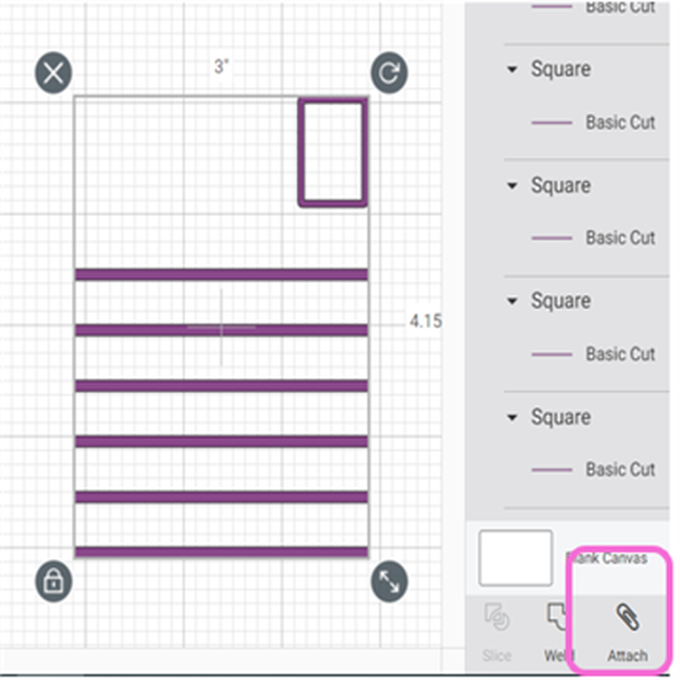
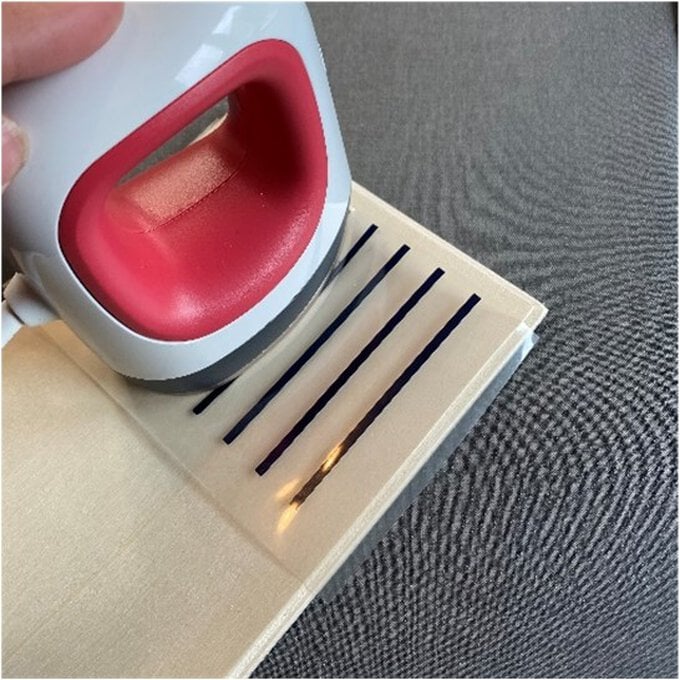
Open the Cricut Design Space app and start a new project, use the shapes function to select a square. Unlock the padlock and adjust the square to a rectangle that is 3”x0.1” using the edit function.

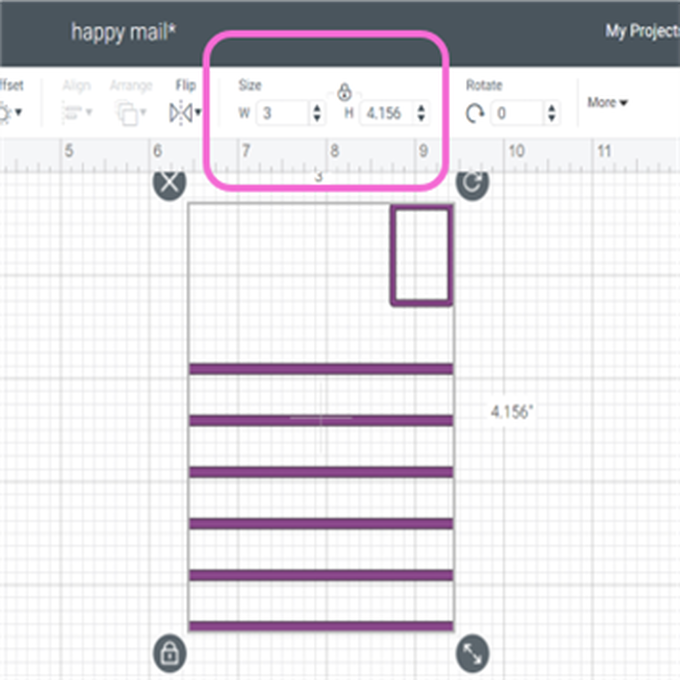
Use the duplicate function to duplicate the rectangle five times so there are six altogether. Highlight them all and use the 'align function to 'centre horizontally'.

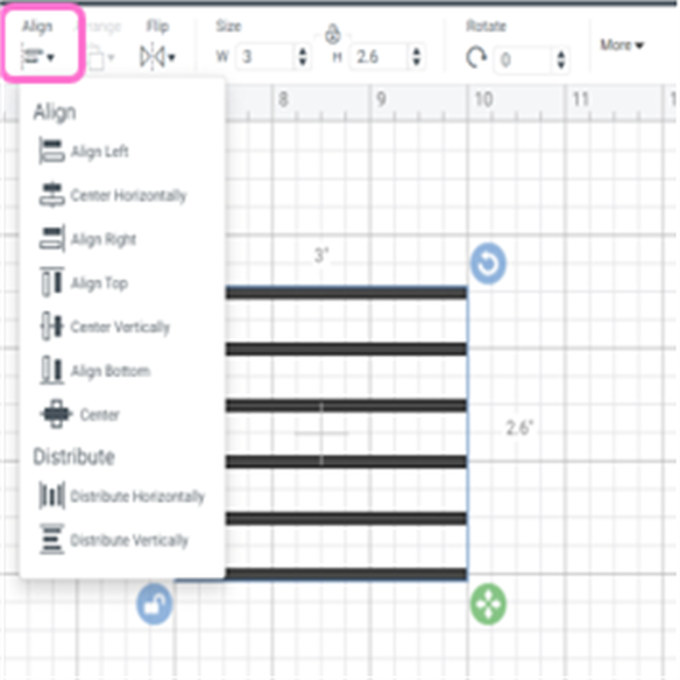
Highlight all of the rectangles and select attach function.
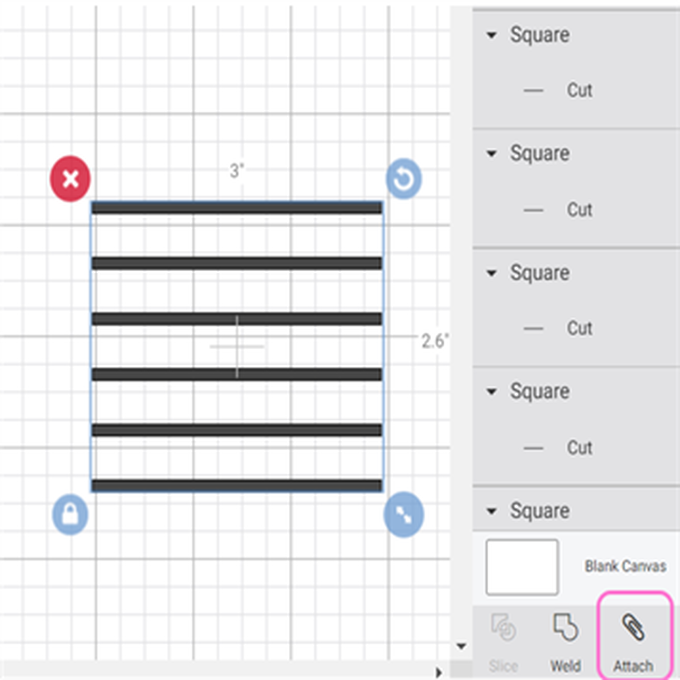
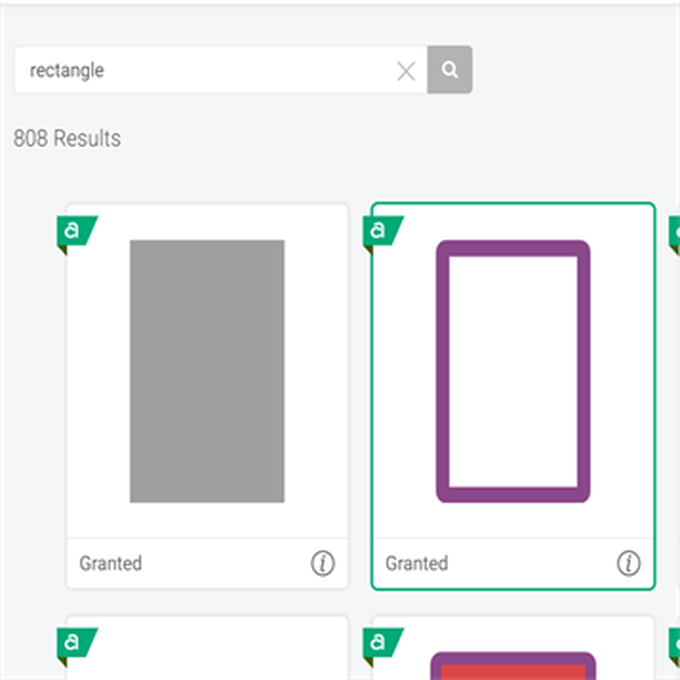
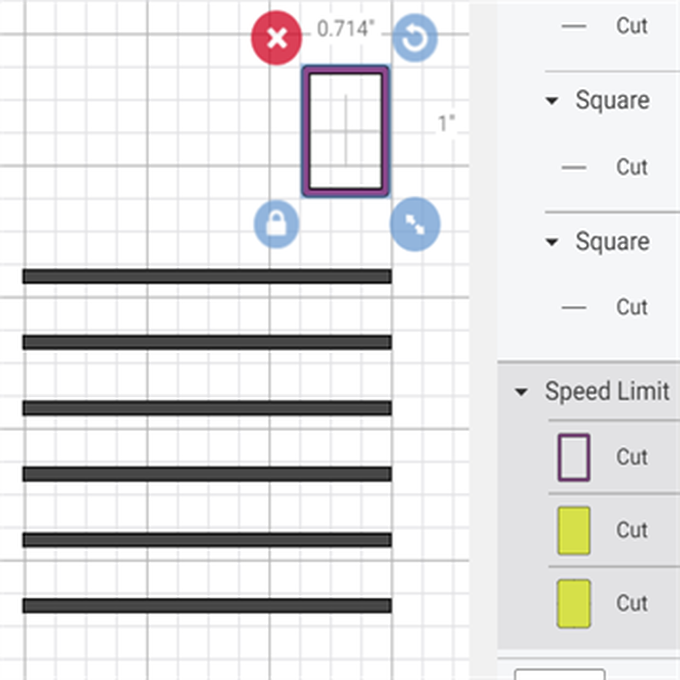
Seach for 'rectangle 'in Images and find the open rectangle – image #M31B06 , hightlight the image and 'insert'. Resize the rectangle to 1” in height position it above the lines as image below.
Select all and 'attach'.
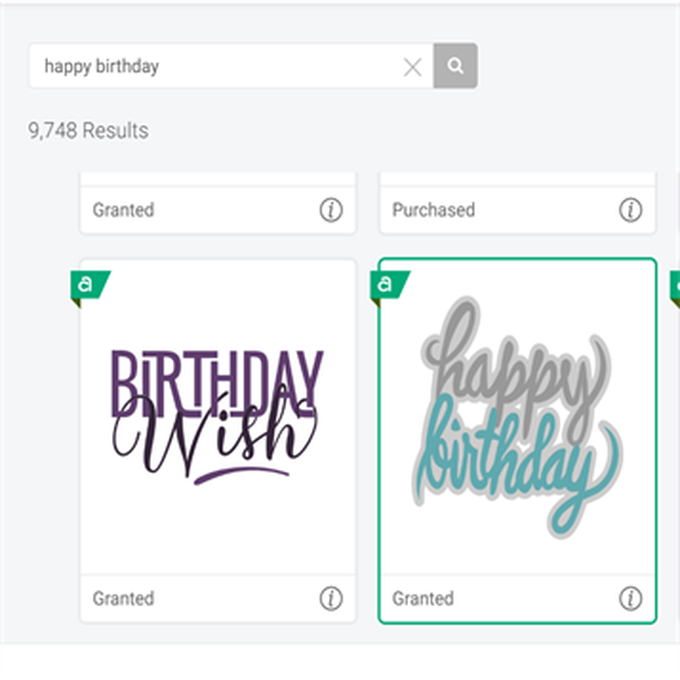
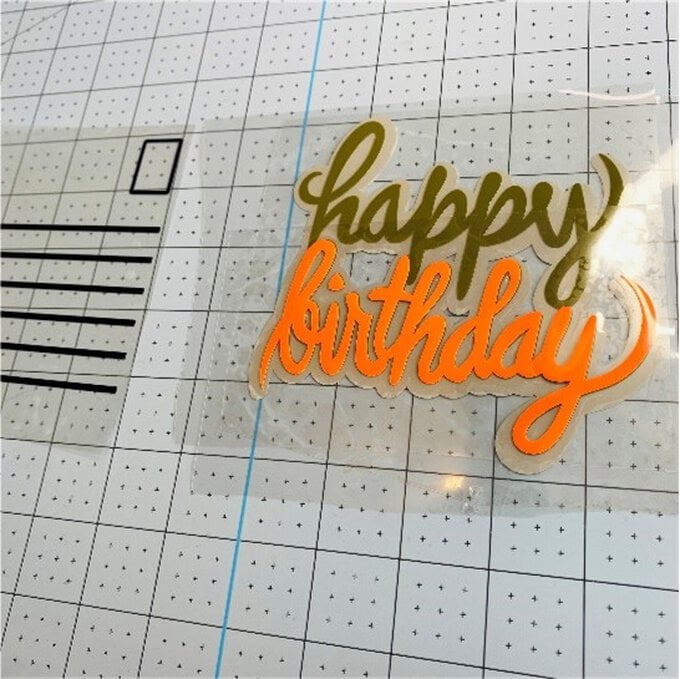
Search for 'Happy Birthday' and select image #M9F46C7, select the image and 'insert'. Adjust height to 4.5” (with the padlock on, the width will adjust in proportion)
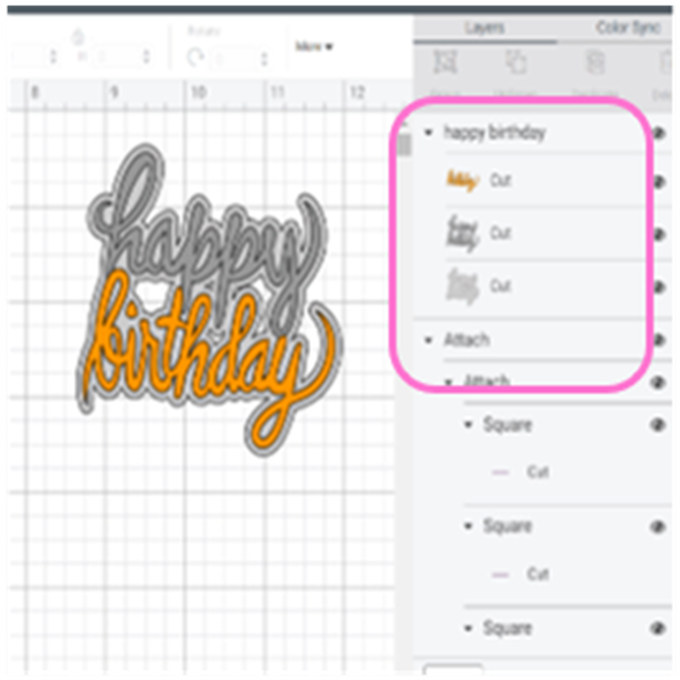
You can select the individual layers and the alter their colour using the colour swatch to select a colour ( this helps you organise the colours on the mats when cutting)
Now select 'Make it'
As we are using Iron-on it is important to move the 'Mirror' toggle to on.
Select 'Continue'
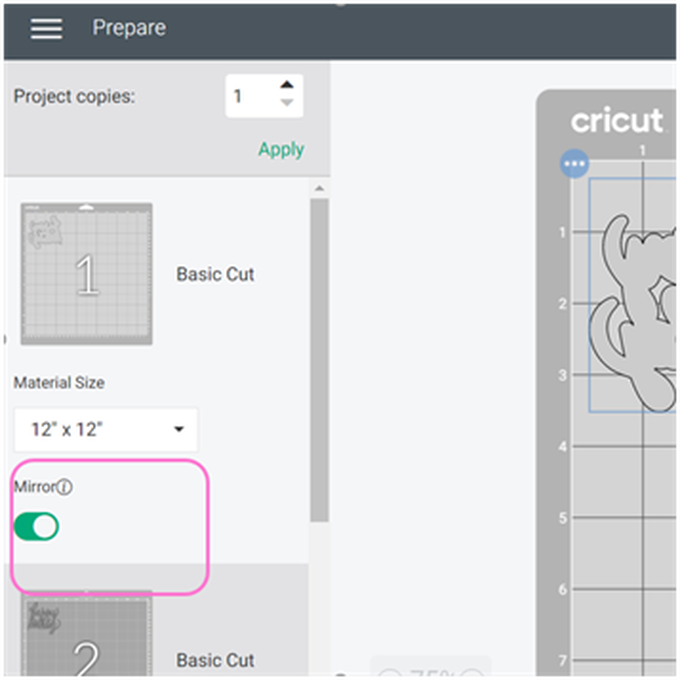
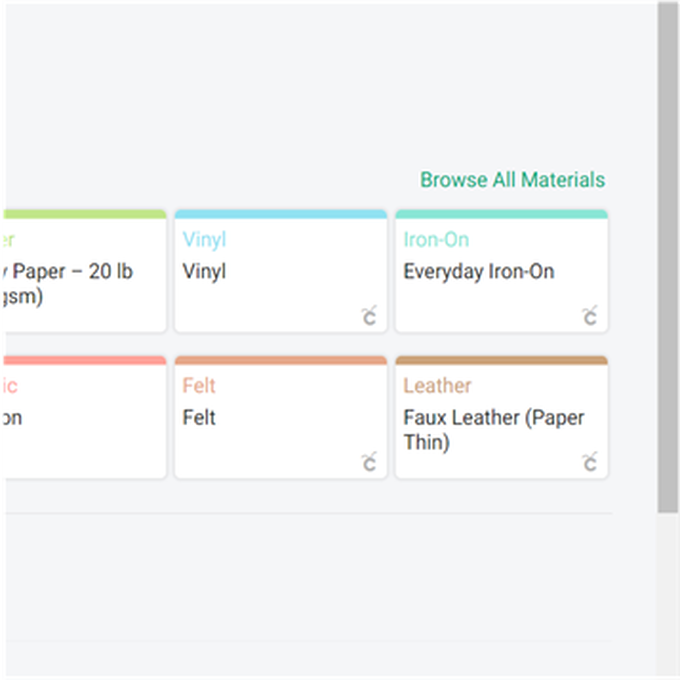
Select Everyday Iron-on from the 'Popular Materials' Menu (if you have an Explore Air2 this will pop up when you have the dial on your machine set to 'custom').
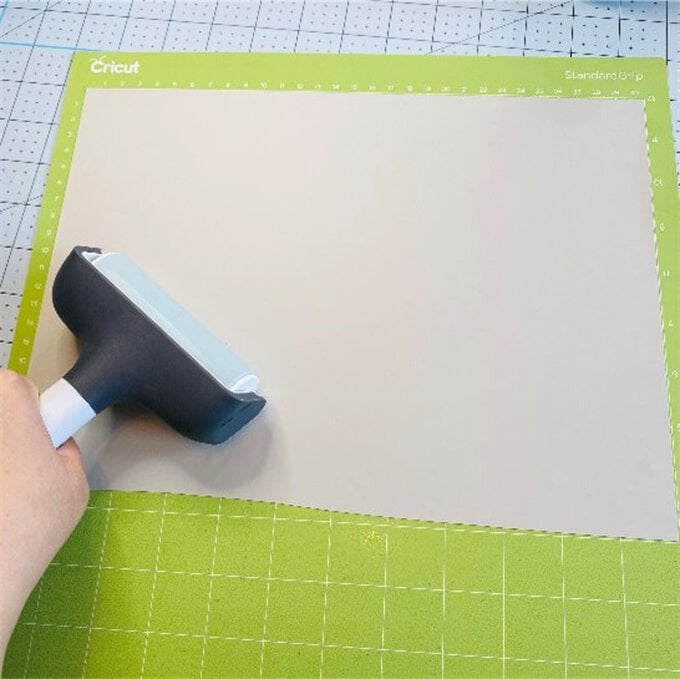
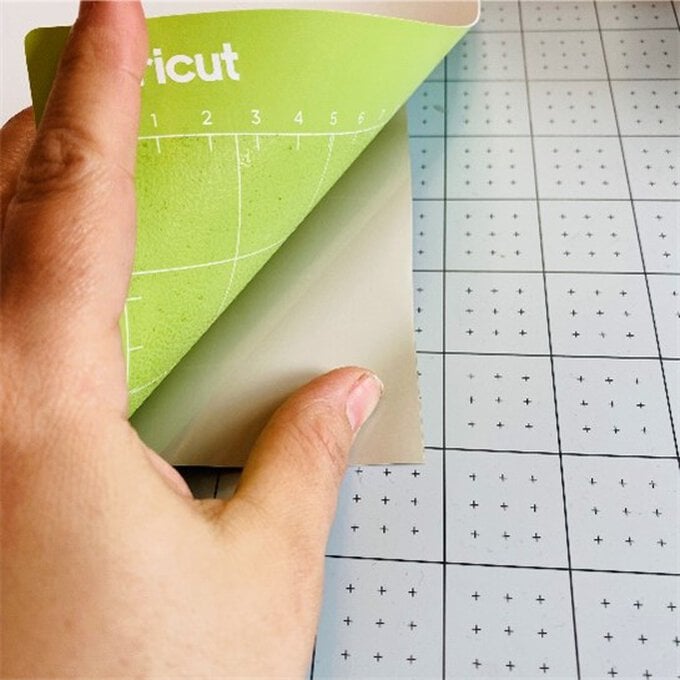
Place your Iron-on vinyl shiny side down on to your mat using the brayer to secure.
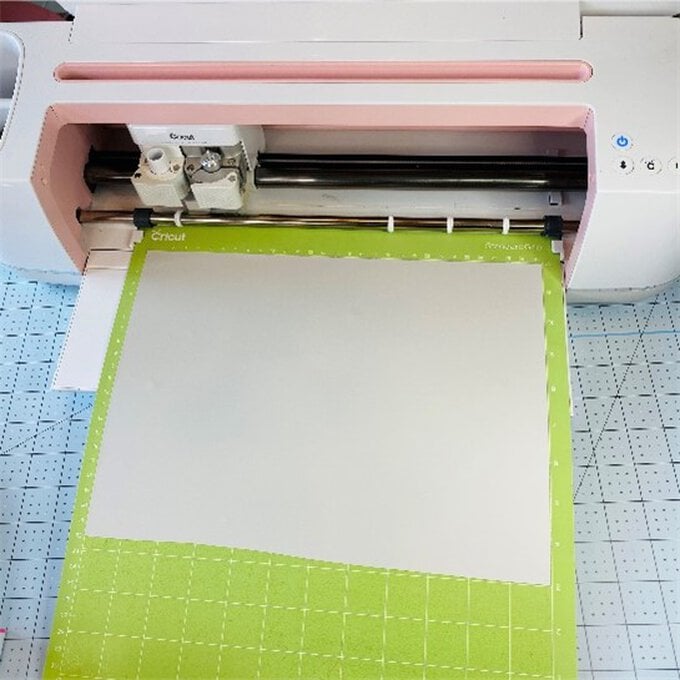
Load into your machine and press the Cricut 'Go' button.
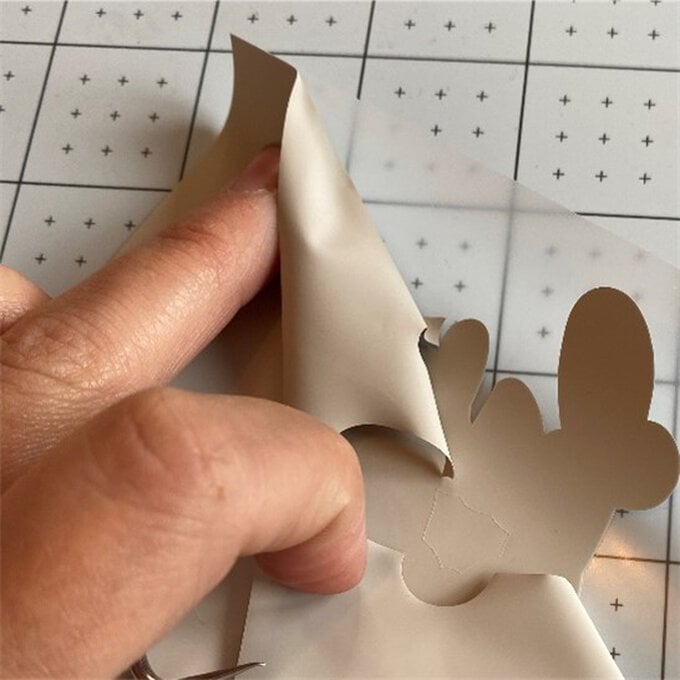
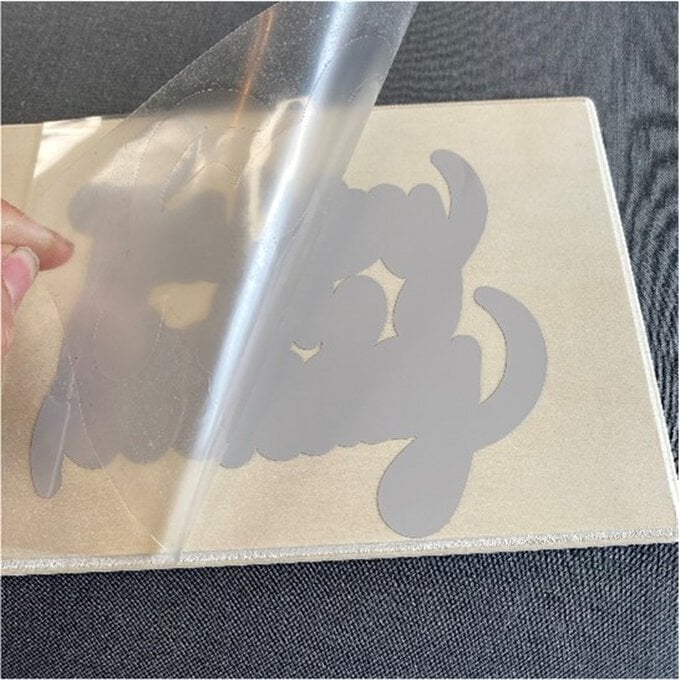
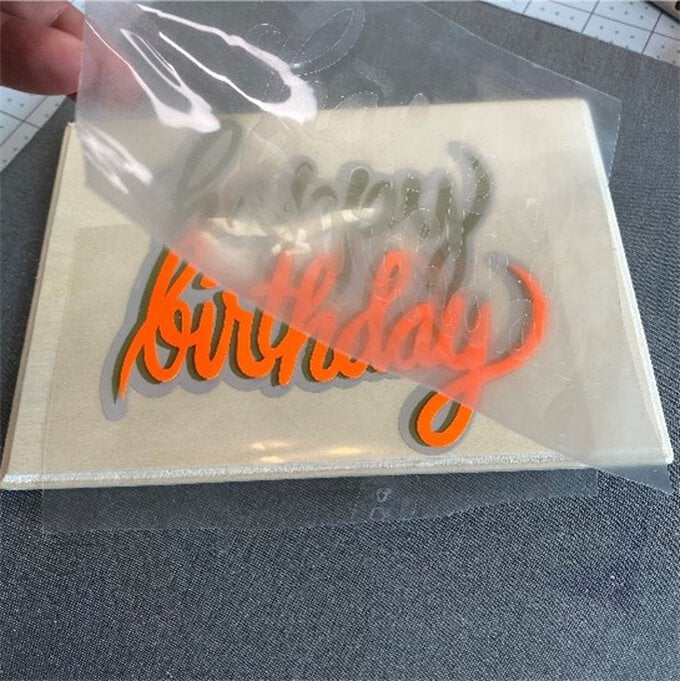
Turn the mat over and remove the mat from your vinyl and then 'weed' your image (this is the process of removing the vinyl that you do not need). Repeat with all the colour layers.
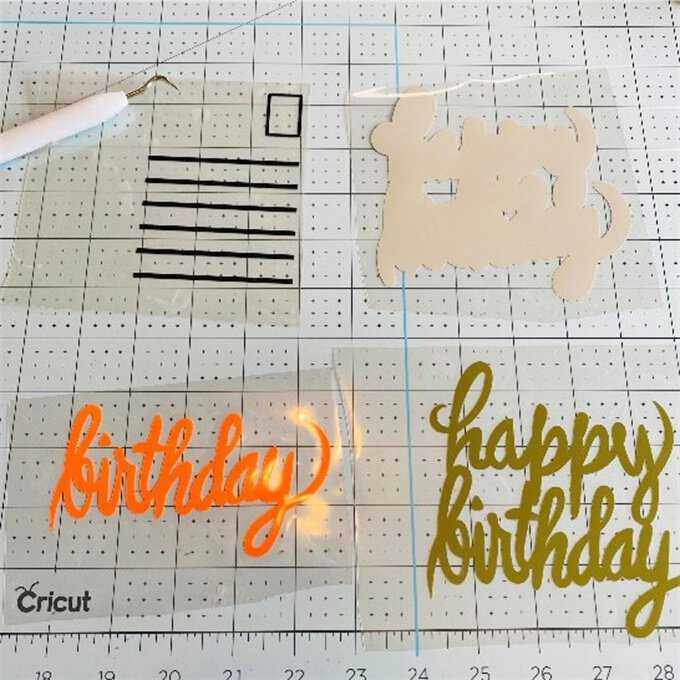
You should now have three layers of your image and the address lines and stamp for the back of your happy mail. Now is a good opportunity to use the original image on your canvas to check the order of the layers- the background colour goes down first followed by the two words and then just the one – see below. We will be using the Easypress to add each layer to the post card one at a time.
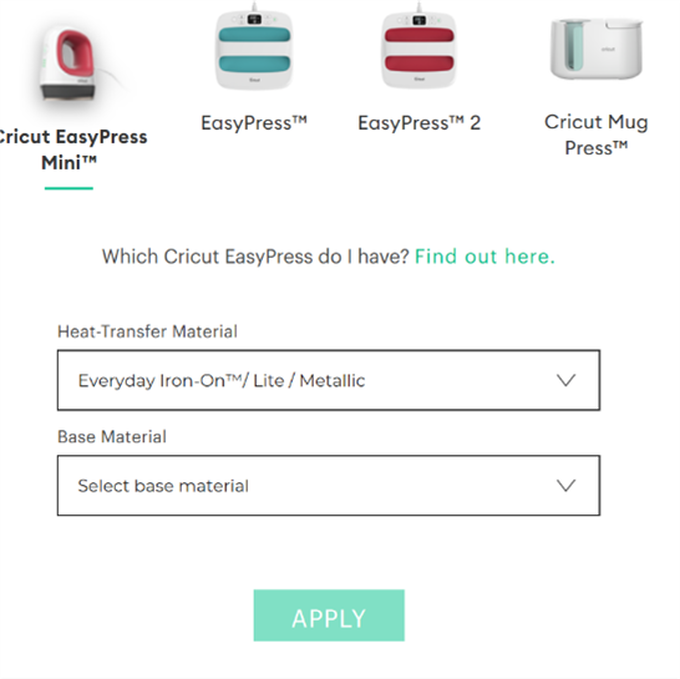
Use the Cricut Heat guie to select the Easypress mini, Everyday Iron-on and wood as the base material. This will show you that you need to use a medium heat for 40 seconds.
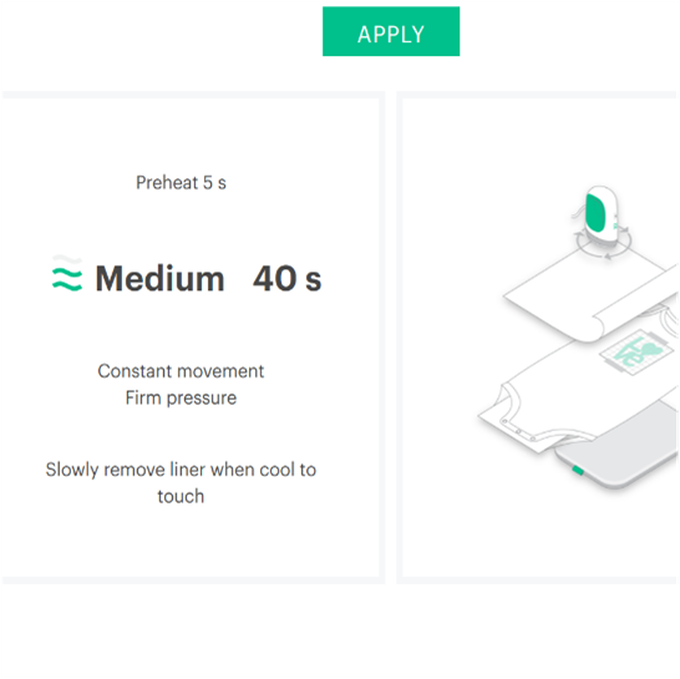
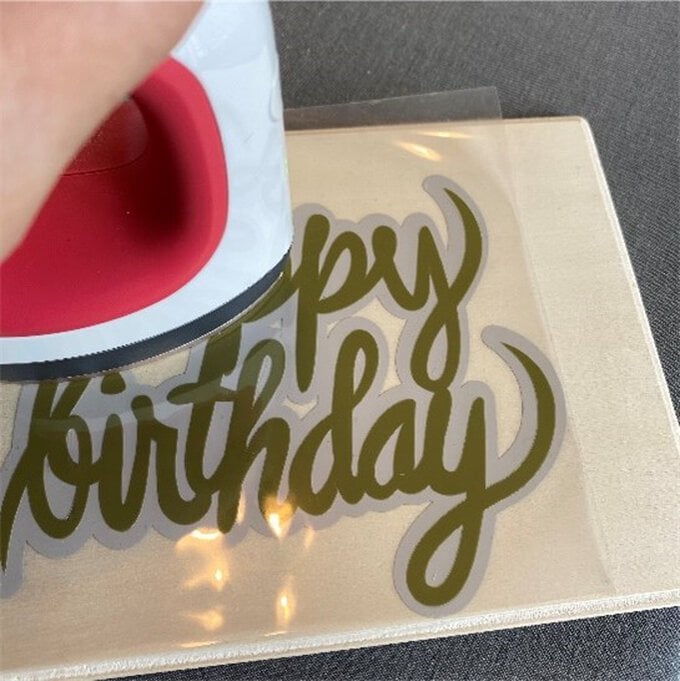
Lay the first layer dull side down ,apply gentle pressure and continuously move the Easypress mini around the shiny surface for 40 seconds- allow to cool and then remove the carrier sheet. Keep hold of the first carrier sheet to protect the first layers by popping over the top – see below.
Once everything is cooled you can remove the carrier sheet and you have your happy mail !