How to Create a Sophisticated Halloween Tablescape
Get into the spirit of Halloween with fun and easy table-styling inspiration. With this step-by-step guide, you'll be able to add some magic to your autumnal table.
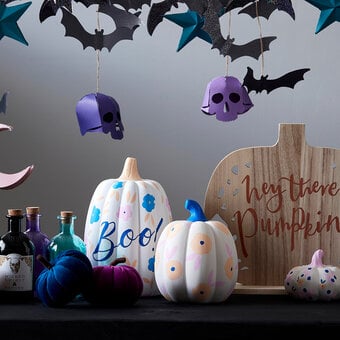
Why not get creative with our ceramic pumpkins? They come in different sizes and are so easy to paint and write on! Style them with some mini personalised bottles to finish the tablescape.
Project and instructions by Edlyl Asis.
You will need
You Will Need
* Ceramic Pumpkins
* Clear Glass Potion Bottles
* Acrylic Paint
* Posca Pens
* Gold Gilding Flakes
* Paintbrushes
* Pencil
* Paper
How to make
Paint your pumpkin. If you have several different sizes, paint them in different colours so you have a variety of styles.
When painting, leave the stem plain so you can paint this a different colour.


Put a second coat on to make sure the paint covers all the surfaces.


Once dry, colour the stem in a different colour by either painting on it with an acrylic paint or using a Posca Pen.


To use the gold gilding flakes, apply the glitter glue on the surface you want to cover in gold flakes, and use a paintbrush to spread the glue evenly.


Fill a large bowl with gold gilding flakes. (Only fill with enough flakes, as you don't want this to overflow!)

Submerge your pumpkin in the bowl and move it around as much as you can, to make sure the flakes stick onto the surface.


Slowly lift your pumpkin. Carefully brush away any excess flakes using a soft brush.


If you want to just add a hint of gold to your pumpkin, apply a small amount of glue onto your surface and use a paint brush to dab some gold gilding flakes onto the pumpkin.


Write out some Halloween-related words that you'd like to write on your pumpkin. You can use the downloadable worksheets as inspiration!


Once you're happy with a word, lightly write it out onto your pumpkin using a pencil.


To use a Posca Pen, shake the pen first and press down until you see the ink come out.
Using the pencil lines as guides, slowly write out your word or phrase. Try and avoid writing continuously - instead split your word into sections.
Pause when you need to and take your time.


Write out some words you would like to use for your bottles. Make them nice and short, as you have less space to work on than the pumpkin.

Carefully write out your word with a Posca Pen. Again, split your letters/words into sections and take your time.
The surface is slightly more slippery so control your pen by resting your pinkie onto the surface.

As the surface is smaller, no need to go over it again to avoid making it too thick.
If you do make a mistake, just use a tissue paper to wipe the error and start again.


