How to Make a Pinata Egg Slider Card
This piñata egg slider card adds an Easter sentiment surprise to the centre of the egg in a cleverly constructed way. Read the tutorial below to find out how you can make your own.
There are plenty of alternative Easter-themed embellishments to fill your egg with that can be found online and in store at Hobbycraft!
Project and instructions by Sue Smith
You will need
Subtotal
Is $ 17.00

Subtotal
Is $ 1.49
Subtotal
Is $ 1.49
Subtotal
Is $ 8.49
Out of stock
Subtotal
Is $ 1.49
Subtotal
Is $ 7.49 , was $ 9.49
Subtotal
Is $ 22.00
Subtotal
Is $ 3.49
Subtotal
Is $ 4.49
How to make
You will also need:
- To create your own Happy Easter greeting
Use a 5 x 7 inch white card blank, and make an egg shaped template to fit.
Use this template to cut five egg shapes from white textured card stock. Glue two together so that the base is smooth and the top surface textured
With the remaining three egg shapes, cut them all in half widthways at a slight angle
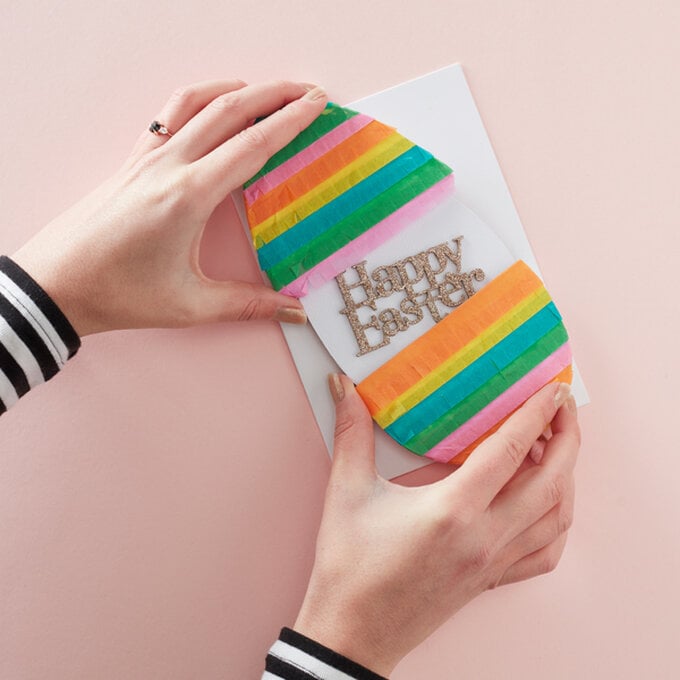
Decorate the reverse side of one set of egg halves, using tissue paper to create a kind of piñata. Cut long, folded strips of tissue paper in five different bright colours. Using a ruler and sharp craft knife, re-cut the strips to measure 1.5 cm wide from the folded edge. Snip along the lengths to create a frill. Starting at the bottom and using a glue stick, cover the lower egg section working parallel to the top cut. Finish with a frill fold matching the top cut. Start on the upper egg section, overhanging the first frill slightly. Continue adding the frills until the whole section is covered. Cut away all the excess tissue leaving a couple of millimetres around the edge.
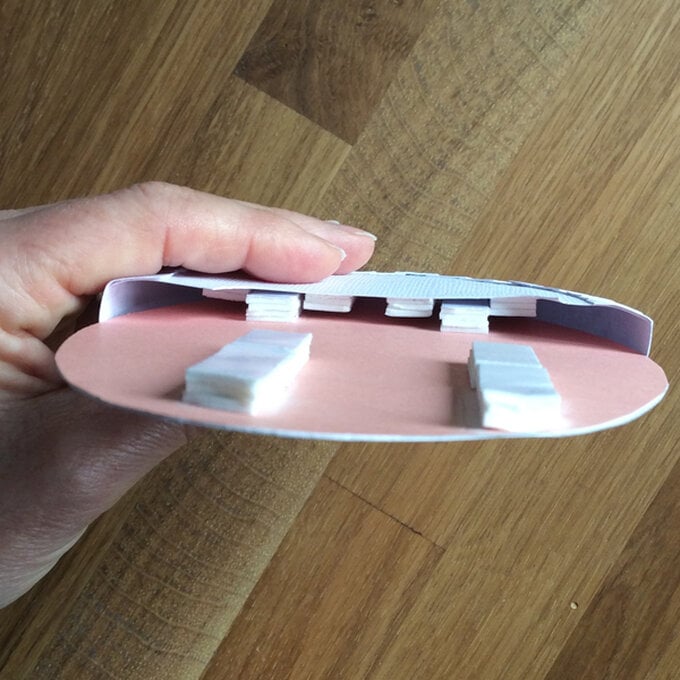
Now begin to construct the slider mechanism. Apply two tram lines of 3D foam tape to the smooth, underside of the whole egg. This is shown in a peach colour in the following images. Leave the middle area free as seen below.
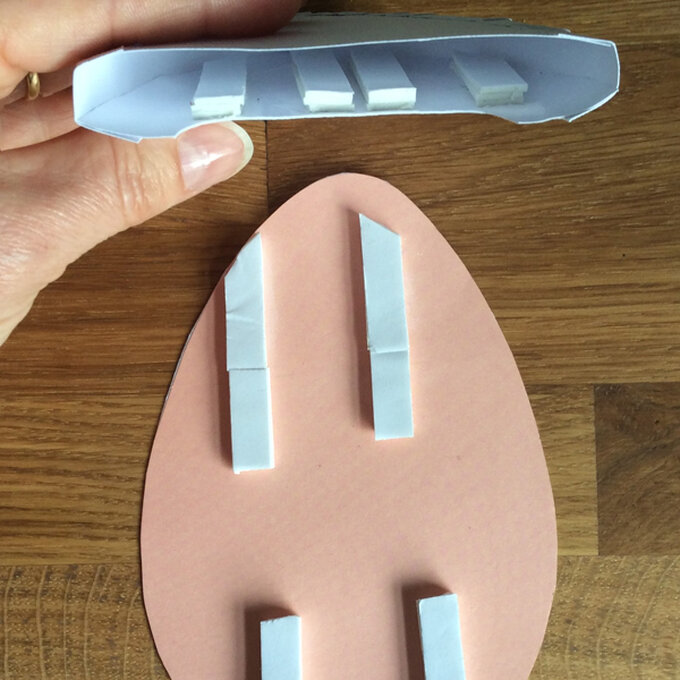
Working with another set of egg sections. Place more 3D foam tape to the underside, sitting either side of the tram line tape already positioned on the whole egg. Make sure both sections can easily slide backwards and forwards like a draw. Use a little talcum powder on the tape sides to make the mechanism move even smoother.
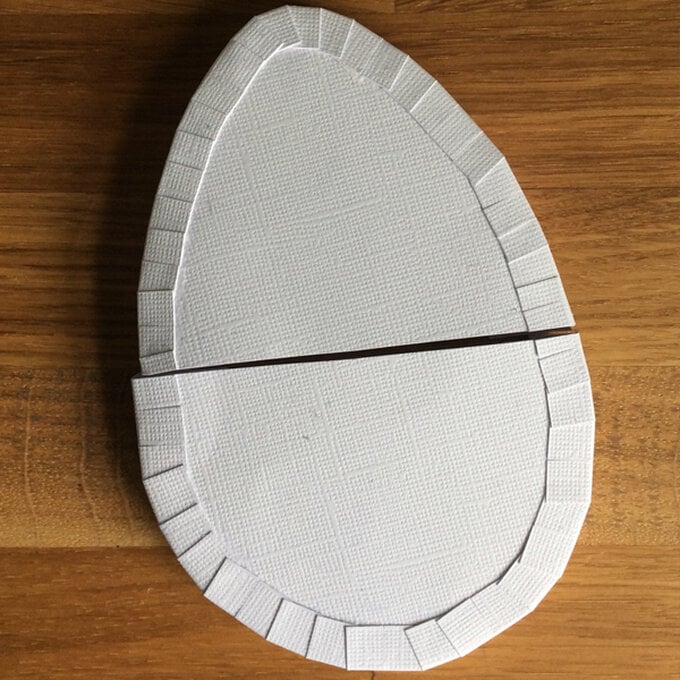
Cut long lengths of textured card three centimetres wide. Measure and score two lines running down the length at one centimetre apart. Snip with scissors little tabs down both long sides, leaving a centimetre section in the middle. Working on the reverse side of the egg sections with double lines of foam tape, add glue around the outer edge. Fold the tabs up on one side of the strip, and add glue to the inside. Fix these two pieces together following the contour of the egg shape, and leaving the angled cut line free. Repeat this for the other tabs, and fixing them onto the last remaining egg section that matches. A one centimetre wide, pocket is created, just like the one in the top of the image above. All that's left to do is cut away slightly on the side that has the foam pads attached.
Double check at this stage that the pocket still fits as a draw over the main egg, as in the image below. Repeat this and construct another pocket for the other half of the egg. Again cut away the side slightly on the panel where the foam pads are fixed. This does not need to be neat, it will all be hidden when it is finished.
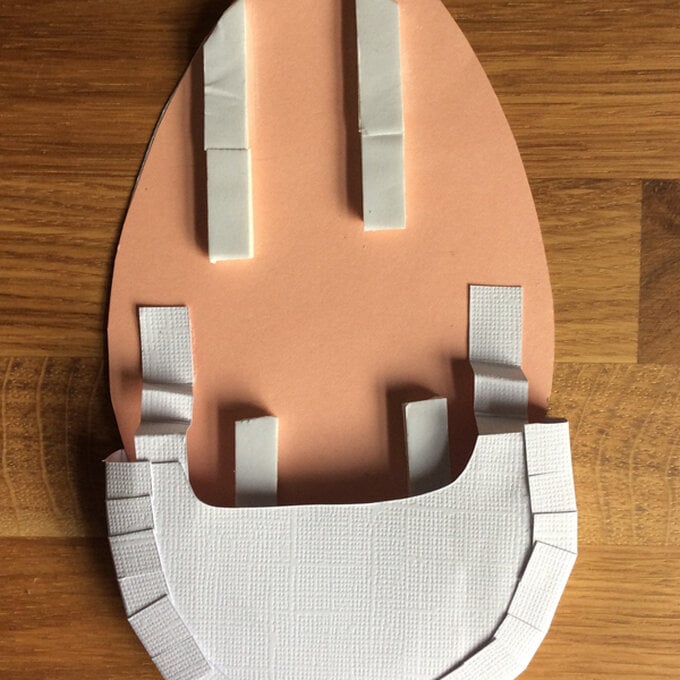
When both pocket sections are finished, they should completely cover the whole egg piece inside. Just like the next image. The image shows the top surface, with the cut away areas underneath.
Small concertina strips of card can be fixed in place to stop the pocket sections from sliding right off. Make two little tethers either side of each pocket, and glue them in place on the underside of the egg. See image below. The image shows the pocket half way out, so the tether has a little more to give to fully open. When closed it should just ruck up inside. Again neatness doesn't matter.
Apply glue to the back of the decorated piñata sections, and fix in place on the top of the sliding pockets.
Fill the middle, cut away section on the base of the egg piñata with 3D foam tape. Use as much surface area as you can. Build this up using four layers of tape in total, and fix the egg piñata to the card blank.
Slide the pocket sections back and glue into place the glittered wooden sentiment inside the piñata egg. The pockets should be able to slide closed again, hiding the sentiment from view.
Related Products