How to Sew a PE Kit Drawstring Bag
It's so easy to learn how to sew your own P.E. kit drawstring bag and all the easier with this brilliant tutorial from sewing expert Miss Libby Rose! Have a read below to find out what you'll need to complete this project - there's a huge range of fabrics and fat quarters available in-store and online.
You will need


How to make
You will also need:
An iron and an ironing board
Take the 2 x fat quarter pieces and sew up the sides.
Then sew along the bottom so you have made a sack.


Go to the bottom corners of the 'sack' and create a 4cm x 4cm square corner, mark with a pen to get this accurate.
Cut the corners open through the stitching.


Open the corners (like opening a crisp packet).
Line up the two seams so they are facing each other and sew along the diagonal line with a 0.5 seam allowance. Now you have created a base for the bag.

Press the seams flat and create the base as you can see in the picture.
Turn the sack/bag through so it is now right side out.


Measure up 4 cm from the base along the side seam and base seam. Make a mark to apply the eyelets.
Do the same for the other side of the bag

Apply the eyelets on both sides where you have made the mark.
Ensure you are going through both the base and side seams.
Apply to eyelets all as according to the manufacturers recommendations and directions on the eyelet packet.

Now go to the top of the bag and the only raw edge remaining.
Decide which side is the rear of the bag.
Fold the bag in half lengthways, match up the side seams and press a crease down the middle so you have the centre back.
Measure down from the top raw edge along the centre back crease to create a mark 10cm down from the top.
Apply the eyelet here as the manufacturer's instructions on the packet.


Turn down the top raw edge 4cm then press so it leaves a nice crisp line, and fold it down again 4cm to create a channel all the way around the top edge. Press firmly.
Sew around the channel close to the edge (leaving a 0.5cm seam allowance) and watch out for the eyelet – skip over it if its in your way when you get to it.

Take your safety pin and pin it to the end of the chord or ribbon – insert the ribbon / chord through the eyelet and into the channel bringing it the whole way around and out the other side.
Pull it so that there is equal amounts of chord / ribbon coming out and tie these to the bottom eyelets.


VIOLA! you are done! Happy exercising!


Craft with us at our workshops


Related Products
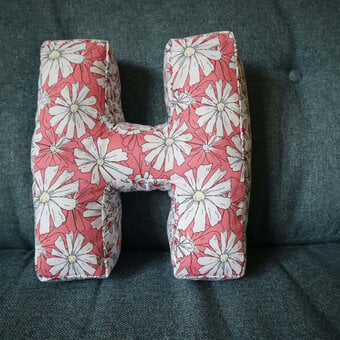
Discover how to create a stylish letter cushion using your favourite fabric designs. Perfect for intermediate level sewers, this project is ideal for making as a personalised gift!
With the help of your sewing machine, you'll be able to turn any letter of the alphabet into a cute and comfy cushion. Whether you match your fabric or use a contrasting design to make an impact, you'll be able to spell out an entire name or phrase in cushions!
Project and instructions by Paula Milner, The Crafty Lass.
Screen grab reference images have been taken from Microsoft Word. This project was created using Microsoft Word; however, it can be completed without it.