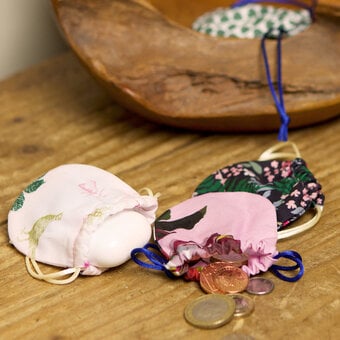
How to Make a Fabric Drawstring Bag
Fabric drawstring bags can be used in a multitude of ways: as wash bags, storage or even gift wrap! What's even better is that they can be reused, repaired, and upcycled when old and worn – the perfect eco-friendly project!
For this bag, we used contrasting fabrics for a fun and elegant finish but you can mix and match to suit your taste.
Project and instructions by Paula Milner
You will need
* Fat Quarters
* Ribbon
* Iron
* Thread
* A Pencil
* Tape Measure
* Pins
* Dressmaking Scissors
* A Safety Pin
* Sewing Machine

Select, measure and cut out your fabrics. You will need the below measurements:
Larger bag
2 x Outer - Height 42cm x Width 26cm
2 x Inner - Height 42cm x Width 26cm
Smaller bag
2 x Outer – Height 28cm x Width 23cm
2 x Inner – Height 28cm x Width 23cm

Press your fabrics and mark out your ribbon casing points:
Larger bag
Mark from the top at 11cm down and 13.5cm down on both height sides.
Smaller bag
Mark from the top at 6cm down and 8cm down on both height sides.

Place your outer fabric right sides together. Sew with a 1cm seam allowance from the top down to the first casing point, backstitch to secure before removing your needle and 'jumping' to the next casing point to leave a gap. Start sewing again, use a backstitch to secure from your second lower casing point and sew to the bottom of your bag. Pivot and sew along the bottom. Sew up the other side and repeat as with the previous side with the casing.

Now to sew your fabric inner. There is no casing on this one - so it is a straight stitch down one side, pivot and sew along the bottom, pivot and sew up the other side.

Fold your outer fabric bag out the right way and fold so that your casing 'gap' is within your fabric fold by just over 1cm. Press into position.

Fold over your inner by the same amount and press.

Sew in a simple straight stitch all the way around your folded over fabric just below your casing gap.

Using a safety pin on the end of your ribbon, push this through your casing gap and all the way around your casing gap. Make sure you leave enough ribbon for when the drawstring is completely open and some extra to knot as below.


Knot your ribbon to secure. Repeat this from your opposite casing side.

Insert your inner lining inside the outer fabric layer.

Sew in a simple straight-line stitch around the top of the bag using a 2cm seam allowance, ensuring the casing is complete. You can make less of a seam allowance than this if desired – but this does create a 'ruffled' edge finish.

Secure your threads and double-check the ribbons aren't caught in the sewing before pulling together as a drawstring.

Et voila! Fabric drawstring bag: done!


