A Beginner's Guide to Fluid Pouring
Fluid art, paint pouring, acrylic pouring, flow art – this fantastic craft is known by many names! Pour flowing acrylic in a fun, experimental and abstract way to create your next masterpiece.
Paint pouring is delightfully unpredictable and is a great way to make a mess mindfully and let the paint take control. Showcasing the basics of mixing colours, easy techniques and how to make pouring more sustainable, this guide will give you the confidence to thrive within the chaos of fluid art!
Project and instructions by Rachel Elinor Toye.
You will need


How to make
You Will Also Need:
* Easy to reach cleaning supplies (sponge, towel and basin with soapy water)
* Rubber gloves
* Scraper or piece of acetate to swipe paint
* Empty bottles, cups, or jars for excess paint
Fluid art can be messy – but that's the fun of it!
Protect your workspace with a wipe clean tablecloth and wear gloves to keep your hands clean. It's also handy to have a sponge, towel, and basin of soapy water nearby for easy clean up.
Once you start pouring, the paint will begin to dry so be prepared and ensure all the paints, materials and tools needed are close to hand.
Tip: A drip tray is a paint pouring essential! It will catch all the excess flowing paint, keep your work surface clean and minimise paint wastage.

The paint used for fluid art is thin, fast flowing and resists itself for interesting textures and patterns. You can use pre-mixed pouring paints or create your own colours by mixing pouring medium and acrylic paint.
1: To create your own pouring paint, first fill a cup with the pouring medium.
2: Pouring medium is clear so add a few drops of acrylic paint to reach the desired colour and mix thoroughly. 1 part acrylic paint to 3 parts medium is a good starting point. It should be the consistency of warm honey; you can also add some water to thin the mixture.
Tip: Try to limit your artworks to around 5 colours at a time, any more and they can begin to mix and turn muddy.
3: Add a couple drops of silicone oil if you want to easily create 'cells' (colour resist and separation) in your artwork. Use sparingly as it can cause the paint to degrade over time. Be careful as the more you mix the oil in, the smaller the cells will be once poured.
Tip: Fluid art uses a lot more paint than you might think so it's best to mix more than you need. If you don't use it all you can save it for another artwork! Keep in an airtight container and mix well before using again.


The most commonly used technique in fluid art, the 'Dirty Pour', layers alternating colours into one cup, then is poured onto the canvas for abstract and instant results.
1: Pour your chosen colours into the middle of the cup one by one, randomising the order and amount of each colour until the cup is full.
2: Flip the cup over so the paint pours across the canvas.
3: Moving quickly, start to tilt the canvas in all directions to spread the paint across. Allow the excess paint to flow down the sides and into the drip tray.
4: Keep changing where you hold the canvas so everywhere gets evenly coated. The more you tilt, the more paint will fall off and stretch each colour into larger sections.
5: Continue until happy with the final look and place onto a clean cup over the drip tray to dry.


Using an art panel with edges, this 'Clean Pour' this technique is a slower and more controlled paint pour - working straight onto the panel and continuously adding more paint where needed.
1: Pour and squeeze paint directly onto the panel in irregular stripes and blobs using contrasting colours side by side for the strongest impact.
2: Begin to wiggle and tilt the panel so the colours run and swirl into one and other.
3: Add extra squirts of paint where needed and continue to tilt until fully covered with the marbled effect.
Tip: Use masking tape along the pine edges to keep them clean or paint the edges afterwards to compliment your artwork.


White paint is dense in weight and naturally allows other colours to push through and sit on top, the 'Wet in Wet Swipe' technique manipulates this and creates lots of colourful cells easily.
1: Cover the panel thinly in a coat of white pouring paint.
2: Spread the paint across the panel with something flat like a scraper or piece of acetate and cover the sides too.
3: Alternate pouring your chosen colours in a random zig zag shape across ¾ of the panel onto the wet white paint.
4: Dip your scraper into the white side of the panel and swipe gently across the top of the colours slowly to the other side.
5: Don't be afraid to take a couple of passes to swipe across the whole panel.
6: Wait a few minutes for the colours to push through and interact with the white.
7: You can use a heat tool or butane torch to stretch and enhance the cells whilst popping any air bubbles.


Paint pouring is quick to make but can take up to 48 hours to dry! Leave them somewhere well ventilated and free of dust and movement. While they dry you can continue to work with the excess paint, so nothing goes to waste!
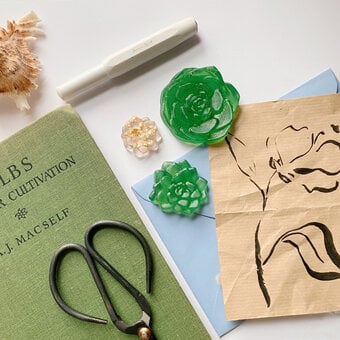
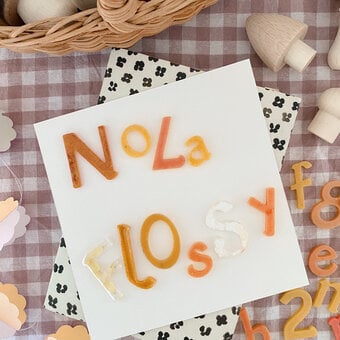
1: Use up scrap papers or small canvases by dipping them into the drip tray to coat them in a colourful, marbled layer of paint.
2: Place the paper on the most interesting cells and colours, leave for a few seconds then remove. Once dried these could be turned into mini prints, postcards, gift tags or crafting paper.
3: Tilt the drip tray and scrape all the excess paint into a sealable cup or jar. (If it isn't too murky already you could attempt another dirty pour with this paint!)
4: Mix thoroughly and be aware it might not make the prettiest colour! But you could add a dark colour in to knock any muddiness or add white to lighten it back to a base colour. Use these to tint new colours lighter or darker.
Tip: Paint pouring as a craft uses large volumes of paint but by being mindful and resourceful you can minimise the amount of wasted paint. You can also work back on top of dried canvases to practice your technique.


Craft with us at our workshops


Related Products