How to Make a Cold Porcelain Clay Trinket Dish
Ever fancied making your own clay? This cold porcelain clay tutorial will show you how to make clay from just a few simple kitchen ingredients and some basic craft supplies!
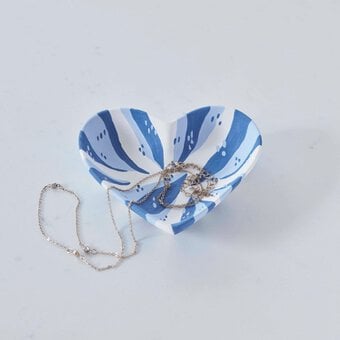
Follow the step-by-step instructions to make your clay and then have a go at turning it into a beautiful cherry trinket dish, perfect for storing your precious things!
You will need
You Will Need
Clay Ingredients
* 1/2 cup Cornflour
* 1/2 cup PVA Glue
* 1 tbsp Baby Oil (or Olive/Vegetable Oil)
* 1 tbsp Lemon Juice (or Vinegar)
* Extra Baby Oil
Equipment
* Non-Stick Pan
* Non-Stick Mat
* Silicone or Plastic Spatula
* Cling Film
* Air Tight Bag or Container
* Acrylic Paint
* Table Knife
* Needle Tool or Cocktail Stick
* Round Cookie Cutter
Project Notes
Any cookware used for clay must not be used for food preparation afterwards.
Ensure that the clay cooking process is only done by adults, as it can get very hot.
Clay must no be left unattended whilst cooking.
How To Make
Add the cornflour, PVA glue, baby oil and lemon juice into a pan. Mix together with a spatula until completely smooth. Ensure that there is no conrflour stuck to the sides of the pan.


Heat the clay slowly, over a very low heat, stirring continuously. The clay will start to get a little lumpy, then start to get thicker and clump together more, use your spatula to press and spread the clay against the bottom of the pan, this will ensure it is evenly heated.
When the clay sticks together and is no longer sticking to the pan it is time to remove it from the heat and transfer it to a non-stick mat.
Leave for a few minutes, so that it is cool enough to touch but still fairly warm.


Knead the warm clay for about 5 mins, until there are no lumps. This will make your clay smooth and elastic.
Now take some cling film and spread a few drops of baby oil across it (to stop your clay from sticking to the film.)
Wrap the clay tightly in the cling film, and then place inside an airtight bag or container.
Leave for a minimum of 6 hours, but ideally 24 hours.


After the clay has been left for 6-24 hours test the consistency, it should feel smooth, soft and pliable. If your clay feels very firm and rubbery it may be overcooked. If it feel sticky it may be undercooked. You may be able to rescue overcooked or undercooked clay by making a new, correctly made, batch and adding the clay in by kneading again. If the clay is too over/undercooked this may not work.
Perform the following tests to check if your clay is suitable:
1. Break off a small piece of clay and firmly roll it into a ball, the surface should be smooth and free of cracks and creases.
2. Press this ball flat and check to see if you get any cracks at the edges, it should be nice and smooth.
3. Pull apart a ball of clay, it should form smooth teardrop shapes.
Your clay must be kept wrapped up and airtight at all times when not in use, uncoloured clay will keep for a very long time if stored correctly.


Cold Porcelain can be painted when cured, but you can also pre colour the clay with a small amount of acrylic paint or food colouring.
It's best to only colour small batches at one time, coloured cold porcelain does not last as long as uncoloured clay, and dries more quickly.
To colour your clay for the trinket dish:
Take a piece of clay and add a small amount of red paint. Mix by kneading and stretching the clay. If the colour looks very pale add more paint then mix again.
Repeat this process with another piece of clay and green acrylic.
Be sparing with the paint, if you add too much acrylic the clay will become sticky and hard to use, the more paint added will also make the clay weaker when cured.
Coloured clay dries a few shades darker than it appears when wet, so try to take this into account when mixing colours.
Before you begin shaping your project, it is also useful to note that cold porcelain shrinks when cured, by about 15% - 20%.


Begin by rolling out a sheet of red clay about 5-6mm thick. Cut out two circles using a cookie cutter or a knife. Lightly press around the edges to smooth down any rough parts.
Next, press a little indention at the top and bottom to make a cherry shape.
Make a raised rim around the edge of the cherry by lightly pressing in the centre to about 5mm away from the edge. Do this a little bit at a time until you have an even indentation in the middle and the surface looks smooth and even.
Repeat this for the second cherry, but on this one press the middle of the left side flat; this is where the cherries will be joined together.
At the top of each cherry shape press an indentation, this will make a little groove for the stalk.


To help join pieces together you will need to make a kind of slip (glue) from your clay.
Take a small piece of clay and add a few drop of water. Squish the clay into the water using a table knife. When mixed, it should form a thick sticky paste.
Lightly score a small section on each piece you want to join then add a little of your slip.
Overlap the cherry shapes then gently press in the middle where they join, being careful not to flatten the raised edge.
If you have any marks in your clay or the surface doesn't look very smooth you can wet the clay and brush or rub the surface. Be careful as this will make the clay very sticky.
Put the cherry shapes to one side, lightly covering them with a little cling film to stop them drying out too quickly. If you have smoothed the surface of your clay with water, and it is still very sticky wait a few minutes before covering it so your cling film doesn't stick to the surface.


Roll out a tube of green clay about 8mm thick. Bend into a v shape then trim off the excess.
Flatten each end, then pinch to thin a little. This is where you will join the stalk to the cherries.
Squeeze the top together and flatten out a little.


At the ends of the stalk and on the back add a bit of water, rub until sticky, and then score a small area.
Next, wet, rub and score the indentation at the top of each cherry.
Add a little of your red clay slip, position the stalks then gently press them into the cherries.
Bend the stalks into a curved shape.


To make a leaf, start by making a small ball from the green clay. Next, roll one side of the ball to form a cone shape.
Press the cone shape flat; do this a little at a time working around the edges then in the middle.
Next, thin out the edges by gently squeezing, again do this a little at a time. This will give a more delicate look but will be thicker in the middle for strength.
Using a needle tool, a cocktail stick or just the edge of a knife press a line down the centre of the leaf.
Tip: If possible it is better to press in detail rather than carve. Carving will create rough edges that you will need to smooth down with water and a brush, which will then make your clay very sticky.
Press in diagonal lines at each side of the mid line to create veins.
Pinch the leaf slightly to add a little more shape.


Mix some green clay slip. Wet, rub then score the back end of the leaf and the top of the stalk.
Gently press the leaf on to the stalk to join. You may ruin a little of the vein detail, if so just press it back in.


Liglty oil a non-stick surface or piece of cling film and place your dish on it. Leave for three to four days to let it cure.
Tip: As the clay dries it will shrink, the top surface will dry more quickly than the bottom as it is exposed to the air, this can make your clay curl and warp as it dries. It's best to occasionally turn your work, just wait until the top surface feels dry and firm or you will ruin the detail.
Your trinket dish is now complete!
You can also paint cold porcelain clay with watercolours or acrylic paints once cured. Cold porcelain is transparent in thinner sections, a light coat of watercolour will keep a little of the transparency. Acrylic paint will create a solid colour.


