How to Make a Floral Weave
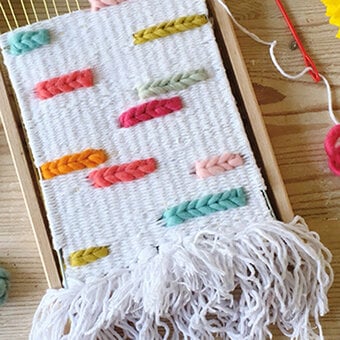
Create a spring-inspired floral weave to enjoy handcrafted blooms that chase away any winter blues. This is a great way to craft a unique wall hanging to brighten up your décor, using your loom to breathe new life into your yarn stash!
Experiment with colours and yarns to recreate the flowers from your own garden or your spring and summer favourites.
Project and instructions by @peasandneedles.
You will need
You Will Need
* Large Weaving Loom 30cm x 39.5cm
* Embroidery Scissors * Darner Needles
* Trimits Natural Wool Roving 10g in Powder Pink, Yellow, Beige
* Knitcraft Leader of the Pac Aran Yarn in Pink & Cream
* Knitcraft Everyday DK Yarn in Mint Green & Pistachio
* Knitcraft Cosy On Up Yarn in Cream & Silver
* Hardwood Dowel 7/8 x 36 inches - or an alternative size
How to make
To warp up your loom, tie your warp thread around the first notch from the left. Secure with a double knot.

Bring the warp thread directly towards the top, hook around the notch and bring it back down towards you. Repeat this creating an 's' movement. Try to keep the tension of your warp nice and tight. This will be the base of your weave so needs to be strong.

Tie off the warp around the last notch using a double knot.


Once you reach the end you will want to weave back in the opposite direction, this time weaving the opposite to the row below.

Weave your wool at a 45 degree angle.

Bring your wool down so you create a 'bump'.

Brush your wool towards yourself, starting from the middle and then outwards. This will create the perfect tension and will stop your warps from going inwards.

Repeat this for 8 rows. This is your basic weave which is called 'tabby weave'. Once you have finished your 8 rows, weave your shuttle into the middle and trim the wool, making sure all ends of your wool are poking out the back.

Once you have finished your 8 rows, weave your shuttle into the middle and trim the wool, making sure all ends of your wool are poking out the back.

To create your first row of tassels, take your chunky cream wool and cut strips approximately 35cm in length.

Lay 3 strands on top of the warp threads. Each tassel will use 2 warp threads at a time. With your left hand, twist the wool over and around the warp and poke it back through.

Repeat this with your right hand with the second warp thread.

Bring the two sections together and gently pull towards yourself. This is your first tassel.

Repeat the technique until you have a complete row of cream tassels. No need to trim your tassels just yet, wait until the weave is off the loom at the end.

Weave 3 rows of tabby weave with your cream wool. After you create any tassels you need to secure them down with a few rows tabby weave.

Add 4 chunky cream tassels on the left. Cut some 35cm strands of the chunky grey and gold.

With 3 strands of gold and 3 strands of chunky grey add 10 tassels on the right. With your shuttle weave 4 rows of chunky cream. Add another 6 grey and gold tassels on the right.

Weave 4 rows of chunky cream on the left, to fill up the gap. Weave all the way across.

To create loopy tassels, cut off a large piece of wool, just over 2m in length. You will need 7 strands of the same length. Weave your ends in to the 7th warp and lay your wool over the top of the warps, just like you would when making a tassel.

With the strands of wool in your right hand, twist under the warp. Exactly as you would with a tassel.

With your left hand, twist the wool over and under next warp thread.

With your fingers hook the loops and bring down.

Repeat these steps working to the left.

Create another 2 loopy tassels above.

To create little flower bundles, tear off a small piece of roving and roll into a ball with your fingers.

Using some gold wool, bind the roving (using 2 strands at a time) rotating as you go and tie in a knot.

Tie this flower bundle to the warp threads at the back of your loom, next to your green loopy tassels.

To create some pink petals, tear off a strip of pink roving and weave into your warp threads but making sure you create large loops as you go.

Add some cream loops to the right of your pink roving. Do this by weaving chunky cream wool and teasing it out to create big loops.

You will need to weave some cream wool on the left, next to the pink roving and above the green loops. Weave 17 rows on the right, decreasing every two rows to create a diagonal shape.

Make a pom pom out of the pink wool and tie onto your warp threads.

Add some yellow roving strands, this will be for the pollen of the flowers.

Make a pom pom out of the chunky grey wool, tie this to your warp threads.

Remember to keep weaving your cream chunky wool to fill in the gaps.

Add some more roving petals with the pink roving.

Weave in some beige coloured roving to the left and add some green loops. Tie another bundle of beige roving and tie to your warp threads.

Add 3 pink loopy tassels. Use 4 strands to create the loops.

Add in a chunky cream pom pom. Tie onto a warp thread in the middle.

Keep weaving chunky cream around your flowers, this will hold all your warp threads together. Weave in some green loops, making your way towards the righthand side of the loom. Add some pink and yellow weaving as you have done before to create some more flowers.

Add one more beige roving bundle at the top.

Fill in all the gaps with the cream chunky wool. You will want to finish weaving once your weave is straight and level at the top.

With a contrasting colour tie a double hitch to each warp thread. This is creating this knot shown in the picture twice on each warp thread.

Do this to every warp thread.

Using your wool needle, sew in all your ends on the back of your weave. Sew down or up the weave, not across.

To hang your weave cut your doweling so it is 5cm larger than the width of your weave.

Carefully release the first looped warp thread. Wrap the looped warp thread around your dowel twice.

Work your way along your weave, releasing each looped warp thread one at a time.

When you have wrapped all warp threads around your dowel, carefully tease your weave off your loom at the bottom.

To be able to hang your weave tie a piece of the cream wool around each end of the dowel. You can have this any length you desire. Here we have used a piece approximately 50cm in length.


