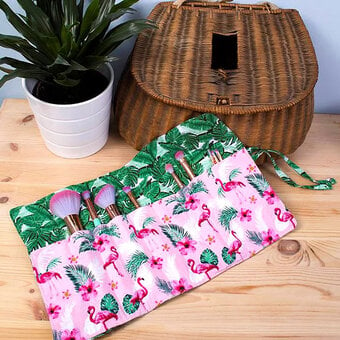
How to Make a Roll-up Craft Tidy
I often find it hard keeping track of my paintbrushes, crochet hooks and knitting needles, so I decided to make a roll-up craft tidy. Perfect if you're on the go and want to keep all of your supplies together in your bag, plus it's also a really good way of keeping everything in tip top condition! It's also a great project for using up any remnants of fabrics you might have, (dependent on the size case you want to make) you only need half a metre of fabric plus an additional 25 centimetres of coordinating fabric!
You will need
How to make
First of all you need to measure the tools you wish to make your wrap for, in this case I'm using paintbrushes, but they can also be useful for crochet hooks, knitting needles and make-up brushes.
My brushes measured 20 centimetres, so I doubled that and cut the height of the fabric at 40 centimetres. You will also need to decide how many compartments you would like. For a regular paint brush (and crochet hooks and a pair of knitting needles) I would recommend 3 centimetres, but if what you would like to put in wider items you need to plan for that. I am going to go for 12 compartments at 3 centimetres each, plus a little for hemming (2 centimetres) which is 38 centimetres wide. So, go ahead and cut two pieces of fabric to your measurements.
You will also need a piece of coordinating fabric for the actual compartments. This piece should be the same width (38 centimetres) by half the height (20 centimetres).


Fold the coordinating fabric in half lengthways and place neatly on the bottom of a piece of patterned fabric with all the open edges at the bottom.


Pin it securely in place then either with a disappearing fabric pen (the one I use is heat sensitive and disappears when you iron it) or pins mark across the top of the compartment piece.


Next, with a sewing machine, run a row of stitches up one edge to join the two pieces, then working across run a row of stitches at each mark to separate your compartments. It is worth doing a little reverse stitch to strengthen at the top edge.

Work all of the way along, you should end up with something that looks like this. You don't need to sew the bottom edge.

Now attach the ribbon by folding it in half and pinning it inwards, just above the compartments, as shown in the photograph below. Give it a few rows of stitches over each other to secure.


Take the other large piece of fabric that you cut earlier and place it face down on top of your panel. Make sure the pattern faces the correct way and pin it in place.

Leave a gap in the centre bottom, and sew all the way around, leaving an un-stitched section at the bottom to allow you to turn the 'case' outside in.

Trim off the corners, very carefully as this will make your corners neater once you turn it the right way in.

Once you've turned the case outside in, hand sew the gap shut with tiny overstitches.

To finish off your roll you can give it a top-stitch on the sewing machine, just sew a nice neat stitch all the way around. Of course you don't need to do this but I think it finishes it off nicely.
And there you have your brush / hook / needle / pencil tidy!


This fab craft tidy doesn't just have to be just for paint brushes! It'd make the perfect pencil tidy for all of your adult colouring needs too. I've added some pom pom and ricrac ribbons to the version above and, instead of a tie, sewn on a small loop of elastic with a button to keep the tidy together when rolled.


