Sawgrass: How to Make a Personalised Ceramic Mug
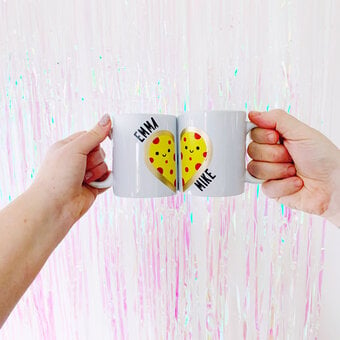
Want to create the perfect personalised gift for a loved one this Christmas? Look no further than this personalised ceramic mug, a beautiful project to make with your Sawgrass printer!
The Sawgrass sublimation printer uses special ink and paper to transfer your design onto the sublimation-compatible enamel mug blank, with flawless professional results achieved every time.
You can choose from different designs, colours and fonts to create a sentimental gift.
This project is perfect for Sawgrass beginners, and it can be created in under an hour.
You will need
* Sawgrass Sublimation Machine
* Mug Press
* Sublimation Mug Paper
* Mug Blank (we used an 11oz mug)
* Butcher Paper
* Heat Resistant Tape
* Scissors
* Heat Resistant Gloves
* A Sawgrass Creative Studio Account (If you don’t already have an account, you can sign up for free at www.sawgrassink.com)

Log in to your Sawgrass Creative Studio account and click 'new creation'. Go to 'blank products' and then search for the 11oz ceramic mug.

Navigate to the 'designs' tab on the left of the screen, and click into the 'Christmas' folder.
Find and select the Season's Greetings Christmas Tree design from this folder.


The design will appear on your mug. Click the 'select all' button on the top bar and, using your mouse, move your design to one side of the mug. Resize by dragging one of the corners of the design to ensure the design fits fully on the mug.

Click back on the 'select all' once more to deselect. Then click on just the background of the image and extend by pulling the corner to completely fill the design space.

Click on the ’Season’s Greetings’ text, and then navigate to the right column under the 'text' section to change the text to what you would like it to read. For this mug, we chose to change the wording to ‘Happy Christmas’.

You can personalise this mug by adding a name, date, or special saying if you wish. To do so, click on the 'text' tab on the left side, and then click the 'CreativeStudio' folder. Select a font that you like and then on the right side in the 'text' section you can change the text. You can also change the size of the text if necessary.
Then click on the text on your design and move it to where you would like it.


You can use the 3D preview option to see your design as it will look on the mug. When you are happy with it, make sure to save your design, and then click 'print'.

For your mug, select to mirror your design and make sure your paper size matches the sublimation paper you are using (for example A4 paper or mug standard), and then change the product to 'ceramic mug’.
Change the colour mode to vivid. Ensure that your sublimation transfer paper is loaded into your printer bright side facing down, then click 'print'. This will open the Sawgrass print manager where you can double check your print settings to make sure they are correct.
Once your settings are in place, click 'print'.


Once your design is printed, switch on your mug press so that it has a chance to warm up.
Cut any excess paper from your design and then tape it to the mug using heat resistant tape. The tighter the seal, the better your mug will sublimate, so make sure the transfer paper is smooth and taped tightly around (remember to check the design is the right way up too!).
Tape on a layer of butcher paper over the top as an extra layer of protection. When your mug press has heated up, place your mug inside it and press.


When the timer has gone off, carefully remove the mug from the press with heat protection gloves. Allow the mug to cool fully before removing the papers.


