Cricut: How to Make a Birthday Banner with Smart Iron-on Vinyl
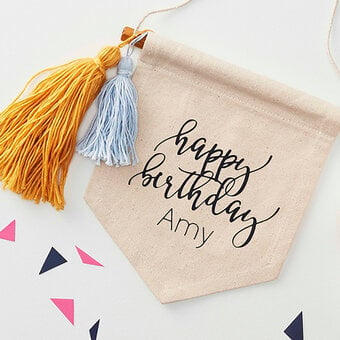
Make a statement at an upcoming birthday celebration with this personalised banner created with the Cricut Maker 4 (the Cricut Explore 4 can also be used). Make your banner truly one-of-a-kind by adding the lucky recipient's favourite colours to the design.
Cricut Design Space Project Link: Birthday Banner;
Project and instructions by Emma Jewell
Please note: This project contains paid-for content from Cricut's Design Space app. Screen grab reference images are taken from the desktop version of Design Space.
You will need
How to make
You will also need:
* Cricut Design Space installed on a mobile, tablet or desktop device
Start by opening up the project in the Cricut Design Space app using the project link at the top of this post, or alternatively use the link below - https://design.cricut.com/landing/project-detail/60b8ee35fa3c2207c441ff60
To access the project, copy and paste the link into your browser, you will be directed to a Cricut ladning page, select 'Open' followed by 'Open Cricut Design Space Application'.
The app will open (you may be prompted to log in) and the project overview screen will appear.
Select 'Edit a copy' to open the project in a new Canvas, esure you have 'Explore 4' or 'Maker 4' selected within the app, re-size the greeting as desired to your banner, then click 'Make it'.


Select the 'Mutiple Ways' option from the pop-up that appears on screen, then click 'Done'.
Once through to the main section of the mat preview screen, make sure the 'Mirrror' function is activated on all the mats.
Click 'Continue'.
Once through to the machine set up screen, choose the type of iron-on from the materials listing.
Follow the on-screen instructions to complete the cut.
Top Tip: When using Smart Iron-on make sure to load it into the machine face down. If working with non-smart iron on load it face down onto a mat, then into the machine and start cutting.


Once cut weed your design by removing all of the parts of the design you do not wish to tranfer to the banner. Cut around the words to make them easier to place onto the material.

Once all pieces are cut and weeded lay them out on the calico material, making sure they are all lined up, then press with your EasyPress.
Check the Cricut Heat Guide (https://cricut.com/en_us/heatguide) for the correct heat and time for your material and iron-on type.
Once pressed wait for the iron-on to cool before peeling off the plastic carrier sheet.

Use a sewing machine, or hand stitch, to create a banner from the material, creating a channel along the top of the banner for the doweling to sit in.


