Cricut: How to Make a Personalised Pet Treat Jar
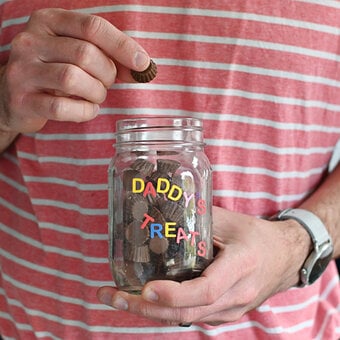
Make sure your furry family members aren't left out of the Christmas festivities with this quick and easy personalised pet treat jar project! Simply grab an old jar and fill it with your dog or cat's favourite tasty treats, then use adhesive vinyl to decorate it.
This project has been created on the Cricut Joy, but you can also use the Maker or the Explore.
Project and instructions by Aisha Cluitt.
Please note: This project contains paid-for content from Cricut's Design Space app. Screen reference images are taken from the desktop Windows version of Design Space.
You will need
How to make
You will also need:
· Cricut Design Space app installed on your Mac, PC or laptop.
Open a new project in Design Space and select the “Text” menu from the toolbar on the left-hand side of the screen. Type your chosen name into the text box that appears on screen.

Change the font type using the drop-down menu in the toolbar at the top of the screen. I chose “Felix”.

Repeat the steps one and two, this time with the word “Treats”. Resize and position both words, making sure to consider the size of the jar you're using and the width of the Smart Vinyl.
Once happy with the positioning, drag a selection box over both parts and “Attach” them, this will ensure the phrase stays in this position when cut.


Open the “Images” menu and type "Bone" into the search bar. Select the cream bone design with a black outline (image #M43EED). Click “Insert”.

Once back through to the canvas, hide/delete the black outline of bone and re-size as desired. Use the “Duplicate” function to create multiple bones.


Once happy with the design click “Make it” in the top right-hand corner of the screen.
You'll then be taken through to the mat preview screen, you'll be prompted to select how the material will be loaded into the Joy, as we're using Smart Vinyls for this project select the “Without Mat” option.
Check everything is present and correct before selecting “Continue”.

Follow the on-screen instructions to cut out the design.
Once the cut is complete, trim away any excess vinyl before weeding it and using Transfer Tape to apply the text part of the design to the jar.

Peel the bone stickers from the vinyl backing sheet and apply these to the jar by hand. The jar is then complete and ready to be gifted!


