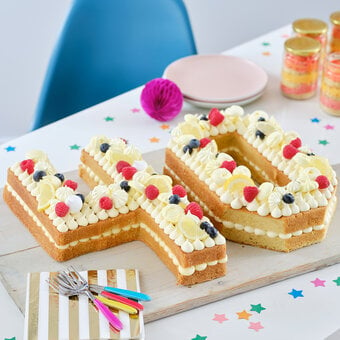
How to Make a Funfetti Ice Cream Cake
Celebrate the beautiful and sunny weather by creating this showstopping and delicious ice cream-themed funfetti cake.
Whether you want to improve your baking skills or create something extra-special for your family and friends at a celebration, this cake will be sure to delight.
It's fun to make – and even more fun to eat!
Project and instructions by Lucy Bruns
You will need
You Will Need
* Vanilla Buttercream Style Icing
* Scrumptious Sprinkles
* Renshaw White Royal Icing
* Gel Food Colouring - Pale Pink, Violet, Pistachio
* Round Cake Decorating Turntable
* No.2D Large Drop Flower Decorating Tip
* Icing Bag
* Baking Powder
* Vanilla Extract
* Long Knife
* Mixing Bowls
* Cooling Rack
* 10 inch Cake Board
* 8 Medium Eggs
* 16oz/450g Caster Sugar
* 16oz/450g Margarine or Soft Butter
* 16oz/450g Self Raising Flour
* Jam or Filling of Choice
* Wafer Ice Cream Cones x4
* Macarons
* Meringue Kisses
How To Make
Preheat the oven to 170°C fan.
Cream together the sugar and butter/margarine until light and fluffy.
Beat in the eggs one at a time and sift in the flour and baking powder.
Mix together along with the vanilla and fold in the sprinkles.

Divide the mixture equally between three 7” cake tins lined with baking paper and bake for 40 - 50 minutes until golden and risen.

Turn the cakes out onto a cooling rack and leave until completely cool before decorating.

Use a long, serrated knife to level off each sponge and remove any domed tops.
Keep the offcuts and put to one side.


Stick the first sponge to a 10inch cake board with a blob of frosting and pipe a narrow dam of frosting all around the top edge.
Fill inside the dam with your jam or filling.
Layer the next sponge on top and repeat the process.
Invert the third sponge on top of the cake so it is base side up.


Cover the whole cake in a thin layer of frosting to seal in any crumbs and put in the fridge to chill for one hour.

Use a serrated knife to cut three ice cream cones in half lengthways – cut along the seams/joins down the sides.
Keep one ice cream cone intact for the top of the cake.

After the cake has had time to get cold and the crumb coat is stiff, cover the whole cake in a layer of frosting and use a turntable and cake scraper to give the cake a smooth finish.


Add the six half cones evenly around the outside of the cake, pushing them gently into the frosting – you may need to trim the cones down a little at the base.
Stick colourful sprinkles to the frosting around the base of the cake.
Put the cake back into the fridge for another hour or two to firm up the frosting.


Crumble up the cake off cuts and stir in a tablespoon or two of frosting to make a mixture which binds together when squeezed in your hand.
Take an ice cream scoop amount of the mixture and form a ball which is flat on the base.
Stick this ball on top of the chilled cake with a blob of frosting.


Mix three tablespoons of Royal Icing with a little water to make a thick but slightly runny consistency.
Colour the icing with pink food colour.
Carefully drizzle the icing over the scoop of ice cream on top of the cake, ensuring it is covered completely.


Add more icing to the top of the cake and encourage some drips down the sides. Stick the wafer cone to the top of the scoop and add sprinkles to the pink icing before it sets.


Embellish the top of the cake with macarons and meringue kisses.

Colour any remaining frosting to pipe inside the cones around the cake.
Fit a piping bag with a 2D nozzle and pipe a swirl inside each cone.
Finish with more sprinkles.


The cake is then ready to be displayed in pride of place on your table, ready to be eaten!


