Skip to Content (Press Enter) Skip to Footer (Press Enter)

How to do Floral Skull Face Paint

Level
Intermediate
Time
1 hour
Budget
<10

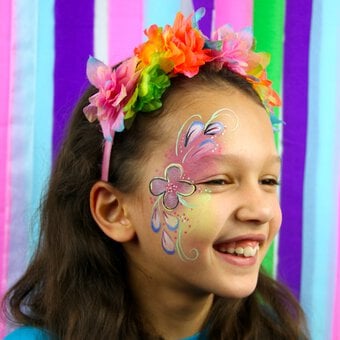
If you’re looking for a Floral skull face painting project, then this is the perfect project for you! Ideal for Halloween lovers of all ages, this step-by-step guide will show you how to recreate this look and how to build each layer as you go.

Project and instructions by Hobbycraft Artisan Cat Finlayson.

You will need

Is $ 4.49

Quantity: 1

Subtotal

Is $ 4.49

Is $ 5.49

Quantity: 1

Subtotal

Is $ 5.49

Is $ 7.49

Quantity: 1

Subtotal

Is $ 7.49

Is $ 7.49

Quantity: 1

Subtotal

Is $ 7.49

Is $ 6.49

Quantity: 1

Subtotal

Is $ 6.49

Is $ 7.49

Quantity: 1

Subtotal

Is $ 7.49

Is $ 7.49

Quantity: 1

Subtotal

Is $ 7.49

Is $ 7.49

Quantity: 1

Subtotal

Is $ 7.49

You’ve viewed 2 of 8 products

You’ve viewed 4 of 8 products

Total:

How to make

Step-1
Dampen your sponge (I spray mine with water), and work up white face paint until it is creamy (not sticky but not runny). Pat white paint evenly all over the face with the sponge, re-loading or re-dampening sponge as needed. Paint does not need to be as neat around the eyes this time.
0553_hc_halloween_2017_0107.jpg?sw=680&q=85
Step-2
Using a damp sponge, work up the light blue paint. Use a picture of a skull to copy if needed. Contour under cheekbones by gently tapping blue on, and in temples, eye sockets and under eyes.
0553_hc_halloween_2017_0114.jpg?sw=680&q=85
Step-3
We are going to stencil the forehead, temples, and upper cheeks. Load your sponge by dampening it, then swiping it parallel to your colour stripes so that your sponge looks stripey. To make a rainbow face paint cake, scoop or slice the colours and line up in a clean paint lid. It may help to chill them first (do not freeze) as some colours can be a bit soft. I did a green, light blue, dark blue, purple rainbow stripe. Lie the green at the 'top'. Press the pale blue along one long side of the green, then dark blue along the empty long side of the blue, and purple along the last empty side of the dark blue. You can use brushes to paint each colour onto your sponge in a rainbow stripe instead. Open your iridescent cosmetic glitter. Press the mandala stencil against the skin and press the sponge over it, trying not to move the stencil. I put the green end of my sponge into the middle of the circular stencil and gently pressed my sponge round like the hands of a clock, so the green was always in the centre but the purple moved round the outside edge. Without moving the stencil, pick up glitter on a clean sponge and press onto the damp paint through the stencil. Remove the stencil and get ready to repeat this all on the next stencil area – you may need to it off on a damp facecloth. Make sure it is clean and dry before re-using.
0553_hc_halloween_2017_0120.jpg?sw=680&q=85
Step-4
Using black, sponge more dramatic shading into the outer eyes, eye sockets, temple and cheekbones. With a clean, wet size 6 round brush, add black lines as swirls, dots, teardrops, nostrils and black lip liner. Fill in lips with dark blue.
0553_hc_halloween_2017_0126.jpg?sw=680&q=85
Step-5
Add the sticky flat back pearl gems from Hobbycraft where you wish. If they fall off they can be re-glued with any cosmetic adhesive or eyelash glue.
  • bvseo_sdk, dw_cartridge, 18.2.0, p_sdk_3.2.0
  • CLOUD, getReviews, 18ms
  • reviews, product
  • bvseo-msg: Unsuccessful GET. status = 'ERROR', msg = 'Not Found.'; Unsuccessful GET. status = 'ERROR', msg = 'Not Found.';
Top