How to Make a Hand Printed Boxy Bag
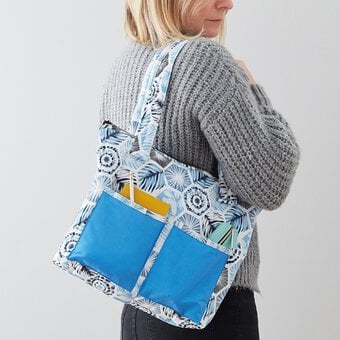
Sew your way to personalised designs for every aspect of your life. Choose your favourite fabrics and transform them into unique accessories, such as cute box bags like these by sewing expert Debbie von Grabler-Crozier. Follow the tutorial below to find out how to make your very own.
You will need
You will also need: An iron and an ironing board
NB: seam allowances are all ½ cm (1/4”) unless otherwise stated. Please read all instructions through and assemble the equipment before beginning.
Press the natural fabric to remove any bumps and creases which may get in the way and put it onto a flat surface.

Ink the stamp that you have chosen and stamp onto the fabric. Re-ink and repeat until you have covered the fabric completely.
There are a few things to remember when printing-
Re-ink after each stamping
Be prepared to accept some 'variations' in the printing
Try not to drop the stamp on the fabric!
Embrace some mistakes and either ignore them or cover them – this is an organic process
Go slow and concentrate

Press again to set the ink and fuse the fusible wadding to the back of the outer fabric.
Use the template to cut two pieces each of interfaced outer and two pieces of lining.

Lay the outer pieces onto a slightly larger piece of interfacing and attach all around with a very narrow basting seam. Trim so that all layers match the outer.
Take your zipper and make a 'sandwich' with one piece of lining and one interfaced linen panel. The right sides should be together with the zip in the middle.
With the three layers together, sew along the zip starting and stopping 2cm from each end.

Flip the layers open and topstitch along the zip, again stopping and starting 2cm in from either end.
Repeat for the other side. The zip is a bit long but don't worry about it, it will be trimmed in the next steps.
Find the base seams of the outer and sew both right sides together with no gaps. Now do the same on the lining but this time, leave a turning gap

Working from the wrong side, align the zip so that it is perfectly matched with the outer base seam, pull the lining up out of the way (this is why you did not stitch or topstitch right to the end) and sew across.

Repeat for the other end and then turn over and do the same for the lining, clipping the outer out of the way.

Pinch the square corners across now and box the corners.
Turn the bag out through the gap in the lining and close the gap. Gently poke the corners out so that they are nice and sharp.
Thread the baker's twine through the zipper pull and tie it off securely.


