How to Make Easter Treat Boxes
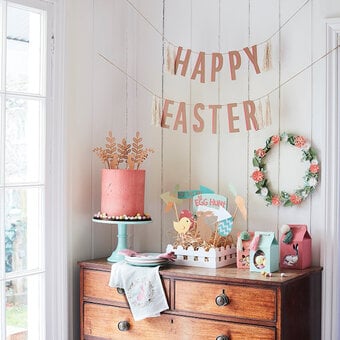
If you've got an Egg Hunt party coming up these quick to make, spring-themed boxes are ideal, they make the perfect favour for both adults and children alike.
The Design Space app (used in conjunction with the Cricut machines) makes it super-easy to customise the size of the treat boxes so that they're the perfect proportion.
This project includes paid for Design Space images
You will need
How to make
* A3 Pastel Card
* Stix 2 Anything Acetate Sheets A5 10 Pack
* Cricut Light Grip Cutting Mat 12 x 24 Inches
* Cricut Basic Pastel Tool Set 5 Pack
* Cricut Scoring Stylus
* Double Sided Sticky Tape
* Screw Hole Punch
* Pom Pom Maker 4 Pack
* Knitcraft Everyday DK Yarn in Mint Green, White & Baby Pink
* Kraft Jute Twine
* Free Templates - Downloaded + Printed
* Cricut Design Space Downloaded

Open the Cricut Design Space app and start a new project, open the images tab from the menu at the bottom of the screen and search “Carton” (#M3EE51) and select the below design.

Duplicate the carton, so that you have three in total on the canvas (use the “Duplicate” function in the “Actions” menu).

Amend the size of each so that the cartons have the following widths – 46cm, 41cm and 37.9cm.

Open the “Images” tab once more and select three Spring-themed shapes (silhouettes work best). I opted for a rabbit (#M7867B15), egg (#M7F48F0C) and a flower cluster (#M5080D). Once all three images are selected, select “Insert” to add them to the canvas.

It's now time to customise each of the cartons and create the apertures in the fronts. To do this select the largest carton, and select “Detach” from the “Actions” menu, this will detach the score lines from the carton shape.

Re-size the rabbit so that it fits comfortably (and centrally) on the third panel from the left-hand side.

Temporarily place the score lines to one side on the canvas, leaving the rabbit in position. Drag a selection box over the carton image and the rabbit, and then select “Slice” from the “Actions” menu.

Select and remove the black and orange rabbit shapes, so that you're left with a white aperture.


With the carton selected, open the “Edit” menu and select the circular colour swatch to the right of the word “Cut”, amend the colour to match the colour of cardstock you intend to use (in this case pink).


Reposition the score lines onto the carton base. To do this select the score lines (by clicking on them) open the “Edit” menu and then the “Arrange” function, select “Send to Front” from the pop-up.

Reposition the score lines ensuring they go back in exactly the same position. Drag a selection box over the entire carton, and then select “Attach” from the “Actions” menu.

Repeat steps 5 – 11 for the remaining two cartons.

Once you are happy with the design of all three cartons select the green “Make It” button and follow the on-screen instructions to set up your Cricut machine and cut/score the cartons, carefully removing each from the mat once it is cut.

Using a pair of sharp scissors cut a piece of acetate that fits over the aperture, securing it in place on the inside of the carton with double-sided tape, ensuring the acetate does not layer over the score lines.

Gently fold the cardstock along each of the score lines and begin constructing the box, applying double-sided tape along the tab.

Use the Anywhere Screw Hole Punch (fitted with the smallest attachment) to create two holes along the top section of the carton, ensuring the holes go through all the layers of cardstock.

Fill your cartons (if adding edible items place them in a clear food bag), then thread a length of twine through the punched holes and secure with a bow on the back of the carton. Create a selection of pom-poms and tassels to decorate the cartons further.


