Skip to Content (Press Enter) Skip to Footer (Press Enter)

How to Sew Personalised Pennant Bunting

Level
Intermediate
Time
1/2 day
Budget
1

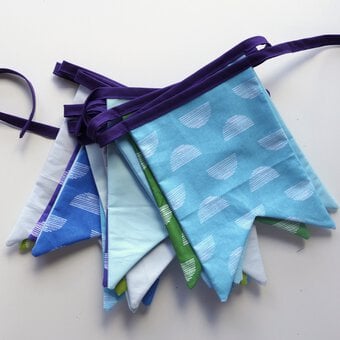
Create this gorgeous personalised pennant bunting using the new Dreamy Pastels Fat Quarters available online and in store at Hobbycraft. Pennant bunting is the perfect sentimental gift for those expecting little ones, that can be kept as a keepsake for years to come. Our haberdashery expert, Kathi, here shows you how to create the individual pennant flags, and suggests ways to decorate using cleverly crafted felt accents!

You will need

Is $ 121.00

Quantity: 1

Subtotal

Is $ 121.00

Is $ 24.00

Quantity: 1

Subtotal

Is $ 24.00

Is $ 25.00

Quantity: 1

Subtotal

Is $ 25.00

Is $ 27.00

Quantity: 1

Subtotal

Is $ 27.00

Is $ 20.00

Quantity: 1

Subtotal

Is $ 20.00

Is $ 3.49

Quantity: 1

Subtotal

Is $ 3.49

Is $ 6.49

Quantity: 1

Subtotal

Is $ 6.49

Is $ 2.49

Quantity: 1

Subtotal

Is $ 2.49

You’ve viewed 2 of 8 products

You’ve viewed 4 of 8 products

Total:

How to make

Step-1
For this four letter name I made 7 pennant flags, however this pattern is easily adaptable for any name. Press all of your fabrics. Fold the fat quarters in half and press again. Cut a 23cm (Height) by 20cm (Width) folded piece from both unicorn fat quarters, two from the pink fat quarter and two from the grey fabric.
Step-2
Fold each piece in half again. Measure up 5.5cm from the folded corner and cut. Once unfolded this will create your pennant shape.
Step-3

Set your fabric aside and take one piece of the bright pink felt. Using a fabric marker, draw on your chosen name in reverse on the back so that there will be no pen marks on the right side.

8-2.jpg?sw=680&q=85
Step-4
Take your Heat N Bond and carefully press a sheet onto the back of the felt that you have drawn onto. Peel of the paper part of the Heat N Bond.
Step-5
Cut all of your letters out and arrange onto your flags. Use the paper part of the Heat N Bond to recover each letter (this will protect the felt) and press.
Step-6
Once all of the letters have been secured onto each flag, take your white embroidery thread and hoop and use a simple running stitch to stitch around each letter. (Be sure to only stitch the front side of the flag!)
Step-7
After you have finished stitching the letters, turn each flag inside out. Pin the edges together, leaving a couple of inches on the left side so that you can turn through and approx 1cm on the right side for the ribbon to thread through. Sew around using a 1cm seam allowance.
Step-8
Trim the excess fabric from the points and snip into the middle point and turn the flag through. Use a chop stick to make the corners pointy! Give each flag a good press.
Step-9
Take your pom pom trims and use fabric glue to stick it to the edges of the flags.
Step-10
Set the letter flags aside and take you grey ones. From pink felt draw and cute several flower shapes. (The templates can be found in the Felt Succulent blog post).
26.jpg?sw=680&q=85
Step-11
From the yellow and pale blue felts cut a simple leafy design and from the dark blue felt cut two simple leaves.
27.jpg?sw=680&q=85
Step-12
Create three small pom flowers from the yellow, pink and white felt. take the yellow pom and start wrapping the bright pink petals around it until you have created a full flower. Use fabric glue or a glue gun for this.
28.jpg?sw=680&q=85
Step-13
Once you have all your felt elements, arrange onto a grey flag and stick.
Step-14
Repeat with alternative colours for the second grey flag.
31.jpg?sw=680&q=85
Step-15
Now all of your flags have been individually completed you can thread them onto your ribbon. Use a safety pin to help you do this.

Related Products

  • bvseo_sdk, dw_cartridge, 18.2.0, p_sdk_3.2.0
  • CLOUD, getReviews, 17ms
  • reviews, product
  • bvseo-msg: Unsuccessful GET. status = 'ERROR', msg = 'Not Found.'; Unsuccessful GET. status = 'ERROR', msg = 'Not Found.';
Top