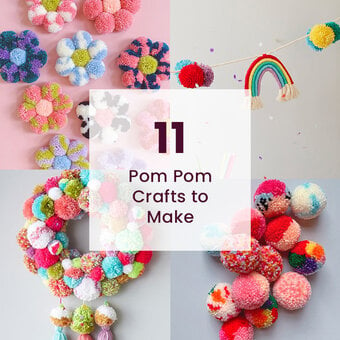
Cricut: How to Make a Spring Wreath
Add a touch of spring to your home décor with a beautiful paper wreath! This wreath can be made any size you like, just re-size the project elements to suit. We created this project on our Cricut Explore Air 2, however, you can also use a Cricut Maker.
Project and instructions by Aisha Cluitt and Hobbycraft Artisan Chrissie Ellson
This project contains paid for content from Cricut's Design Space app
Screengrab references images are taken from the iPad version of Design Space
You will need


How To Make
You Will Need
* Coloured Cardstock A4
* White Card A4
* Cricut Explore
* Cricut LightGrip Cutting Mat 12x12"
* Basic Cricut Tools
* Cricut Scoring Stylus
* Cricut Deep Point Housing and Blade
* Hot Glue Gun and Glue Sticks
* Glue/Glue Pen
* 4ply Matboard
* Basswood (optional)
Open the Cricut Design Space app and type “Wreath” into the search bar at the top of the screen. Select the “Lia Griffith - Summer Wreath” design and select customise.

All of the components that make up the wreath will then populate onto the canvas.

Open the “Shapes” menu from the toolbar at the bottom of the screen, and insert two circles. Re-size one of the circles to 26cm wide and the other 24cm wide ensuring that the padlock icon is locked so that the circle resizes proportionately.

Place the smaller circle centrally over the larger one using the guides to help.
Drag a selection box over both circles and select the “Slice” function from the “Actions” menu.


Select the ring, the click on “Duplicate” from the “Actions” menu so that you have two rings.

Edit, re-size and “Duplicate” the floral and foliage elements that make up the wreath using the ring as a guide as to how many elements you'll need and what size to make them.
For our wreath design, we removed the three sprig floral design and unhide the second layer of the daisy design, changing the colour of this layer from pale yellow to white so that it cuts from the same colour cardstock as the first layer. We also removed the pale green leaf.

Once all of your tweaks have been made to design select the green “Make It” button from the bottom right-hand corner of the screen.

You'll then be taken through to the mat preview screen. Double-check that everything is correct before selecting the “Continue” button.

The machine set-up screen will then appear, twist the smart dial on your Explore Air 2 to “Custom”, you'll then see a materials menu appear. Select the below settings when cutting the specified materials; to find them click the “All Materials” button and search for the material you're using. Cricut Sorbet Cardstock is' Medium Cardstock 80lb (216gsm)'.


Follow the on-screen instructions to cut out each element of the design, inserting the scoring stylus when directed (if you have a Cricut Maker you can use the Scoring Wheel if you prefer).
When it comes to cutting out the rings from mountboard amend the material setting to Matboard 4ply and insert the deep cut blade (you could use a Knife Blade if you prefer, however, the project will need to be completed on the Desktop version of Design Space). Slide the star wheels on your machine to the right-hand side and secure the mountboard to the StrongGrip cutting mat applying masking tape on all four sides.
Construct the flowers using the assembly instructions on the project overview, and gently fold along the centre score line on the leaves.
Using a hot melt glue gun, secure both of the mountboard rings one on top of the other, these make up the wreath base. It's then time to add each of the flower and foliage elements, working in a clockwise direction.

If you're planning on hanging this wreath in a little one's room or on their bedroom door, why not add an extra special personalised touch with their name?! This too can be cut from mountboard, or you could use basswood if you have a Cricut Maker and the knife blade. We've then heat embossed the name with gold embossing powder, but you could paint the name or leave it as natural wood.

Change the font to your chosen design; we went for “Babette”.

The letters that make up the name need to touch in order to attach the final cut name to the wreath. To do this select the name and click “Ungroup to Letters” from the “Advanced” menu. Each of the letters will then be editable, so you can change the size and can be moved independently of one and other. Position the letters individually so that they just overlap each other.


Once you have the letters positioned how you want them highlight the whole word and select “Weld” from the “Actions” menu.

Once the letters have been welded, re-size the greeting as desired, and then click the green “Make It” button. You'll then be taken through to the mat preview screen.

When working with the strips of basswood it is easier to have your image going vertically on the mat rather than horizontally. This is so the strip can go off the end of the mat without you having to cut it down to size. To rotate your image click and hold the rotation button and position your image along the left-hand edge. Then click “Continue”.


Secure the basswood to the purple StrongGrip cutting mat and smooth over it with the scraper tool or the Cricut brayer if you have it. Use masking tape to secure the basswood to the mat to keep it secure during cutting.

Once through to the machine set-up screen click “Browse All Materials” and type Basswood into the search box and select the “Basswood – 1/16” (1.6mm)” option.


Before you load the mat in to the machine move the white star wheels to the right-hand side of the machine and insert the Knife Blade into port B. Follow the on-screen instructions to cut out the design.

A countdown on number of passes and an estimate of cut time will appear on screen. Once your machine has completed the final pass do not eject the mat, follow the on-screen instructions to check that the cut has been successful.


Once the cut is complete, carefully remove it from the mat.


Then it's time to decorate the name however you like! We heat embossed ours, but you could paint it or even use gilding flakes!

Craft with us at our workshops


Related Products