Skip to Content (Press Enter) Skip to Footer (Press Enter)

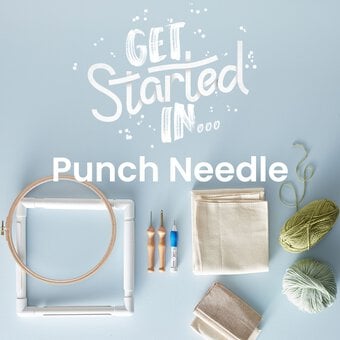
Get Started In Punch Needle

Level
Beginner
Time
1 hour
Budget
10 - 30

Punch needle embroidery is the latest craft trend to make its resurgence, so it's the perfect time to give it a try. Lucy from @peasandneedles has put together the perfect beginner's guide to help you master the art of the punch needle – from how to thread the needle and creating your first piece to finishing your punch needle designs like a professional.

Once you've learned the basics, experiment with your colour palette and stitches to create unique pieces of work. It's a simple technique to get the hang of so you'll be personalising in no time.

You will need

Is $ 6.49

Quantity: 1

Subtotal

Is $ 6.49

Is N/A

Quantity: 1

Subtotal

Is N/A

Is $ 12.00

Quantity: 1

Subtotal

Is $ 12.00

Is $ 24.00

Quantity: 1

Subtotal

Is $ 24.00

Is $ 10.00

Quantity: 1

Subtotal

Is $ 10.00

Is $ 24.00

Quantity: 1

Subtotal

Is $ 24.00

Is $ 14.00

Quantity: 1

Subtotal

Is $ 14.00

You’ve viewed 2 of 7 products

You’ve viewed 4 of 7 products

Total:

How to Make

How to Thread the Needle Step 1

Insert the yarn threader into the punch needle from the tip. Push it through until the metal loop pokes out the other side. Insert your wool into the metal loop.

punch_needle_01.jpg?sw=680&q=85
Step 2
Pull the threader back out of the needle, the yarn will follow and the yarn tail will pop out. Remove the yarn threader.
punch_needle_02.jpg?sw=680&q=85
Step 3
Poke the yarn tail back through the eye at the top of the needle as shown. Pull your yarn through so you have about 10cm showing. This is a really important step and if missed the loops will not form in your work.
punch_needle_03.jpg?sw=680&q=85
How to adjust the needle Step 1

The adjustable needle has various settings, indicated by the notches on the needle.

punch_needle_04.jpg?sw=680&q=85
Step 2
To adjust, simply twist the handle of the needle then push or pull the needle until you feel the spring inside the handle snap into your chosen notch.


To create long loops (especially great for tufting) adjust to the last setting, which creates loops about 3cm. To create small loops set the needle to the first notch, so the yarn is closest to the eye of the needle. Your loops will approximately be 0.5cm.

punch_needle_05.jpg??sw=680&q=85
How to use the needle Step 1

Thread your needle puncher making sure that the wool is threaded through the hole at the top of the needle and coming out the back. This is important as the loops will not stay otherwise.

punch_needle_06.jpg?sw=680&q=85
Step 2
Take the needle and punch down into the fabric until the wooden handle meets the fabric.
punch_needle_07.jpg?sw=680&q=85
Step 3
Bring the needle back out and move along roughly 4mm. Be sure to not bring the needle out too far as you will pull the looped wool out. Move your needle along making small running stitches.
punch_needle_08.jpg?sw=680&q=85
How to finish Step 1

Once you are finished with your stitches, gently pull the punch needle away from the fabric, making sure you catch the yarn with the other hand.

punch_needle_09.jpg?sw=680&q=85
Step 2

Leaving a 10cm length on the 'front' of your work, cut the yarn. Thread the yarn tail onto your wool needle.

punch_needle_10.jpg?sw=680&q=85
Step 3
Poke your needle thorough the centre of one of your stitches, pull your needle out the other side (the ‘back’ of your work). The yarn tail should now be anchored as it is ‘squished’ inside the stitch. Cut off the excess yarn flush against the loops on the ’back’ of your design.
punch_needle_11.jpg?sw=680&q=85
How to clean up your work

Use the tip of your punch needle to separate the loops, this will help to create a clean line.

punch_needle_12.jpg?sw=680&q=85

Related Products

Related Categories

  • bvseo_sdk, dw_cartridge, 18.2.0, p_sdk_3.2.0
  • CLOUD, getReviews, 17ms
  • reviews, product
  • bvseo-msg: Unsuccessful GET. status = 'ERROR', msg = 'Not Found.'; Unsuccessful GET. status = 'ERROR', msg = 'Not Found.';
Top