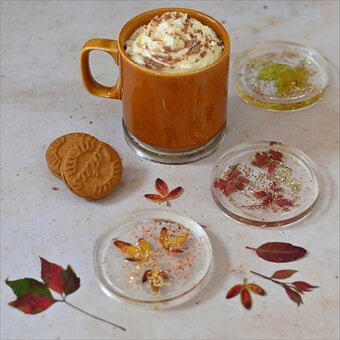
How to Make Autumn Mosaic Coasters
Add a special touch to your home décor this autumn with this unique project guide on creating lovely mosaic coasters.
Learn the art of mosaic with four unique designs tailored to complement different styles of home décor.
Perfect for the fall season, this DIY project will help you craft beautiful and functional pieces that enhance your home's autumnal charm.
Project and instructions by TheMakingBox
You will need


How To Make
You Will Need
* Unglazed Ceramic Coasters
* Mixed Mosaic Tiles
* Mosaic Glue
* Mosaic Grout
* Grout Spreader
* Moasic Tile Nlippers
* Tracing Paper/Carbon Paper
* Permanent Marker
* Sponge
* Paintbrush
To begin, we need to trace the templates provided onto the coasters. To do this, place your carbon paper directly onto the blank coaster, lay the template on top making sure it’s lined up currently, and trace over the outlines with your marker. This should create a nice faint outline on your coaster.
If using tracing paper, trace your designs onto the tracing paper using your marker, and then place the tracing paper directly onto your coasters. Go over the outlines again using your marker - this should go through straight onto your coasters.
Top Tip: The tracing paper needs to be fairly thin to use this method!

It’s time to mosaic! Separate your box of tiles into the colours you’re wanting to use.
Using your clippers, start to cut out your desired shapes from the tiles. Make sure to cup your hand around the clippers to prevent any fly away pieces and wear protective goggles when doing this.


Use a small paintbrush to apply the mosaic glue on to the tiles before sticking them down on to your coasters.
Repeat this for each piece of tile.


Remember that the size, shape and direction of your tiles makes a really big difference! Really think about this when you’re creating your designs.


Once you’re happy with your designs and the whole coaster is filled in, leave them to dry overnight to allow the glue to set fully.

Once they’re dry, it’s time to grout!
Mix up your grout with some water - you’re looking for it to be a peanut butter like consistency.


Use a damp sponge to wipe off any excess grout and you’ll see your design has really come together! You can use a little cotton bud too to reach any smaller areas.


Craft with us at our workshops


Related Products