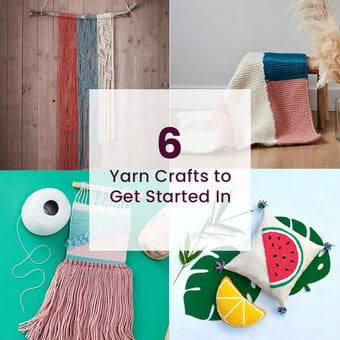
How to Crochet a Granny Square Blanket
This crocheted granny square blanket will be sure to keep you nice and toasty as it's made using super soft yarn that is also chunky, which means it's an incredibly quick blanket to make up.
You will need


How to Make
You Will Need
* WI Soft and Chunky Yarn 100g - Cream x 7, Grey x 5, Petrol x 5
* 8mm Crochet Hook
* Yarn Needle
* Scissors
Abbreviations - Stitches (UK):
ch : Chain Stitch – Yarn around hook (from the back) draw through loop on hook.
st – stitch
sp – space
sl st : Slip Stitch – Put hook through work and pull yarn through work and through loop on hook.
dc : Double Crochet – Put hook through work and draw yarn back through (two loops on hook) yarn around hook, draw through two loops on hook..
tr : Treble Crochet – Yarn around hook (from the back) put hook through work and draw yarn back through (three loops on hook) yarn around hook, draw through two loops on hook, yarn around hook, draw through two loops on hook.
Rem : remaining
Notes
This blanket is made by working rounds, it consists of only two stitches, the Chain stitch and the Treble Crochet, but you can add a Double Crochet to edge it if you wish.
When joining in new yarn, join on last pull through of last stitch in previous colour.
There are 2 colour ways;
ReferenceColourway 1Colourway 2
Yarn APETROLGREY
Yarn BGREYPINK
Yarn CCREAMCREAM
Using yarn A and 8mm hook, make an adjustable loop or a foundation ring by working 4ch, sl st to first ch to join to form the ring.


ch3 (this counts as your first tr – hereafter known as tr) Take note of the sp in the middle of the circle, you will be working into this for the whole of the next part.

Into the ring work a 2tr. You now have a cluster of 3tr's.

ch2, then work 3trs into that same space.

ch2, then work 3trs into that same space.

ch2, then work 3trs into that same space.

ch2, then sl st into the top of the 3ch from the start of the round.


Make a single ch, cut the yarn and pull the loop up and out to form a knot.

That is the first round done, now onto the next.

Using yarn C, put your hook through one of the large corner holes and draw your yarn back (no knots).

Using BOTH ends of the yarn, make a ch stitch (this anchors your yarn in place). Ch2.

Into the SAME space work the following: 2tr, ch2, 3tr.
[Work into the next corner space and work: 3tr, ch2, 3tr.] rep for the rem corners.

sl st into the top of the 3ch from the start of the row

Make a single ch stitch, cut the yarn and pull the loop up and out to form a knot.
Using the same joining method as in Round 2, join yarn B into any corner space and ch3 work 2tr, ch2, 3tr.into the SAME sp.

Work into the next space in-between the tr's of the previous row and work 3tr into it.
Now work into the next corner space and work 3tr, ch2, 3tr into that space.
Continue around working 3tr into the straight bits and 3tr, ch2, 3tr into each corner. Sl st to join as before.

Using yarn C, work another round as you have just done, this time there will be TWO clusters of 3trs in-between each corner.

Using yarn A, work another round as you have just done, this time there will be THREE clusters of 3trs in-between each corner.

Using yarn C, work another round as you have just done, this time there will be FOUR clusters of 3trs in-between each corner.

Make a new square, but alternate the colours yarn A and yarn B, starting with Yarn B in the centre.

Place two squares (alternate colours) back to back. Now let us look at the stitches we need to join. A whole stitch is the two strands of yarn you can see on my hook, for this joining method we are going to only use the back loops of each stitch.


Starting in one corner as you did when working squares, join the yarn and work a corner (3 x tr, 2 x ch, 2 x tr), work a full round in c3, then 2 more rounds in c1.
The last round will be a dc – work 1 x dc into every stitch (not working in clusters of 3 this time) and work 3 x dc into each corner.
And that is your chunky Granny Square blanket done! Hope you enjoyed making it.


Craft with us at our workshops


Related Products