Make Your Own Cuddly Fabric Bunnies!
Level
Intermediate
Time
1 hour
Budget
10 - 30
Hello! We are Tia and Laura from Little Button Diaries, a blog about crafting baking and babies. We are thrilled to have joined the Hobbycraft team and are looking forward to coming up with lots of exciting crafts to share with you. As it's Easter, our first project is a cuddly fabric bunny.
We really enjoyed making these bunnies, coming up with the pattern ourselves and seeing our children's faces when we gave them to them. The soft fabric, rattle and detachable carrot makes this toy irresistibly huggable. We really hope you like them too!
You will need


How to make
Step-1

Step-2


Step-3


Step-4


Step-5

Step-6


Step-7


Step-8

Step-9

Step-10


Craft with us at our workshops


Related Products

How to Sew a T-Shirt Using Jersey Fabric
How to make You Will Need * Tape Measure * Dressmakers Tracing Paper * Fabric Scissors * Rotary Cutter * Sewing Machine * T-Shirt Sewing Pattern * Jersey Fabric 160cm x 2.5m * Thread * Cutting Mat * Pins * ...

How to Create a Year of Stitches
How To Make You Will Need * Medium to Large Embroidery Hoop * White Cotton Fabric * Large Selection of Embroidery Threads * Embroidery Needles * Fabric Marker * Ruler * Protractor * Fabric Scissors Free Templates Setting up your ...

How to Sew a Bunny Bag
How to make Bunny Bag Template.pdf Step 1 NB: seam allowances are all ½ cm (1/4”) unless otherwise stated. Please read all instructions through and assemble the equipment before beginning. Cut your fabric to the following specifications: From the outer ...
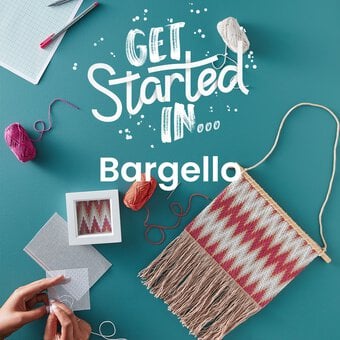
Get Started In Bargello
Get Started In Bargello Tool Guide Graph Paper: Create impressive designs with this Graph Paper Pad. With easily detachable sheets and a solid backing board, this pad is a must-have product for Bargello. Pens: You'll need the perfect pen to ...

How to Make a Fabric Storage Box
How To Make You Will Need * Sewing Machine * Cotton Fat Quarters * Tape Measure * Sewing Thread * Elastic * Dressmaking Pins * Safety Pins * Iron-On Interfacing * Fabric Scissors * Fabric Pen * Iron Step 1 ...

How to Make a Fabric Drawstring Bag
You Will Need * Fat Quarters * Ribbon * Iron * Thread * A Pencil * Tape Measure * Pins * Dressmaking Scissors * A Safety Pin * Sewing Machine View More Step 1 Select, measure and cut out your ...