Cricut: How to Make a Scrapbook Welcome Frame
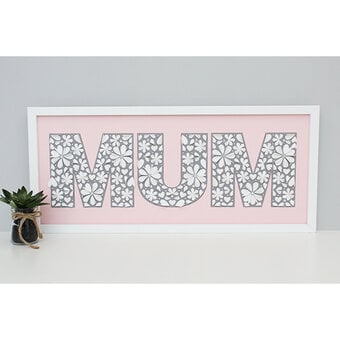
Say hello to your guests in style and add a touch of colour to your hallway with this welcoming scrapbook frame. From photographic memories to collections that remind you of happy times and places, these glass frames are the perfect way to get your precious keepsakes out of your drawers and onto your walls.
Project and instructions by Nerrisa Pratt.
Please note: This project contains paid-for content from Cricut's Design Space app. Screen reference images are taken from the desktop version of Design Space. The Cricut Joy has been used to create this project, but it can be recreated on the Cricut Maker or Explore machines.
You will need


How to make
Open the Cricut Design Space app and start a new project, and click the text button. Enter your phrase or text and choose your desired font (We've used 'Friday' here)

Once you're happy with your text, you might want to push it closer together to make it seem joined up. To do this, clock on the 'Letter space' button and reduce the spacing down to your desired sizing

Next, cut your material to size and cut your words onto your chosen vinyl. Remember to place the vinyl shiny side up – no need to mirror the text here.

Carefully weed your project

Using the grid on the transfer tape, line your design up with the text and once you're happy, use the scraper tool to get your design to stick to it

When your design is secured in place, gently peel the transfer tape away, making sure that you go back over it with the scraper if any of the pieces start to lift


Start to add in your pieces, regularly closing the frame and opening it again to make sure that it looks ok when it's closed.

Once the frame is fully, slowly close the frame and take your time to make sure everything is in place – when you close the frame, your items will start to move. If this happens, use something long and sharp like a knitting needle to push it back in place

Finally, once you're happy with your placement, close the frame firmly and use the mechanism on the side to close it up tight – it's now ready to hang. Remember if you need to shift the contents of the frame around or make changes, your items might spring free as you open it so be careful!

Craft with us at our workshops


Related Products