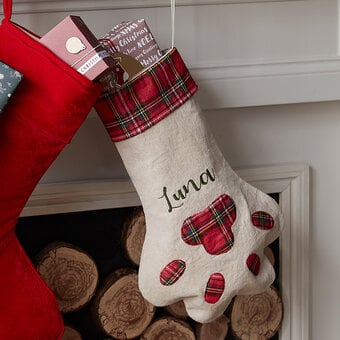
Cricut: How to Make a Personalised Christmas Pet Stocking
Personalised Christmas stockings are perfect for four-legged members of the family too! From rabbits to dogs, and cats to hamsters, make sure every member of the family is covered this festive season.
Follow this simple tutorial to create a stocking that can be used year after year! Get creative and make a custom design perfect for your pet.
You will need


How to make
Login to Design Space, you will need Cricut Access for this project. Open a blank canvas.
Click on the 'Text' button located in the menu at the bottom of the screen. Once the text menu pops up, type 'Chloe' in the search bar and select the font. Type your chosen name in the text box that appears on the canvas, and re-size to font size 150. 'UnGroup' the letters, then overlap them slightly so that they join together. Drag a selection box over the word then select 'Weld' from the 'Actions' menu.


Select 'Image' from the toolbar at the bottom of the screen and type 'Paw Print' into the search bar. Select the design below and click 'Insert'.

With the 'Edit' menu and the paw print selected, resize to 5 x 4.6cm.

With the 'Actions' menu and the paw print selected, click on 'Duplicate'. Duplicate so that you have a total of eight paw prints.

Select 'Image' from the toolbar at the bottom of the screen and type 'Bone' into the search bar. Select the design below and click 'Insert'.

With the 'Actions' menu and the new image selected, click on 'Hide Contour'. Hide the curved line in the bone by clicking on it, this should then turn a light grey colour.

With the 'Edit' menu and the paw print selected, resize to 14 x 7cm.

With the 'Actions' menu and the bone selected, click on 'Duplicate'. Duplicate three times, resize two of the duplicated bones to 9 x 4.5cm. You can make as many felt bones as you like, just make sure you have a matching pair of each size.

Click 'Make It' in the bottom right-hand corner and follow the on-screen instructions. Always make sure the 'Mirror (for iron-on)' is switched on, on all of the mats when using iron-on vinyl.
Follow the on-screen instructions to cut your iron-on vinyl text and paw prints. You'll then need to amend the cut material to cut the felt bones and use the FabricGrip cutting mat.
Once all of the pieces are cut, save your project, then navigate back to the 'Home' screen. Search for 'Bow' in projects and select the project named 'Scarf Embellishment'. Click 'customise'.


Click 'Make It' in the bottom right had corner and follow the on screen instructions. Set your cuts aside for now.


Take a piece of red felt and your linen stocking.

Fold in half and cut.

With a pencil, measure and mark on 1 inch from each side of the stocking and cut. Sew the two pieces of felt together at the sides. This will create a tube shape.

Turn the stocking inside out. Carefully remove the hanging loop from the and keep to one side, you will need to reapply this later.

Insert the red felt into the stocking, fold over 1.5cm so that it is visible on the wrong side of the stocking.
Pin into place and then turn the stocking the right way round.
Straight stitch the felt to the top of the stocking, roughly 1cm from the top. Re-attach the hanging loop.

Take your iron-on vinyl cuts and weed out the negative areas from the design. Carefully cut around the different shapes so that each of the paw prints is separate, along with the name.


Use Cricut's Interactive Guide » to determine the best settings to set your EasyPress to, then adhere the designs one at a time to the stocking, starting with the name on the felt and then adding each of the paw prints.


Take the felt bones, using matching thread, sew around the edge. Leave a small opening so that you can fill with toy stuffing and sew up the gap. Add embroidery thread through the middle of the bone, using different lengths for each bone.


Sew or glue the felt bow together, using the Cricut project as a guide for this if needed.

Attach the bones to the back of the bow by sewing or gluing and then attach to the same side as the stocking hanging loop.

Craft with us at our workshops


Related Products