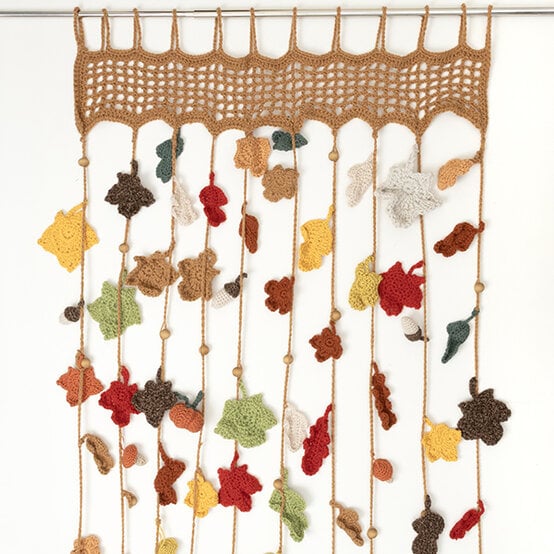
How to Crochet an Autumn Door Curtain
This gorgeous crochet door curtain will make a beautiful addition to your autumn décor. From cosy pumpkins and mushrooms to crisp-looking leaves, this autumnal curtain has everything you need to bring those warm, seasonal vibes into your home.
Follow along with the step-by-step instructions to find out how to make this stunning crochet creation.

You will need




How To Make
You Will Need
* A Selection of Autumnal Coloured Yarns
* Beige, Green and Brown DK Yarns
* Appropriate Crochet Hooks for Your Yarn Choices, Including 2mm, 3mm and 5mm
* Yarn Needle
* Stitch markers
* Toy Stuffing
* Glue Gun
* Wooden Beads
* Scissors
* Telescopic Curtain Rail
Pattern Notes
This pattern is written using UK crochet terms.
The weight of the yarns used for the motifs is unimportant, so feel free to use up anything from your stash, just ensure you use an appropriate hook for each yarn weight.
You will need to make a selection of each of the motifs in different colours, in order to fill your entire curtain.
Abbreviations
MC - Magic Circle
Ch - Chain
Dc - Double Crochet
Htr - Half Treble Crochet
Tr - Treble Crochet
Dtr - Double Treble Crochet
Trtr - Triple Treble Crochet
Slst - Slip Stitch
Dc2tog - Double Crochet Decrease
st(s) - Stitch(es)
Rep - Repeat
[ ] - Denotes stitches made all in the same stitch of the previous round
* * - Denotes a repeat of the pattern
Special Stitches
Picot - Ch3, slst into 1st ch
Using your yarn of choice and an appropriate hook, make a MC.
Round 1: Ch1, 10dc into MC, slst into 1st dc to join. (10dc)
Rnd 2: Ch1, dc, [dc, htr], [htr, tr], [2tr], [tr, dtr], [3dtr], [dtr, tr], [2tr], [tr, htr], [htr, dc], slst to join. (20 sts)
Stem: Ch8, htr in 2nd ch from hook, dc, slst in each remaining ch, slst into 1st st of main leaf.
You will now create the 5 points of the leaf.
Rnd 3:
Point 1: [dc, htr], [tr, picot, tr], [htr, dc],
Point 2: [dc, htr], [tr, dtr], [dtr, picot, dtr], [dtr, tr], [htr, dc],
Point 3: [dc, tr], [dtr, trtr, trtr, picot], [trtr, trtr, dtr], [tr, dc],
Point 4: [dc, htr], [tr, dtr], [dtr, picot, dtr], [dtr, tr], [htr, dc],
Point 5: [dc, htr], [tr, picot, tr], [htr, dc],
Slst behind the stem to finish.
Fasten off and weave in ends.
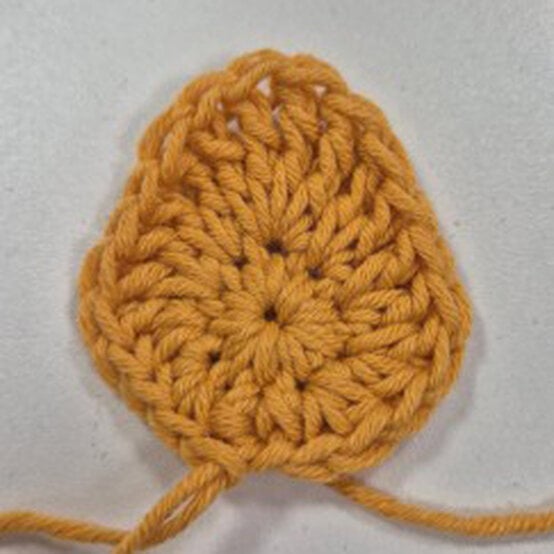
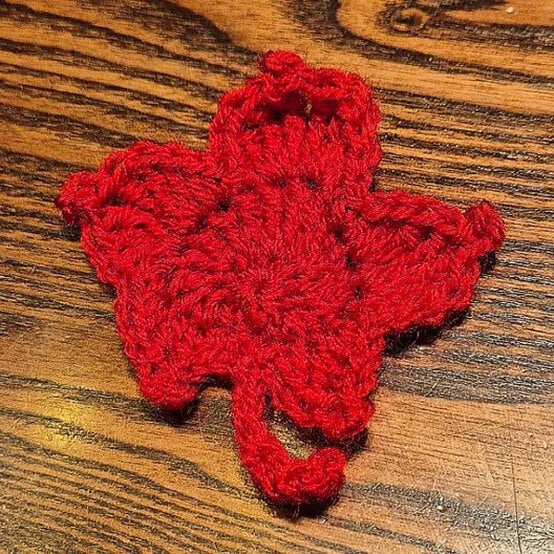
Using your yarn of choice and an appropriate hook, ch9.
Rnd 1: (Working in the back bumps of the chain) [dc, htr] in 2nd ch from hook, 3tr, 3htr, [3htr] in last st. Turn your work so you can work back up the other side of the chain. [3htr] in same st as the previous [3htr] (so you have worked [6htr] into this same st.) Continue working up the other side of the chain. 3htr, 3tr, [htr, dc] in last st. Slst to join.
You will now create the 5 ridges of the leaf.
Rnd 2: (Working into the stitches as normal, ie not the back bumps)
Ridge 1: ch1, dc in 1st st, htr, [2tr], [tr, dtr], [dtr, 3ch, slst],
Ridge 2: dc, [htr, tr], [2tr, ch2, slst] slst,
Ridge 3: [htr, tr, dtr], [dtr, tr, htr],
Ridge 4: slst, [slst, ch2, tr], [2tr], [tr, htr], dc, slst,
Ridge 5: [slst, ch3, dtr], [dtr, tr], [2tr] htr, dc, slst into 1st dc,
Stem: Ch7, htr in 2nd ch from hook, dc, slst in each remaining ch, slst into 1st st of main leaf.
Fasten off and weave in ends.
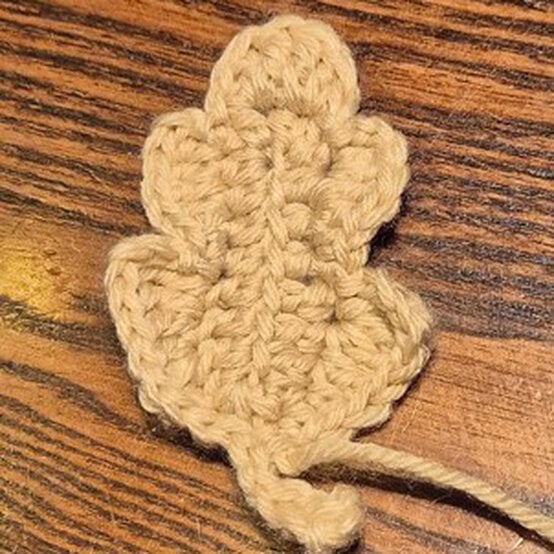
You may wish to block your leaves before attaching them to the main curtain.
Alternatively, leave them unblocked, so they are slightly curled like real leaves.
Using your yarn of choice and an appropriate hook, ch13.
Row 1: Htr in 2nd ch from hook, and in each ch across. (12htr)
Row 2: (In BLO) tr in each st across. (12tr)
Row 3: (In both loops) htr in each st across. (12htr)
Row 4: (In BLO) tr in each st across. (12tr)
Rep rows 3 and 4 until you reach the desired size.
Fold right sides together and join with a row of dc.
Fasten off, leaving a long tail of at least 25cm.
Turn right side out and thread the yarn onto a yarn needle.
Weave a running stitch around the bottom edge, pull the yarn tight to close the end and sew a couple of back stitches to secure. Run the yarn up one of the ribs on the inside of your pumpkin to the top edge. Stuff lightly with toy stuffing and then weave the running stitch around the top edge and pull closed and secure with a couple of back stitches.
Now use the remainder of the yarn tail to make the ribs of the pumpkin, by running the yarn down the outside of the indent, and threading back into the bottom. Repeat this for each of the remaining indents. Fasten off and weave in remaining ends.
Pumpkin Stalks
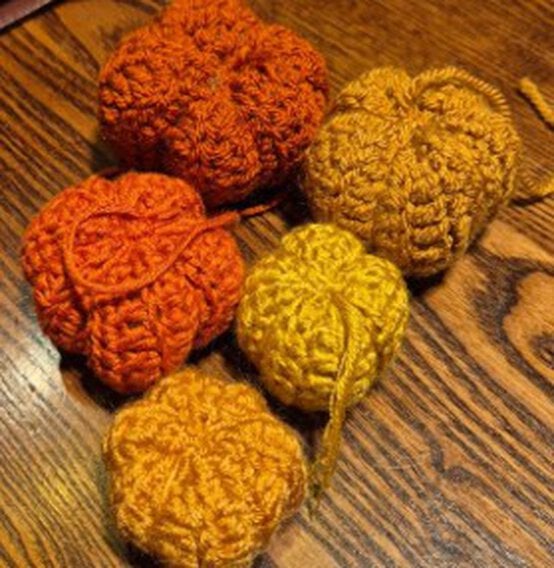
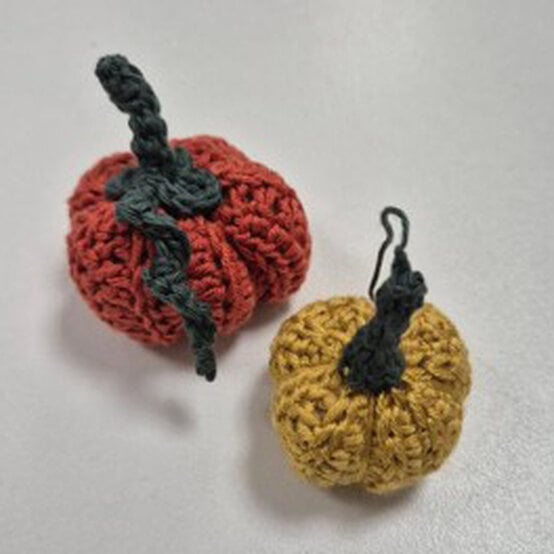
There are two different options for how to make the stalks for your pumpkins. Make a variation of them for your different pumpkins as desired, using the image as a guide.
Stalk 1
Using Dark Green or Brown, and a small hook, attach yarn to the top centre of your pumpkin and ch8.
Htr into 2nd ch from hook, 3dc, slst in each remaining ch, slst back into the top centre of your pumpkin to secure.
Now work 6dc in stitches around the top of your pumpkin.
Working in a continuous spiral, dc in each st around for 6 rounds. Ch2 at the end and then fasten off and weave in ends.
Stalk 2
Using Dark Green or Brown and an appropriate hook, make a MC.
6dc into MC,
Dc in each st around for 6 continuous rounds. Ch15, [2dc] in each ch, slst back into the last st of the main stalk.
Working around the sts of the main stalk again, *[dc, htr, tr, ch2], slst* rep around.
Fasten off, leaving a long tail.
Use the tail to attach to the top of the pumpkin.
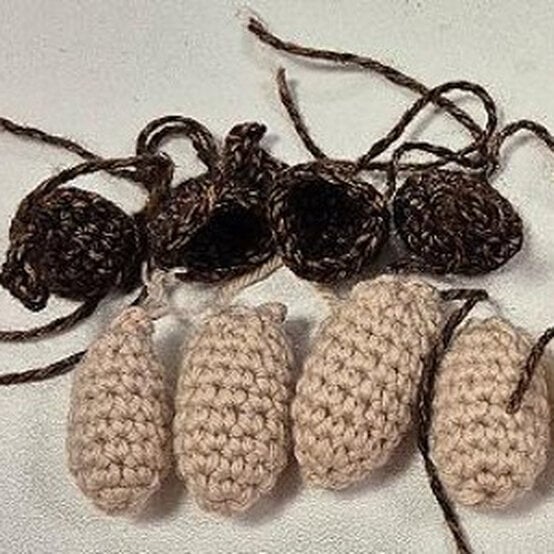
Cap
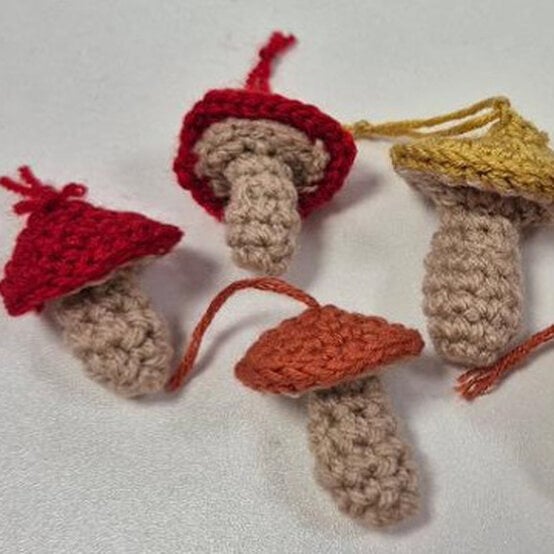
Using your choice of yarn and appropriate hook, make a MC.
Rnd 1: 5dc into MC. (5dc)
Rnd 2: 2dc in each st around. (10dc)
Rnd 3: dc in each st around. (10dc)
Rnd 4: *dc, [2dc]* rep around. (15dc)
Rnd 5: *2dc, [2dc] in next* rep around. (20dc)
Fasten off, leaving a long tail to sew to the stem.
Stem
Using beige yarn and appropriate hook, make a MC.
Rnd 1: 5dc into MC. (5dc)
Rnd 2: 2dc, [2dc], dc, [2dc]. (7dc)
Rnd 3: dc in each st around. (7dc)
Rnd 4: dc in each st around. (7dc)
Rnd 5: 2dc, dc2tog, 3dc. (6dc)
Rnd 6: 2dc in each st around. (12dc)
Rnd 7: dc, [2dc], dc, [2dc], 2slst. Finish the round here.
Fasten off and stuff the tail inside the stem as stuffing.
Use the tail from the cap to attach it to the stem with a yarn needle. Work through the BLO of the final round of the stem, and in between rnds 3 and 4 of the cap.
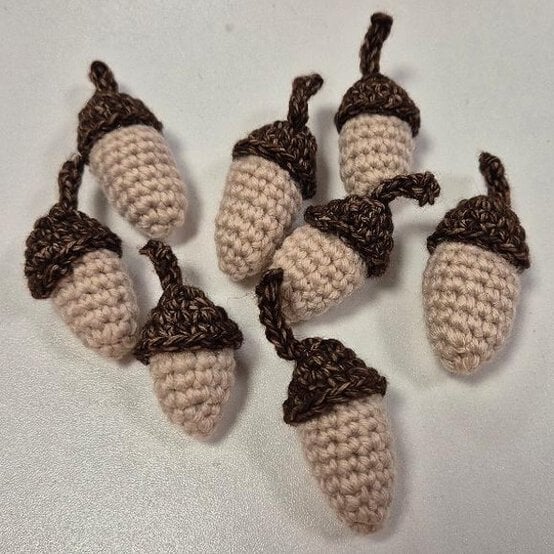
Nut
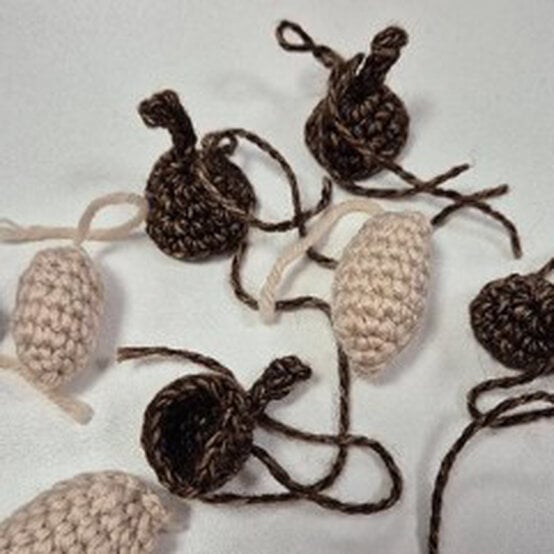
Using beige or cream yarn and a small hook, make a MC.
Rnd 1: 6dc in MC.
Rnd 2: 2dc in each st around. (12dc)
Rnds 3-8: dc in each st around. (12dc)
Stuff with a small amount of toy stuffing.
Rnd 9: *dc2tog* rep around. (6dc)
Fasten off and weave in ends.
Cap
Using brown or copper yarn and a small hook, make a MC.
Rnd 1: Ch5, dc in 2nd ch from hook, 3slst (this creates the stalk), then 6dc into MC. (6dc)
Rnd 2: 2dc in each st around. (12dc)
Rnd 3: *dc, [2dc]* rep around. (18dc)
Rnd 4: dc in each st around. (18dc)
Fasten off and weave in ends.
Use a hot glue gun to attach the cap to the nut.
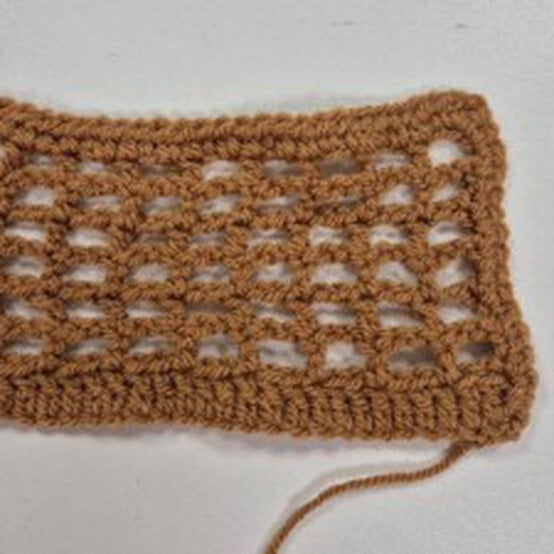
Using brown dk yarn, and 3mm hook, chain the width of your desired doorway plus 20 stitches. Ensure the final number of chains is a multiple of 3.
Row 1: ch2, tr in 2nd ch from hook and in each ch across.
Row 2: ch4, skip 2sts, *tr, ch2, skip 2sts * rep across.
Repeat row 2 a further 6 times, or as many times as you like to create the desired size header section.
Row 9: ch2, tr in each st across.
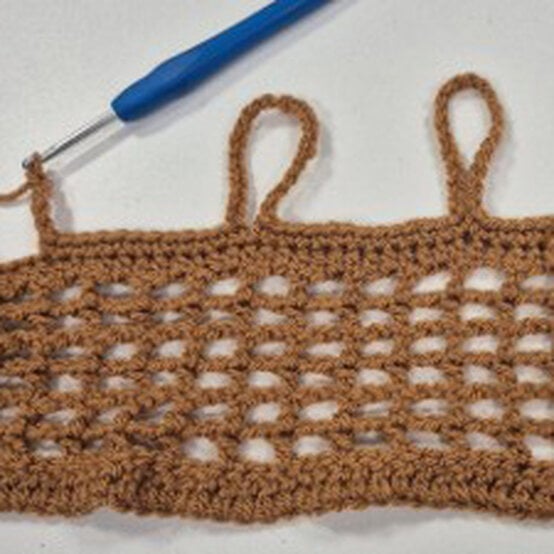
Now create the loops for your telescopic rail.
Row 10: ch20, dc in next st, 6dc, *ch20, 12dc * rep across until you approach the other end. Add in an extra loop 7sts from the end (the same as you made at the start of this row), 6dc, ch20, slst into final st.
Fasten off and weave in ends.
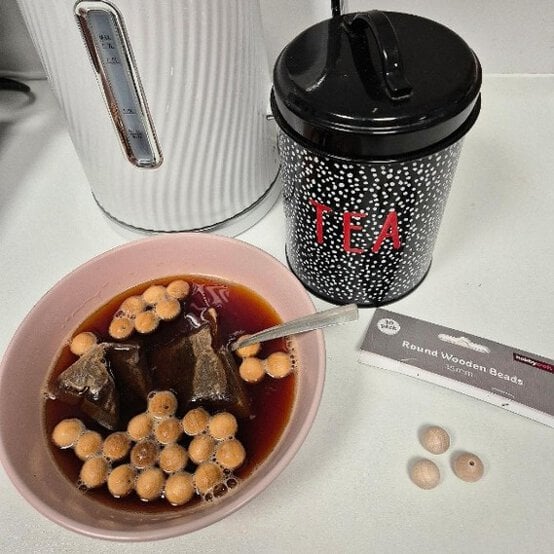
You may wish to add some wooden beads into your curtain.
To make them darker, stain them with tea in a bowl, and leave to dry fully.
Thread the telescopic curtain rail through all the loops on the header section.
Lay out your motifs in lines, with the outer lines longer, getting shorter towards the middle.
Using the same yarn you used for the header section and a 5mm hook, join with a slip knot to the bottom motif on one of the outer lines, work a long chain up to the desired length, adding in your motifs at variable intervals with a slip stitch into the top of the motif.
If you wish to add beads along the way as well, use a 2mm hook. Put the hook through the bead and pull the yarn back through it. Then dc around the bead. Switch back to the 5mm hook to continue on with your chain to the next motif.
When you reach the end, tie the chain to the header section and weave in the ends.
Proceed with the next line of motifs and join together in the same way, adjusting the amount of chains in between each one so that they fall in a staggered pattern. Repeat until all lines of motifs have been connected. Be aware that your chains and the header will stretch with the weight of the added motifs.
Your autumn door curtain is now complete!