Skip to Content (Press Enter) Skip to Footer (Press Enter)

Siser: How to Create Personalised Party Drinks Bottles

Level
Beginner
Time
1/2 day
Budget
30+

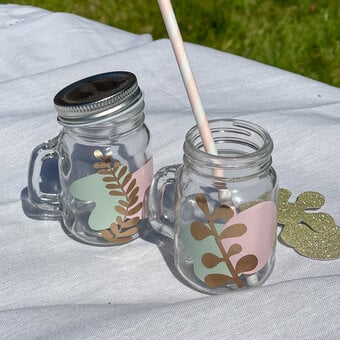
Create your own personalised bottle party accessory using our Hobbycraft Adhesive Vinyl and your Siser Juliet machine. It's the perfect way to add personal touches for a special event or get creative with your gifting. 

Using imagery from Sisers Leonardo Design Studio software and fonts from your own computer, you can create a truly unique addition to any party in no time! 

Discover more digital crafting projects here >

Project by Hobbycraft Artisan:

Chrissie Ellson

Find out more

You will need

Is $ 736.00

Quantity: 1

Subtotal

Is $ 736.00

Is $ 6.49 , was $ 9.49

Quantity: 1

Subtotal

Is $ 6.49 , was $ 9.49

Is $ 9.49

Quantity: 1

Subtotal

Is $ 9.49

Is $ 8.49

Quantity: 1

Subtotal

Is $ 8.49

You’ve viewed 2 of 4 products

Total:

How to make

You Will Need

* Siser Juliet Digital Cutting Machine

* Siser Cutting Mat

* LeonardoDesignStudio Installed on your Device

* Green Glossy Permanent Vinyl

* Transfer Tape

* Glass Milk Bottles

idea_siser-projects-for-beginners-bottles_youwillneed.png?sw=680&q=85
Step 1
To start our project and find the imagery contained within the Siser LeonardoDesignStudio, select “Design Library”.
idea_siser-projects-for-beginners-jars_step1.jpg?sw=680&q=85
Step 2

In this project we used several plant images, to find these search “plant”.


Scroll and select the image you would like to use.

idea_siser-projects-for-beginners-jars_step2.jpg?sw=680&q=85
Step 3

Once you have selected your image click “Open Design”. 


Repeat this process until you have all the imagery that you want.

idea_siser-projects-for-beginners-jars_step3.jpg?sw=680&q=85
Step 4

Resize the images as required. Highlight each one and then change the width or height (keep the padlock closed to ensure the size changes in proportion). We resized the images so that they were 1" in height.

idea_siser-projects-for-beginners-jars_step4.jpg?sw=680&q=85
Step 5

Organise your images on your mat as required, you can use the alignment tool to help.


Hover over the icon and then select the alignment you require.

idea_siser-projects-for-beginners-jars_step5.jpg?sw=680&q=85
Step 6
In order to duplicate the images a little easier, you may want to group the selection of plants. To do this right click on your mouse to access this menu.
idea_siser-projects-for-beginners-jars_step6.jpg?sw=680&q=85
Step 7
To duplicate your imagery, highlight it, click on “Edit” and then select “Add Copy”.
idea_siser-projects-for-beginners-jars_step7.jpg?sw=680&q=85
Step 8

Now it's time for the personalisation! To add your names to the project, click on the “T” button, type your text and select your font. The font we used was Century Gothic and we selected Bold.


Once you have your text on the mat you can resize it as required.

idea_siser-projects-for-beginners-jars_step8.jpg?sw=680&q=85
Step 9
When you have all of your design as you want it to be, click “Send Design”.
idea_siser-projects-for-beginners-jars_step9.jpg?sw=680&q=85
Step 10
Check the selected options as shown in the image, and then click “Send”.
idea_siser-projects-for-beginners-jars_step10.jpg?sw=680&q=85
Step 11

Whilst you are able to cut a range of materials without the aid of a mat, for ease we applied the Hobbycraft brand vinyl to the mat.


Top Tip: Your Siser Juliet machine cuts from the bottom left hand corner.

idea_siser-projects-for-beginners-jars_step11.jpg?sw=680&q=85
Step 12
Load the mat into your Siser Juliet machine, ensuring the blade holder is located in the bottom left hand corner of the material.
idea_siser-projects-for-beginners-jars_step12.jpg?sw=680&q=85
Step 13
You can add your own cut settings for your selected material but for Hobbycraft own brand vinyl we found that the "Glitter HTV" setting worked very well.
idea_siser-projects-for-beginners-jars_step13.jpg?sw=680&q=85
Step 14
Check your onscreen settings and once you are happy click, “Send to cutter”.
idea_siser-projects-for-beginners-jars_step14.jpg?sw=680&q=85
Step 15
Confirm that the blade is in the machine.
idea_siser-projects-for-beginners-jars_step15.jpg?sw=680&q=85
Step 16
The software will now send the design to the machine to cut.
idea_siser-projects-for-beginners-jars_step16.jpg?sw=680&q=85
Step 17
The cut will start wherever you have set the blade to start, so this is why we make sure the blade is in the bottom left hand corner of the material when we start our cut.
idea_siser-projects-for-beginners-jars_step17.jpg?sw=680&q=85
Step 18
Once the cut has finished weed your design.
idea_siser-projects-for-beginners-jars_step18.jpg?sw=680&q=85
Step 19

Use the transfer tape to apply your design onto your clean bottle.


Once everything is transferred, leave the bottle a few days before getting it wet. The finished item will be suitable for a gentle handwash only.

idea_siser-projects-for-beginners-jars_step19.jpg?sw=680&q=85
Step 20
Your personalised bottle is now ready for use at your next party!
idea_siser-projects-for-beginners-jars_step20.jpg?sw=680&q=85

Related Categories

  • bvseo_sdk, dw_cartridge, 18.2.0, p_sdk_3.2.0
  • CLOUD, getReviews, 18ms
  • reviews, product
  • bvseo-msg: Unsuccessful GET. status = 'ERROR', msg = 'Not Found.'; Unsuccessful GET. status = 'ERROR', msg = 'Not Found.';
Top