How to Crochet a Granny Square Summer Bag
You will need


How to Make
You Will Need
500grams Cotton Aran weight yarn
4.5mm crochet hook
Embroidery needle
Scissors
Abbreviations:
St(s) – Stitch(es)
Ch – Chain
Ss – Slip stitch
Dc – Double crochet
Tr – Treble crochet
Sp – Space
Rpt – Repeat
Nxt – Next
RS – Right side
() – stitches to be worked into the same chain space
{} – stitches to be repeated the number of times stated
* * and ** ** – repeat stitches between asterisks as instructed
Make 18
Round 1 Working into a magic ring, ch3, tr, ch2, 3 tr, ch2, 3 tr, ch2, 3 tr, ch2, tr, ss to the top of the ch3 to join. Pull tightly to close the ring.
Round 2 Ch3, tr in the nxt st, (2 tr, ch2, 2 tr) in the ch2 sp, *3 tr, (2 tr, ch2, 2 tr) in the ch2 sp* rpt from * to * 2 more times, tr, ss to the top of the ch3 to join.
Round 3 Ch3, 3 tr, (2 tr, ch2, 2 tr) in the ch2 sp, *7 tr, (2 tr, ch2, 2 tr) in the ch2 sp* rpt from * to * 2 more times, 3 tr, ss to top of ch3 to join.
Round 4 Ch3, 5 tr, (2 tr, ch2, 2 tr) in the ch2 sp, *11 tr, (2 tr, ch2, 2 tr) in the ch2 sp * rpt from * to * 2 more times, 5 tr, ss to top of ch3 to join.
Round 5 Ch3, 7 tr, (2 tr, ch2, 2 tr) in the ch2 space, *15 tr, (2 tr, ch2, 2 tr) in the ch2 sp* rpt from * to * 2 more times, 7 tr, ss to top of ch3 to join.
Fasten off and sew in the ends.
Make 6
Round 1 Working into a magic circle, ch4, tr, *ch2, tr, ch1, tr, ch1, tr* rpt from * to * 2 more times, ch2, tr, ch1, ss to 3rd ch of the ch4 to join.
Round 2 (All sts will now be worked into the ch sps) Ch4, tr in the first ch1 sp, ch1, (tr, ch1, tr, ch2, tr, ch1, tr, ch1) in the ch2 sp, *tr, ch1, tr, ch1, (tr, ch1, tr, ch2, tr, ch1, tr, ch1) in the ch2 sp * rpt from * to * 2 more times, ss to 3rd ch st of the ch4 to join.
Round 3 Ch4, {tr, ch1} 3 times, (tr, ch1, tr, ch2, tr, ch1, tr, ch1) in the ch2 sp, *{tr, ch1} 5 times, (tr, ch1, tr, ch2, tr, ch1, tr, ch1) in the ch2 sp* repeat from * to * 2 more times, tr, ch1, ss to the 3rd ch st of the ch4 to join.
Round 4 Ch4, {tr, ch1} 5 times, (tr, ch1, tr, ch2, tr, ch1, tr, ch1) in the ch2 sp, *{tr, ch1} 8 times, (tr, ch1, tr, ch2, tr, ch1, tr, ch1) in the ch2 sp* repeat from * to * 2 more times, tr, ch1, tr, ch1, ss to the 3rd ch st of the ch4 to join.
Round 5 Still working in the ch1 spaces, *dc, ch1, dc, ch1, dc* repeat from * to * 1 more time, dc, (dc, ch2, dc) in the ch2 sp, **{dc, ch1, dc, ch1, dc} 3 times, dc, ch1, (dc, ch2, dc) in the ch2 sp ** repeat from ** to ** 2 more times, dc, ch1, dc, ch1, dc, dc, ch1, ss to the first dc to joint.
Fasten off and sew in the ends.
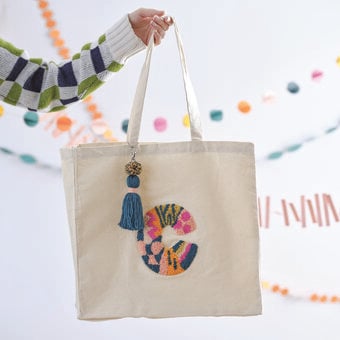
With RS facing ss to join your squares in the layout shown in photo. There are lots of brilliant tutorials available if you need further guidance with joining.
Once all squares are attached together fold the bag in half and join the final seams along both sides. Again I would suggest the squares are joined when the bag is inside out and RS of the squares are facing for consistency. You will now have 3 squares down each side which are folded in half. Ss along the bottom of these squares at the base of the bag to finish.
Fasten off and sew in the ends.
Work the edging and the straps with the RS of the bag facing out.
Round 1 Ss to join in the top corner of the first full solid granny square on the front right of the bag. Ch4, skip a st and tr in the 3rd st along, *ch1, skip a st, tr in the nxt st* repeat from * to * around, ss to the 3rd ch of the ch4 to join.
Round 2 Ch 1, *2 dc in the nxt ch1 sp*, repeat from * to * in the nxt 3 ch1 sps, ch 75, dc back along the ch sts (you have made the first strand of handle 1), 2 dc in the nxt ch1 sp, ch 75, dc back along the ch sts (you have now completed handle 1). {2 dc in the nxt ch1 sp} 21 times, (before making your ch sts check that the placement of your handles looks equal across the front of your bag) ch 75, dc back along the ch sts (you have made half of handle 2), 2 dc in the nxt ch1 sp, ch 75, dc back along the ch sts (you have now completed handle 2). {2 dc in the nxt ch1 sp} 20 times, ch 75, dc back along the ch sts (you have made the first strand of handle 3), 2 dc in the nxt ch1 sp, ch 75, dc back along the ch sts (you have now completed handle 3). {2 dc in the nxt ch1 sp} 21 times, (before making your ch sts check that the placement of your handles looks equal across the back of your bag) ch 75, dc back along the ch sts (you have made half of handle 4), 2 dc in the nxt ch1 sp, ch 75, dc back along the ch sts (you have now completed handle 4). {2 dc in the nxt ch1 sp} 20 times, ss to the first dc to join.
Fasten off and sew in the ends.

Craft with us at our workshops


Related Products