
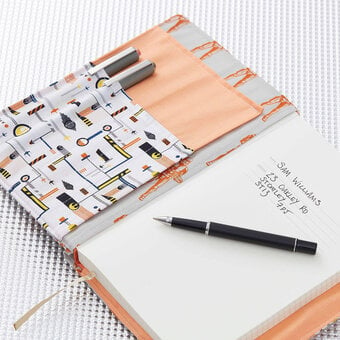
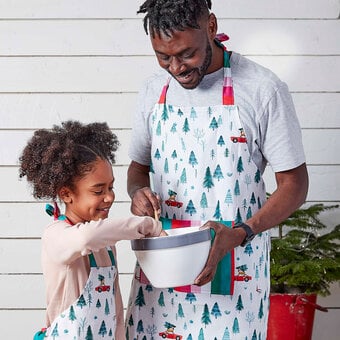
Sewing Projects
Discover a wonderful world of sewing ideas, from easy embroidery projects to machine sewing techniques and simple sewing gift ideas! We’ve got fantastic sewing ideas for beginners, as well as DIY sewing projects that are designed with sustainability in mind. There’s a project for everyone, with step-by-step guides available for each of the unique sewing patterns and projects featured.
Skip to Product Grid (Press Enter)
Filters
- Art - Free Downloads (1)
- Artisan (1)
- Cricut - Sewing (1)
- Decor & Hobbies - Clay Making (1)
- Decor & Hobbies - Needle Felting (4)
- Decor & Hobbies - Other (2)
- Decor & Hobbies - Upcycling (4)
- View more
- Latch Hook (6)
- Occasions - Gift Ideas (1)
- Occasions - Party (2)
- Punch Needle (1)
- Sewing - Bargello (4)
- Sewing - Cross Stitch (2)
- Sewing - Cushion Making (18)
- Sewing - Dressmaking (13)
- Sewing - Embroidery (49)
- Sewing - Fat Quarter Projects (75)
- Sewing - Learn to Sew (6)
- Sewing - Needle Felting (2)
- Sewing - Other (48)
- Sewing - Quilting (28)
- Sewing - Soft Toy Making (10)
- Weaving (11)
- Birthday (1)
- Christmas (39)
- Summer (25)
- Spring (5)
- Pride (3)
- Newborn Baby (11)
- Eid (1)
- View more
- Autumn (9)
- Halloween (5)
- Valentine's Day (5)
- Winter (4)
- New Home (3)
- Black History Month (2)
- Coronation (2)
- Earth Day (2)
- New Year (2)
- St David's Day (2)
- Advent (1)
- Father's Day (1)
- Hanukkah (1)
- International Women's Day (1)
- Lunar New Year (1)
- Party (1)
- Sport Events (1)
- Wedding (1)
- Easter (14)
Viewing 1 - 48 of 323 Ideas
Viewing 1 - 48 of 323 Ideas


You've viewed 48 of 323 products
Related Products
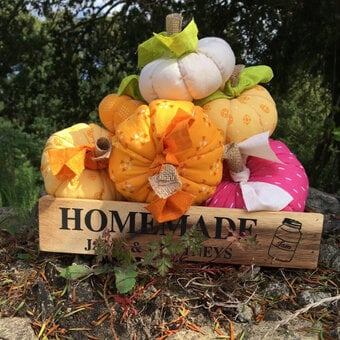
How to Sew Pumpkins with Fat Quarters
You Will Need * Sewing Machine * Fabric Scissors * Embroidery Needles * Embroidery Scissors * Dressmaking Pins * White Thread * Fat Quarters in an Assortment of Colours * Hessian Natural Fat Quarter * Decorative Cinnamon Sticks * Soft ...

How to Make 6 Essential Picnic Projects
You will also need: For the Scalloped-edge Cushion: 50x50cm fabric For the Button Cushion: 50x50 fabric For the Picnic Throw: 1.4 metres fabric x2 1.4 metres interfacing For the stencilled napkin: velvet ribbon For the tray cloths: 50cm fabric x3 ...

How to Tie Dye a Tote Bag
How To Make You Will Need * Tie Dye Kit * Cotton Tote Shopping Bag * Large Paintbrushes * Tissue * Cable Ties or Elastic Bands * Food Bags or Cling Film * Iron * Protective Sheets (To Keep Surfaces ...

9 Autumn Projects to Make for Under £15
How to Crochet an Autumn Textured Snood Hook up this cosy snood in time for autumn! The textured accessory is sure to complement your style all season long, perfect for cold weather days. View Project View More How to Make ...

How to Sew a Patchwork Dog
How to make Step 1 Cut 50 squares from the Fat Quarters measuring 2½ x 2½in (6.5 x 6.5cm) and 2½ x 58in (6.5 x 147cm) (This can be made of shorter lengths, joined with seams pressed open) for a ...

How to Sew a Simple Animal Cushion
How to make Please note: All sewn edges include a 10mm seam allowance, unless otherwise stated. Simple Animal Cushion Templates.pdf Step 1 Trace 2 x body tops(a) and 2 x bottom(b) templates onto iron on interfacing and cut them out ...
Oops...
Sorry, we did not find any products that match the
selected filters. You can go back to previous results to
select something different.