Unicorn Bag Crochet Pattern
Level
Intermediate
Time
1/2 day
Budget
10 - 30
We couldn't resist the pastels and the brights of our new Rico raffia yarn, and as soon as we saw it we knew – it had to be made into a unicorn bag! Perfect for the little ones to carry their sunglasses and a cuddly toy around all summer long.
Pattern by Alison North over at KornflakeStew
You will need


How to make
Abbreviations
Dc – double crochet
Htr – half treble crochet
Tr – treble
Ch – chain
Sl St – slip stitch
2-dc inc – Increase stitch
Rep – repeat
Step-1
Step-2
Step-3

Step-4
Step-5

Step-6

Step-7
Step-8
Step-9

Step-10
Step-11
Step-12

Step-13

Step-14


Craft with us at our workshops


Related Products

How to Crochet a Watermelon Market Bag
How to Make You Will Need * Knitcraft Cotton Blend DK Yarn - Green, Light Grey, 2x Hot Pink * 4.5mm Crochet Hook * Scissors * Yarn Needle Abbreviations MC - Magic Circle Ch- Chain Tr- Treble Hdc- Half double ...
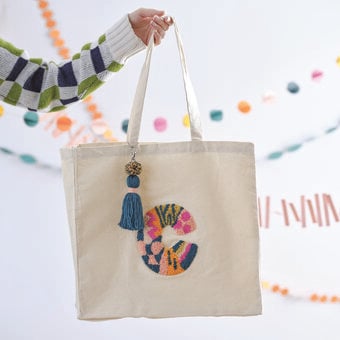
How to Personalise a Canvas Bag with Punch Needle
How To Make You Will Need * Size 10 Punch Needle * Punch Needle Hoop Stand * Large Canvas Tote Bag * Women's Institute Soft and Silky 4 Ply Yarn 100g - Azure * Women’s Institute Premium Acrylic Yarn 100g ...

How to Crochet a Toadstool Bag
You Will Need * 6mm Crochet Hook * Knitcraft Return of the Mac - 2x Ecru (Yarn A), 1x Terracotta (Yarn B) * Scissors * Stitch Markers Pattern Notes This pattern is written using UK terms Gauge is not important ...

How to Crochet an Autumn Squirrel Wreath - Free Pattern
How to Make You Will Need * 3.5mm Crochet Hook * 16" Rattan Grapevine Wreath * Glue Gun and Glue Sticks * Toy Safety Eyes * Mini Wooden Lolly Sticks * Brown Jute Twine * Toy Stuffing * Knitcraft DK ...

How to Crochet a Granny Square Flower Tote Bag
How to Make You Will Need * 6mm Crochet Hook * Knitcraft Everyday Chunky Yarn 100g - 4x Pink, 2x White, 1x Beige * Large Canvas Tote Bag 43 x 38 x 10cm * Scissors * Yarn Needles Pattern Notes ...

How to Crochet a Granny Square Clutch Bag
You Will Need * Knitcraft Cotton Blend DK Yarn 100g - White, Mustard, Teal * 3.5mm Crochet Hook * Yarn Needle * Scissors * 18mm Snap Fastener (Optional) Abbreviations Ch - Chain Tr - Treble Crochet Slst - Slip stitch ...