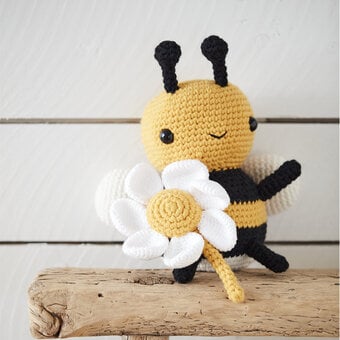
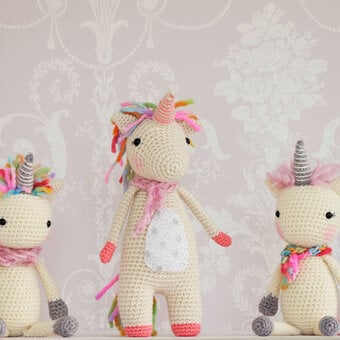
Skip to Content (Press Enter) Skip to Footer (Press Enter)

How to Crochet a Christmas Jumper for Your Tiny Friends Doll

Level
Intermediate
Time
1/2 day
Budget
<10

Celebrate the most festive time of the year with your Tiny Friends. Hook up the perfect crochet Christmas jumper and get ready for the big day by making a Christmas tree, lots of presents and a stocking ready for Santa to arrive!


Patterns designed by @cricket.creates

Please note, this pattern is an expansion of the original Tiny Friends doll pattern and patterns for the dolls are not included. This pattern allows you to add accessories and clothing to your set, perfect for helping little ones embrace imaginative play.

You will need

Is $ 1.49

Quantity: 1

Subtotal

Is $ 1.49

Is $ 1.49

Quantity: 1

Subtotal

Is $ 1.49

Out of stock

Is $ 1.49

Quantity: 1

Subtotal

Is $ 1.49

Out of stock

You’ve viewed 2 of 3 products

Total:
You Will Need

Knitcraft Tiny Friends in:

Bright Green – 1 x 25g

Dark green – 4 x 25g

Purple – 1 x 25g

Orange  – 1 x 25g

White – 1 x 25g

Red – 1 x 25g

Yellow – 1 x 25g

Gold embroidery thread x 2

Silver embroidery thread x 2

Dry foam cone (32cm) x 1

Crochet Hook: 3mm

Yarn needle

Stitch markers

Scissors 

Pins

7mm Invisible snap fasteners x 1 set

Toy stuffing

you-will-need-graphic.png?sw=680&q=85
Pattern Notes

Abbreviations (Uk)

Mr – Magic ring

Ch – chain

Dc – double crochet

Htr – half treble

Tr – treble

Dtr – double treble

St(s) – stitch(es)

Slst – slip stitch

BLO – back loop only

FLO – back loop only

Dc2tog – double crochet 2 stitches together

Htr2tog – half treble 2 stitches together

RHS – Right hand side 

LHS – Left hand side 


Pattern Notes 

This is an Intermediate level crochet pattern. 

Templates%20%2831%29.png?sw=680&q=85
Christmas Hat

Start with white yarn. This is section is worked in rounds.

Round 1: Mr 6dc (6)

Round 2: 2dc into each stitch. (12)

Round 3-4: 1dc into each stitch (2 rounds) (12)

Round 5: dc2tog x 6 (6)

Change to red yarn.

Round 6-7: 1dc into each stitch (2 rounds) (6)

Round 8: (2dc into next stitch, 2dc) x 2 (8)

Round 9: (2dc into next stitch, 3dc) x 2 (10)

Round 10: (2dc into next stitch, 4dc) x 2 (12)

Round 11: (dc,2dc into next stitch) x 6 (18)

Round 12: (2dc into next stitch, 8dc) x 2 (20)

Round 13: (2dc into next stitch, 9dc) x 2 (22)

Round 14: (2dc into next stitch, 10dc) x 2 (24)

Round 15: (3dc,2dc into next stitch) x 6 (30)

Round 16: (2dc into next stitch x 2, 13dc) x 2 (34)

Round 17: (2dc into next stitch, 16dc) x 2 (36)

Round 18: (2dc into next stitch, 17dc) x 2 (38)

Round 19: (2dc into next stitch, 18dc) x 2 (40)

Round 20: (2dc into next stitch, 19dc) x 2 (42)

Round 21: (2dc into next stitch, 6dc) x 6 (48)

Round 22: (2dc into next stitch, 7dc) x 6 (54)

Round 23: (2dc into next stitch, 8dc) x 6 (60)

Round 24-26: 1dc into each stitch (3 rounds) (60)

Change to white yarn.

Round 27: 1dc into each stitch (60)

Round 28: Ch 2, 1Tr into each stitch (60)

Round 29: 1 slst into each stitch (60)

Fasten off and weave in ends.

Tiny%5FFriends%5FChristmas%2DHat.JPG??sw=680&q=85
Presents

The gifts are created using a combination of panel A and B. 

Panel A

This section is worked in rows.

Ch1 at the end of each row. This does not count towards the total stitch count.

Row 1: Ch 11 (11)

Row 2: from the 2nd chain from hook, 1 dc into each stitch (10)

Row 3-11: 1 dc into each stitch (9 rows) (10)

Row 12: Ch 2, 10 dc on the edge of the rows, Ch 2, 10 dc, Ch 2, 10 dc on the edge of the rows, 10 dc.

Fasten off leaving long tail.


Panel B

This section is worked in rows.

Ch1 at the end of each row. This does not count towards the total stitch count.

Row 1: Ch 11 (11)

Row 2: from the 2nd chain from hook, 1 dc into each stitch (10)

Row 3-6: 1 dc into each stitch (4 rows) (10)

Row 7: Ch 2, 5 dc on the edge of the rows, Ch 2, 10 dc, Ch 2, 5 dc on the edge of the rows, 10 dc.

Fasten off leaving long tail.


Assembling the gifts

Large gift.

Make 2 of panel A and 4 of panel B. Lay out as shown in the picture.

Using a whip stitch sew the sides together using the FLO.

Join the sides to form a box with a lid.

Leave one side open to stuff the gift.

Do not stuff too much so that you don’t lose the shape.

Sew closed the last side.

Using white yarn tie a bow around the gift.


Small gift.

Make 2 of panel B.

Using a whip stitch sew 3 of the sides together using the FLO.

Leave one side open to stuff the gift. Do not stuff too much so that you don’t lose the shape.

Sew closed the last side.

Using white yarn tie a bow around the gift.

Stocking

Using orange yarn.

This is section is worked in rounds.

Round 1: Mr 6dc (6)

Round 2: 2dc into each stitch. (12)

Round 3-5: 1dc into each stitch (3 rounds) (12)

The next section is completed in rows.

Ch1 at the end of each row. This does not count towards the total stitch count.

Row 1: 5htr (5)

Row 2-3: 1htr into each stitch (2 rounds) (5)

Now we continue in rounds. 2

Round 6: 7dc to finish the row (12)

Round 7-11: 1htr into each stitch (5 rounds) (12)

Change to white yarn.

Round 12: 1htr into each stitch. (12) Fasten off and weave in ends.

Tiny%5FFriends%5FChristmas%2Dstocking2.JPG?sw=680&q=85
Christmas Jumper

This can be done in two colour ways by switching the colours used for the sweater and the gift box applique.

Using Green Yarn.

This section is worked in rows.

Ch1 at the end of each row. This does not count towards the total stitch count.

Row 1: Ch 41 (41)

Row 2: from the 2nd chain from hook, 1htr into each stitch (40)

Row 3-11: 1 dc into each stitch (9 rows) (40)

Row 12: 3htr, htr2tog x 2, 3htr, ch6, skip 6sts, (1htr, htr2tog, 1htr) x 2, ch6, skip 6sts, 3htr, htr2tog x 2, 3htr. (34)

Row 13: 2htr, htr2tog x 2, 2htr, 6htr, (htr2tog, 1htr) x 2, 6htr, 2htr, htr2tog x 2, 2htr. (28)

Row 14: 28 slst. (28)

You should now have 2 arm holes with 6sts on the top from the ch6 and 6 stitches on the bottom from the 6 skipped stitches.


Sleeves

Using Green Yarn.

This is worked in rounds.

With the base of the Upper part facing towards you, join yarn to first skipped stitch.

Round 1: 6htr into the 6 skipped sts, 1htr, 6htr into base of 6dc of row 6, 1htr. (14)

Round 2-12: 1htr into each stitch. (11 rounds) (14)

Round 13: 1slst into each stitch (14)

Fasten off and weave in ends.

Repeat Rd 1-13 for the second sleeve.

Sew fasteners unto the back of the sweater to fasten it shut


Gift box applique

Using Red Yarn.

This section is worked in rows.

Ch1 at the end of each row. This does not count towards the total stitch count.

Row 1: Ch 9 (9) Row 2: from the 2nd chain from hook, 1htr into each stitch (8)

Row 3-9: 1 dc into each stitch (7 rows) (8)

Row 10: Ch 2, 8 dc on the edge of the rows, Ch 2, 8 dc, Ch 2, 8 dc on the edge of the rows.

Fasten off leaving long tail.

Sew the gift box onto the sweater with its base at row 3 of the sweater.


Ribbon

Using white Yarn.

This section is worked in rows.

Ch1 at the end of each row. This does not count towards the total stitch count.

Row 1: Ch 10 (9)

Row 2: from the 2nd chain from hook, 1htr into each stitch (8)

Fasten off leaving long tail. Sew the ribbon vertically in the middle of the gift box.


Bow

Round 1: Mr 30 dc.

Fasten off leaving long tail. (30)

Pinch together to form two loops.

Using the long tail, wrap around the middle to form a bow.


Assembling the gift applique

Sew the ribbon to the middle of the gift box. sew on the bow to the top of the gift box.

Christmas Tree

Using green yarn.

This is section is worked in rounds.

Round 1: Mr 6dc (6)

Round 2: 2dc into each stitch. (12)

Round 3-4: 1dc into each stitch (2 rounds) (12)

Round 5: (dc,2dc into next stitch) x 6 (18)

Round 6-8: BLO 1tr into each stitch (3 rounds) (18)

Round 9: BLO (8tr, 2tr into next stitch) x 2 (20)

Round 10: BLO 1tr into each stitch (20)

Round 11: BLO (9tr, 2tr into next stitch) x 2 (22)

Round 12: BLO 1tr into each stitch (22)

Round 13: BLO (10tr, 2tr into next stitch) x 2 (24)

Round 14: BLO 1tr into each stitch (24)

Round 15: BLO (7tr, 2tr into next stitch) x 3 (27)

Round 16: BLO 1tr into each stitch (27)

Round 17: BLO (8tr, 2tr into next stitch) x 3 (30)

Round 18: BLO 1tr into each stitch (30)

Round 19: BLO (9tr, 2tr into next stitch) x 3 (33)

Round 20: BLO 1tr into each stitch (33)

Round 21: BLO (10tr, 2tr into next stitch) x 3 (36)

Round 22: BLO 1tr into each stitch (36)

Round 23: BLO (11tr, 2tr into next stitch) x 3 (39)

Round 24: BLO 1tr into each stitch (39)

Round 25: BLO (12tr, 2tr into next stitch) x 3 (42)

Round 26: BLO 1tr into each stitch (42)

Round 27: BLO (13tr, 2tr into next stitch) x 3 (45)

Round 28: BLO 1tr into each stitch (45)

Round 29: BLO (14tr, 2tr into next stitch) x 3 (48)

Round 30: BLO 1tr into each stitch (48)

Round 31: BLO (15tr, 2tr into next stitch) x 3 (51)

Round 32: BLO 1tr into each stitch (51)

Round 33: BLO (16tr, 2tr into next stitch) x 3 (54)

Round 34: BLO 1tr into each stitch (54)

Round 35: BLO (17tr, 2tr into next stitch) x 3 (57) 

Round 36: BLO 1tr into each stitch (57)

Round 37: BLO (18tr, 2tr into next stitch) x 3 (60)

Round 38: BLO 1tr into each stitch (60)

Round 39: BLO (19tr, 2tr into next stitch) x 3 (63)

Round 40: BLO 1tr into each stitch (63)

Do not fasten off, place the Christmas tree over the dry foam cone and continue with the remaining rounds on the underside of the cone.

Round 41: Tr2tog x 31, 1tr (32)

Fasten off, this round will stop the tree from sliding off the cone.


Details on the tree

Starting from the top of the tree, using the front loops attach green yarn, work (Dc, Ch 3, Dc into the next stitch) repeating until you get to the base of the tree.


Decorations on the tree

Chain the length of the gold and silver embroidery threads and sew then onto the tree in the gaps between the leaves in a spiral


Star

Round 1: Mr 6dc (6)

Round 2: 2dc into each stitch. (12)

Round 3: (3dc, 2dc into next stitch) x 3 (18)

To make reach point of the star

Round 4: (dc, htc) into the next stitch (tr, ch1, dtr, ch1, tr) into the next stitch (htc, dc) into the next stitch

Repeat the sequence above until all 5 points off the star are complete (45)

Fasten off leaving long tail.

Sew star unto the top of the Christmas tree using tail.

Related Products

  • bvseo_sdk, dw_cartridge, 18.2.0, p_sdk_3.2.0
  • CLOUD, getReviews, 17ms
  • reviews, product
  • bvseo-msg: Unsuccessful GET. status = 'ERROR', msg = 'Not Found.'; Unsuccessful GET. status = 'ERROR', msg = 'Not Found.';
Top