Skip to Content (Press Enter) Skip to Footer (Press Enter)

How to Crochet a Fluffy Jacket

Level
Intermediate
Time
1+ days
Budget
30+
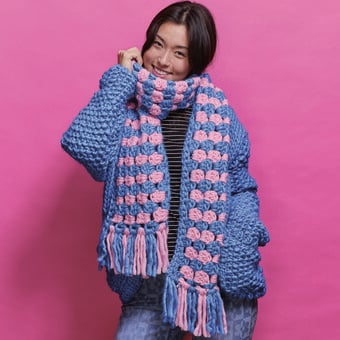
You will love hooking up this statement jacket with James C Brett Chinchilla and Wi Soft and Chunky. Maybe up of basic granny squares it is a great pattern for beginners or the more advanced crocheter.

You will need

Is $ 9.49

Quantity: 1

Subtotal

Is $ 9.49

Is $ 5.49

Quantity: 1

Subtotal

Is $ 5.49

Is $ 9.49

3 for 2 on selected WI yarn
Quantity: 1

Subtotal

Is $ 9.49

Is N/A

Quantity: 1

Subtotal

Is N/A

You’ve viewed 2 of 4 products

Total:

How to make

Abbreviations:

Ch- chain

Dc- double crochet

Ss- slip stitch

Tr- treble

Sp – space

Sts- stitches


Notes

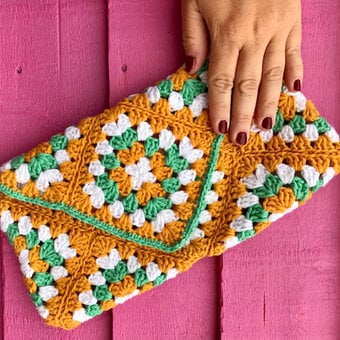
The jacket is made up of granny squares which are then joined together and then borders are added.

Step-1

Size: S M L

Finished bust: 106 118 130 cm

41¾ 46½ 51¼ in

To fit bust: 86 97 107 cm

34 38 42 in

Sleeve seam: 53 53 53 cm

21 21 21 in

Length: 53 60 63 cm

21 23¾ 24¾ in

A 4 4 5 Balls

B 6 7 7 Balls

Step-2
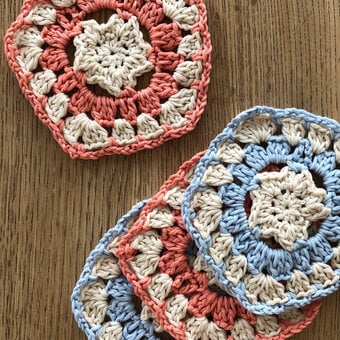
To start make 75 granny squares as follows: Using 9mm hook and yarn A, ch4 and ss into fourth ch from hook to make a ring. Round 1 (RS): Ch3 (counts as 1tr here and throughout), 2tr into ring, (ch2, 3tr into the ring) 3 times, ch2, ss to top of beginning ch3 to join. Fasten off.
Step-3
Round 2 (RS): Join yarn B to any 2ch-sp, ch3, (2tr, ch2, 3tr) into same 2ch-sp, (3tr, ch2, 3tr) into each of next 3 corner spaces, ss to top of beginning ch3 to join. Fasten off.
Step-4 (Back)

Using 9mm hook and yarn B begin to join squares with a ss until you have a completed back of 5×5 squares, a total of 25 squares used.

Step-5
Row 1: With RS of squares facing, join yarn B to any corner, ch1, 1dc into same sp, 1dc into each st along first edge and 1dc into each 2ch sp (40 dc on one side), 2ch, 1dc in same 2ch sp (first corner made), 1dc into each st along second edge and 1dc into each 2ch sp (40 dc on top edge), 2ch, 1dc in same 2ch sp (second corner made), 1dc into each st along third edge and 1dc into each 2ch sp (40 dc on other side). Turn. (a total of 3 sides worked and 120 dc in total)
Step-6
Fasten off. Join yarn to opposite corner. Next row: Ch1, 1 dc into each dc along second long side only, turn. (41 dc)
Step-7
Rep row 2 a further 2[5:8] times. (132[144:156] dc)
Step-8
Fasten off.
Front-LeftStep-1

With RS of squares facing, using 9mm hook and yarn B begin to join squares with a ss until you have a completed front of 2×5 squares, a total of 10 squares used.

Step-2
Row 1: Join B to corner sp to work long edge first, ch1, 1dc into each st and 1dc into each 2ch sp along long edge (40 dc), 2ch, 1dc in same 2ch sp (corner made), 1dc into each st and 1dc into each 2ch sp along short edge (16 dc), turn. (total 56 dc)
Step-3
Row 2: Cont with yarn B, ch1, 1dc into each dc along one side, (1dc, 2ch, 1dc) in 2ch sp at corner, 1dc into each dc along second side, turn. (58 dc) Rep row 2 a further 2[5:8] times. (62[68:74] dc)
Step-4
Fasten off.
Front RightStep-1

With RS of squares facing, using 9mm hook and yarn B begin to join squares with a ss until you have a completed front of 2×5 squares, a total of 10 squares used.

Step-2
Row 1: Join B to corner sp to work short edge first, ch1, 1dc into each st and 1dc into each 2ch sp along short edge (16 dc), 2ch, 1dc in same 2ch sp (corner made), 1dc into each st and 1dc into each 2ch sp along long edge (40 dc), turn. (total 56 dc)
Step-3
Row 2: Cont with yarn B, ch1, 1dc into each dc along one side, (1dc, 2ch, 1dc) in 2ch sp at corner, 1dc into each dc along second side, turn. (58 dc) Rep row 2 a further 2[5:8] times. (62[68:74] dc)
Step-4
Fasten off.
Sleeves (make 2)Step-1

With RS of squares facing, using 9mm hook and yarn B begin to join squares with a ss until you have a completed front of 3×5 squares, a total of 15 squares used.

Step-2
Row 1: Join B to corner sp to work long edge first, ch1, 1dc into each st and 1dc into each 2ch sp along long edge (40 dc), 2ch, 1dc in same 2ch sp (corner made), 1dc into each st and 1dc into each 2ch sp along short edge (24 dc), 2ch, 1dc in same 2ch sp (corner made), 1dc into each st and 1dc into each 2ch sp along long edge (40 dc), turn. (total 104 dc)
Step-3
Row 2: Cont with yarn B, ch1, 1dc into each dc along one side, (1dc, 2ch, 1dc) in 2ch sp at corner, 1dc into each dc along second side, (1dc, 2ch, 1dc) in 2ch sp at corner, 1dc into each dc along final side, turn. (108 dc)
Step-4
Row 3: Ch1, 1 dc into each dc along first long side only, turn. (41 dc)
Step-5
Row 4: Ch1, 1dc into each dc. Rep row 4 a further 0[2:4] times.
Step-6
Fasten off. Join yarn to opposite corner. Next row: Ch1, 1 dc into each dc along second long side only, turn. (41 dc)
Step-7
Next row: Ch1, 1dc into each dc. Rep row 4 a further 0[2:4] times. Fasten off.
Pockets (make 2)Step-1

Using 9mm hook and yarn B, ch13. Row 1 (RS): Miss 1 ch, 1dc into each ch, turn. (12 sts)

Step-2
Row 2: Ch1, 1dc into each dc. Repeat row 2 until pocket measures 30cm. Fold pocket in half to create a square and join sides with a ss leaving one side open.
Making Up:Step-1

With RS together join both shoulder seams, leaving the centre square open at the back neck. Place pockets with seams horizontal 5 sts up from the hem and pin into place. The pocket will be SIDE opening. With RS facing together join side seam of jacket, ss pocket into place when reached.

Hem Edging: Step-1

Using 9mm hook and yarn B, ch8. Row 1: Miss 1ch, 1dc into each st, turn. (7 sts) Row 2: 1ss into each st, turn.

Step-2
Row 3: Ch1, 1dc into each st, turn. Repeat rows 2-3 until work fits around hem without stretching. Sew hem to body.
Neck FrontStep-1

Using 9mm hook and yarn B, join to right front bottom and work 51[54:57]dc along right front, 10dc along back neck and 51[54:57]dc down left front, turn. (112[118:124] sts)

Row 1-2: Ch1, 1dc into each dc. Fasten off.

Sleeve Cuff (make 2)Step-1

Using 9mm hook and yarn B, ch7. Row 1: Miss 1 ch, 1dc into each st, turn. (6 sts) Row 2: 1ss into each st, turn.

Step-2
Row 3: Ch1, 1dc into each st, turn. Repeat rows 2-3 until work measures 22[23:24]cm. Pin cuff to sleeve end, gathering the sleeve into the cuff to create a balloon sleeve effect. Sew hem to sleeve.
Step-3
With RS together join sleeve head by lining up middle square to shoulder seam. Join sleeve seam.
Step-4
Attach inside corners of pocket bag to inside of front jacket to keep in place.
Step-5
Sew in all ends.

Related Products

  • bvseo_sdk, dw_cartridge, 18.2.0, p_sdk_3.2.0
  • CLOUD, getReviews, 18ms
  • reviews, product
  • bvseo-msg: Unsuccessful GET. status = 'ERROR', msg = 'Not Found.'; Unsuccessful GET. status = 'ERROR', msg = 'Not Found.';
Top